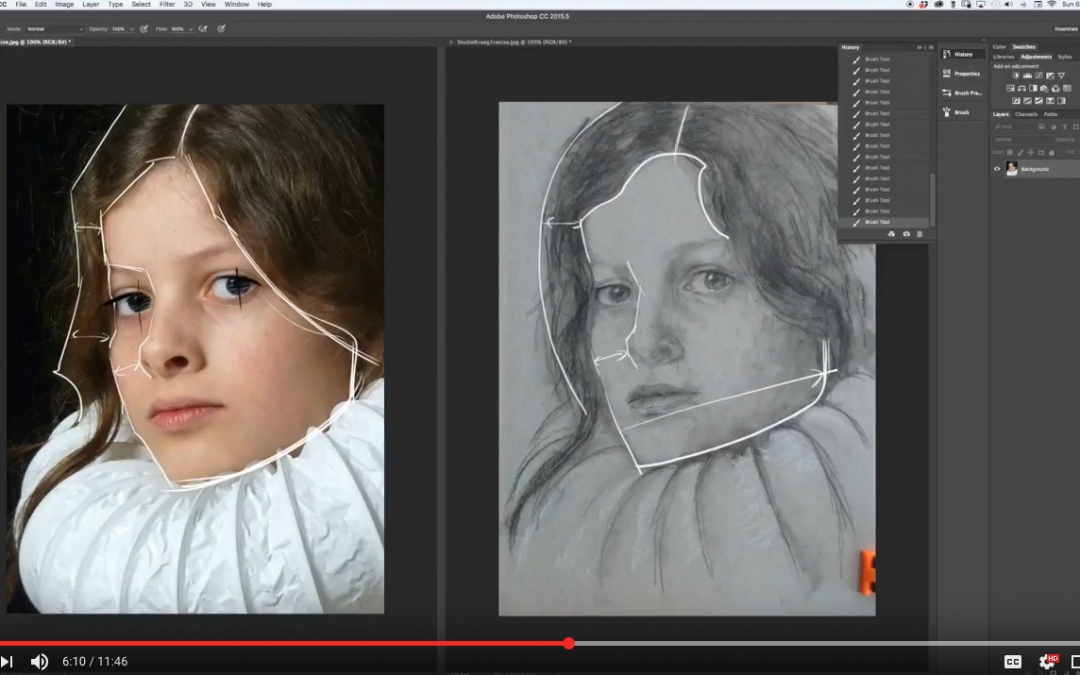
Have you ever tried to draw a portrait where the person in the photo reference had no contrasting shadow shapes? In other words the lighting within the photo was very flat.
When there aren’t many shadow shapes to draw it’s much more difficult to capture a likeness. In this video critique I help out Marjan, a member of Drawing Tutorials Online, with trying to capture a likeness. As you can see in the video below the young girl does not have many shadow shapes to cling onto.
In my latest Begin Here Step By Step course I teach a lesson called “Seeing Shadow Shapes”. Just about every member loved this lesson because shading in shadow shapes makes the process of portrait drawing much easier.
So keep in mind that it’s best to light your subject using form light in order for there to be some recognizable shadow shapes.
Now if you already have photo reference displaying flat light then you want to focus your efforts on drawing the shape of the hair first. Why you may ask, because the shape of the hair acts as a frame for the face. You want to take your time with measuring and drawing the angles of the face where the edge of the face touches the hair.
You also want to look for non contrasting shadow shapes. Practice shading in light non contrasting shadow shapes. Shadows shapes don’t always have to be super dark. You just have to practice being able to recognize subtle values shifts on the face of the person you are drawing.
I hope this video critique helps you with your portrait drawings.
Thank you for watching! If you want more drawing tips on a weekly basis click here.
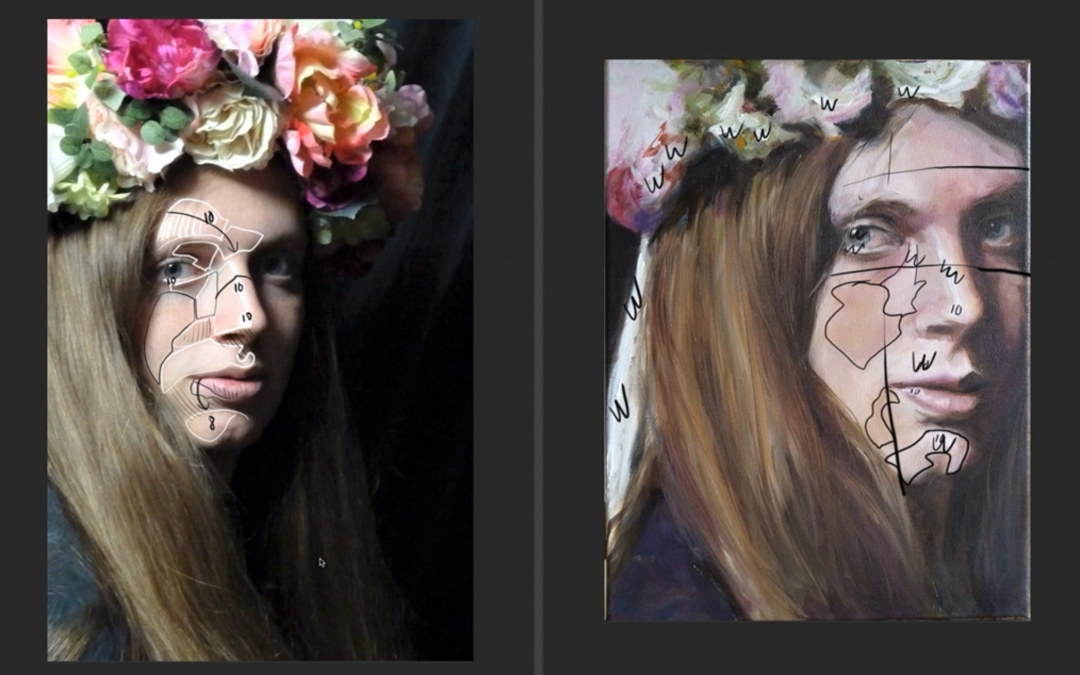
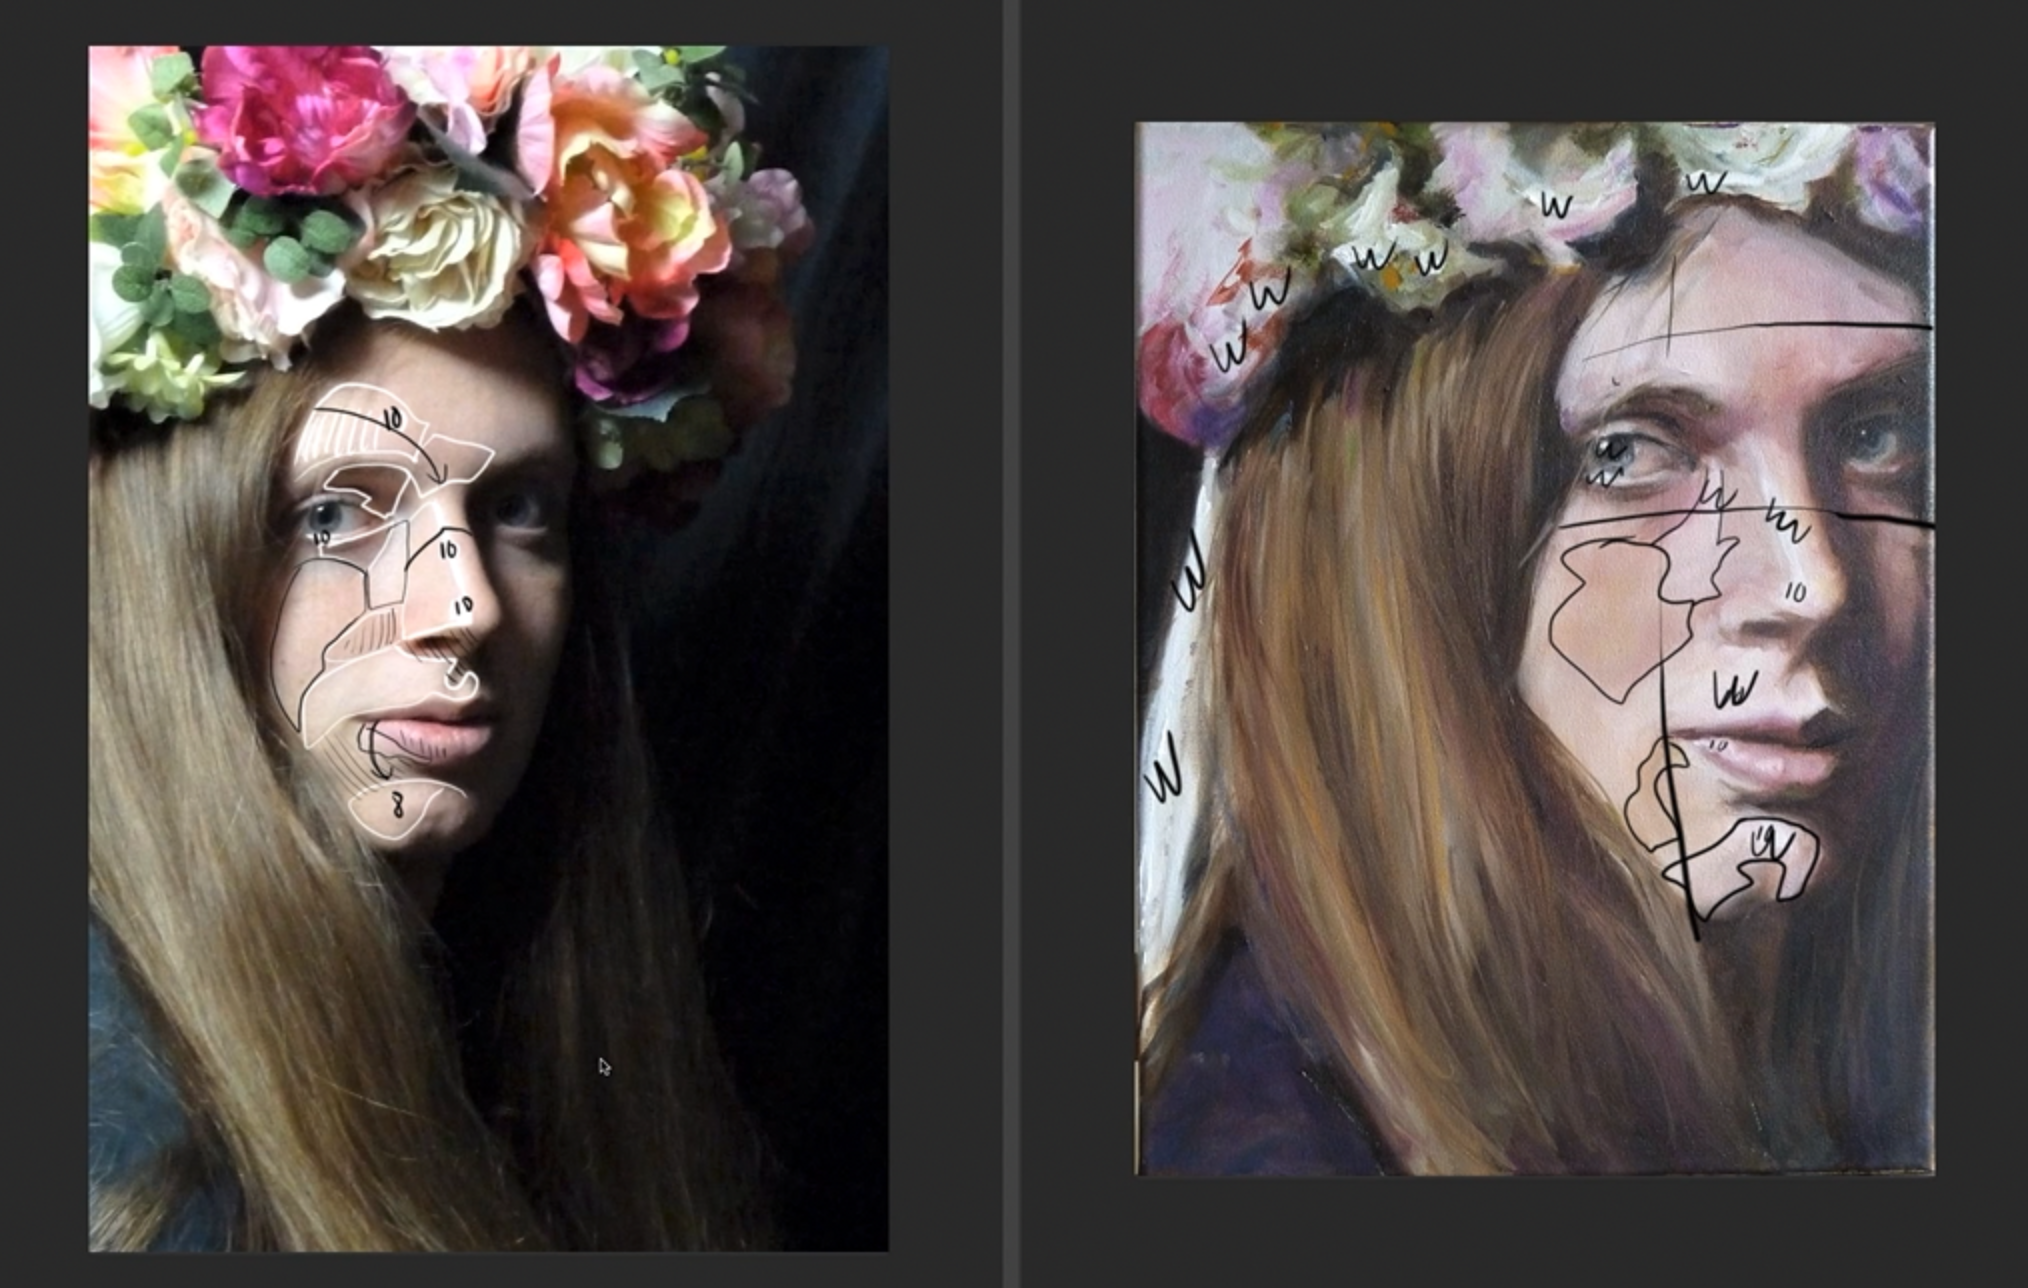
Do you find yourself struggling with painting even looking skin tones? Do the skin tones that you paint look blotchy? Yea sounds awful. I used to struggle with this big time.
Through years of practice and hard work I finally mastered both my palette and my brushes. However back in the day when I was learning how to paint there were no online video tutorials. So hopefully this video critique will provide you with a little bit of a head start in the knowledge department.
Once you understand the concept of keeping your lights light and your darks dark everything gets a little easier to understand. You also want to utilize a gradation in the light of your figure or portrait painting. For example the forehead should be lighter than the chin in form light.
Understand that subtle skin tone value shifts are usually surface plane shifts. You want to paint these value shifts less contrasty, especially in the light. This will help you to avoid drastic value shifts in the light. Drastic value shifts in the light cause blotchy skin tones.
These techniques apply to pencil drawing, traditional painting as well as digital painting. Of course practice makes perfect so get at it.
Have questions about your artwork? We are here to help. A subscription to Drawing Tutorials Online will get you instant access to our member Critique Gallery. We film member critiques every Monday.
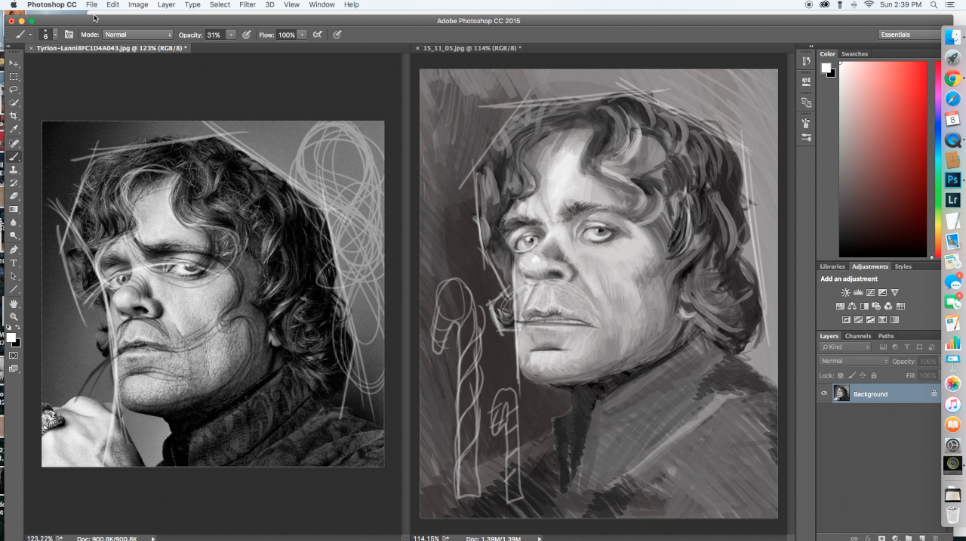
Okay I know what your thinking, candy cane stripe gesture lines, really? Yes really. This funny name came about in class one day. I was trying to explain how to draw with flowing gesture line. However there were a few students who were just not getting it.
I could tell they were starting to get a little frustrated. So the first thing that came to my mind was a candy cane stripe. Who knows it might have been right around the Holidays.
You see when we draw the portrait and the figure for that matter we tend to become too timid with our lines. We start drawing, attempting to get the likeness and we draw with short choppy lines. Sometimes drawing with a short choppy line is appropriate. Especially in the initial stages of the drawing.
You want to start integrating a looser more flowing continuous line early in the process. Almost as if your are drawing a ribbon wrapping around the features of the head.
Whether you want to call it a ribbon line or a candy can stripe, it doesn ‘t matter. What matters is that you try to draw in a state of flow keeping your pencil on the paper for two to four second intervals.
There is not one specific place I can point to start using this candy cane stripe gesture line. You’ll know it when you see it. It will be different on every portrait you draw. Perhaps it could start with a flowing stand of hair. It can start with a shadow shape shown in the critique video below.
You want to start drawing with these loose flowing lines early in the process when you are starting to flesh out the portrait. You know I’m a big proponent of using the angles and measurements technique. Adding this loose gesture drawing technique into the mix early adds balance to your process.
I challenge you to actually practice drawing cylinders with a ribbon like stripe wrapping around them. You could also think of drawing a mummy’s head. Wrapping a strand of linen around the structure of a head.
There are many words for me to use when trying to describe how to draw in a loose manner. Drawing with candy cane stripe gesture lines is just fun playful way to help you remember to draw with continuous line that wraps around form.
We are here to help you improve your drawings. Whether you are into drawing portraits or the figure we can help learn the necessary skills to improve. Click here to start improving today.
Have you ever looked at your portrait drawings and wonder why they don’t look realistic? Part of the reason they do not look realistic is because the edges within and around the portrait are too simplistic. Specifically the edges of the eyes, edges of the hair and the edges of the face in relationship to the background.
When it gets down to brass tacks, there aren’t enough angles within the drawing. There are too many macro angles and not enough micro angles. Think of Macro angles as broad strokes. Think of micro angles as detailed rendering with a fine brush.
One definitely needs to look more at the subject they are drawing. In this case a portrait of a male model drawn from life. You definitely want to get into the habit of looking at what you are drawing at least 50 to 60 percent of the time. A lot of artists have unintentionally developed the very bad habit of looking down at their pad too much.
Another contributing factor to overly simplistic edges, sitting too far away from the subject. In this case once again a male model drawn from life. When drawing someone’s portrait from life you want to be no further than six to eight feet away from the model.
Think about it, if you are trying to draw an iris which is a half an inch wide, sitting ten to fourteen feet away is not going to help you.
So the next time you analyze your drawings ask yourself the question, do I have enough angles? Are my edges too simplistic looking? Do I need to make my drawings more complicated by adding more angles to my edges?
Let us know what you think. Leave us a comment below.
If you need a helping hand analyzing your own artwork take a peek at our One Time Coaching. We can help you figure out how to take your drawings up to higher level of quality today!
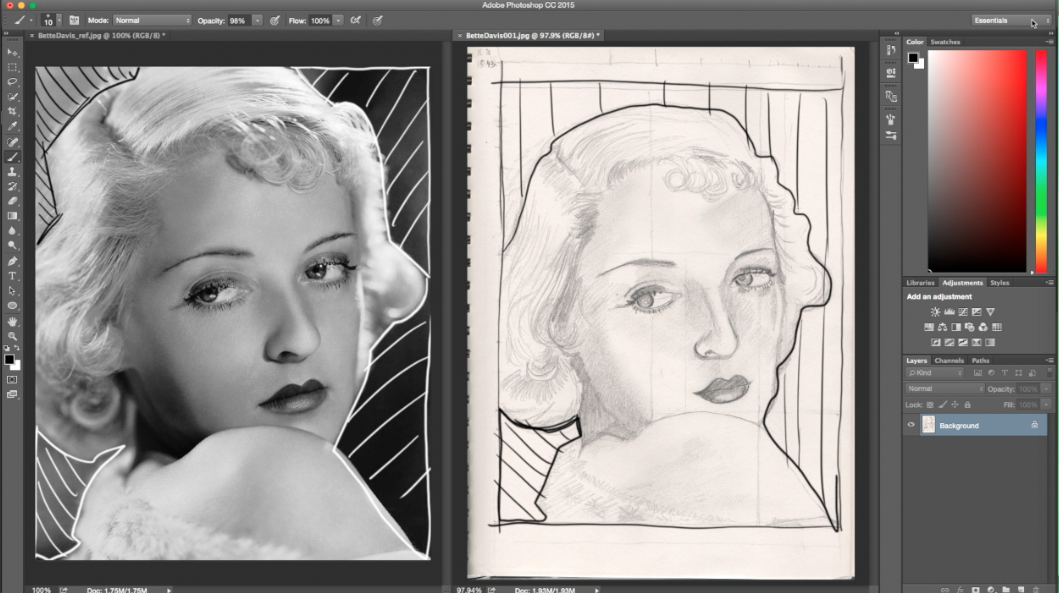
Recently a member posted up a drawing to our Group Coaching Gallery over at Drawing Tutorials Online. The question this member posed was, how do I draw a likeness of Bette Davis in under an hour?
Great question! I’m guessing you have drawn a portrait or two. I guessing you didn’t get the likeness every time. I know there have been many times that I struggled with drawing the likeness of someone too.
There is a combination of drawing techniques that you can use to help solve this problem.
The first technique, draw a boarder. Draw a boarder on your paper to the exact proportions of the boarder of your portrait reference. So if the photo reference has a boarder of 8 x 10, draw an 8 x 10 boarder on your paper. Yes use an old school ruler.
Second, place your photo reference right next to your drawing. A big mistake I see, many artists keep there photo reference far away from their drawing. Keep it super close.
Third, draw the abstract negative shapes that surround the head and shoulders. If these abstract negative shapes are not correct, you guessed it, no bueno. You will never get the likeness of someone’s portrait if you do not draw these negative shapes correctly first.
Fourth technique, draw angles or use a continuous line to separate the hair from the face. Just being conscious of drawing the shape of the hair verses the shape of the face is half of the battle.
Fifth, definitely start to draw in the shadow shapes of both the hair and face. Put some tone in. Don’t make the mistake of just drawing with line alone.
In terms of the features, it totally depends on the type of light. Was the portrait reference taken in form light, rim light or front light? Each one of these light sources requires a different skill set to get the likeness.
So the next time your want to draw Bette Davis or the girl next door start with a boarder.
This techniques works. It has helped many of my coaching students. It has taken the mystery out of how to draw a likeness when drawing a portrait.
Did you need help with learning how to draw a better portrait? We have dozen’s of portrait drawing tutorials within our member area at Drawing Tutorials Online. Those tutorials combined with weekly coaching will help you improve with speed and confidence.