Portrait Drawing Tips – Getting A Likeness

Portrait Drawing Tips – Getting A Likeness

Are you passionate about drawing portraits? Do you strive to draw a likeness correctly? If you do you watching this video will really help you.

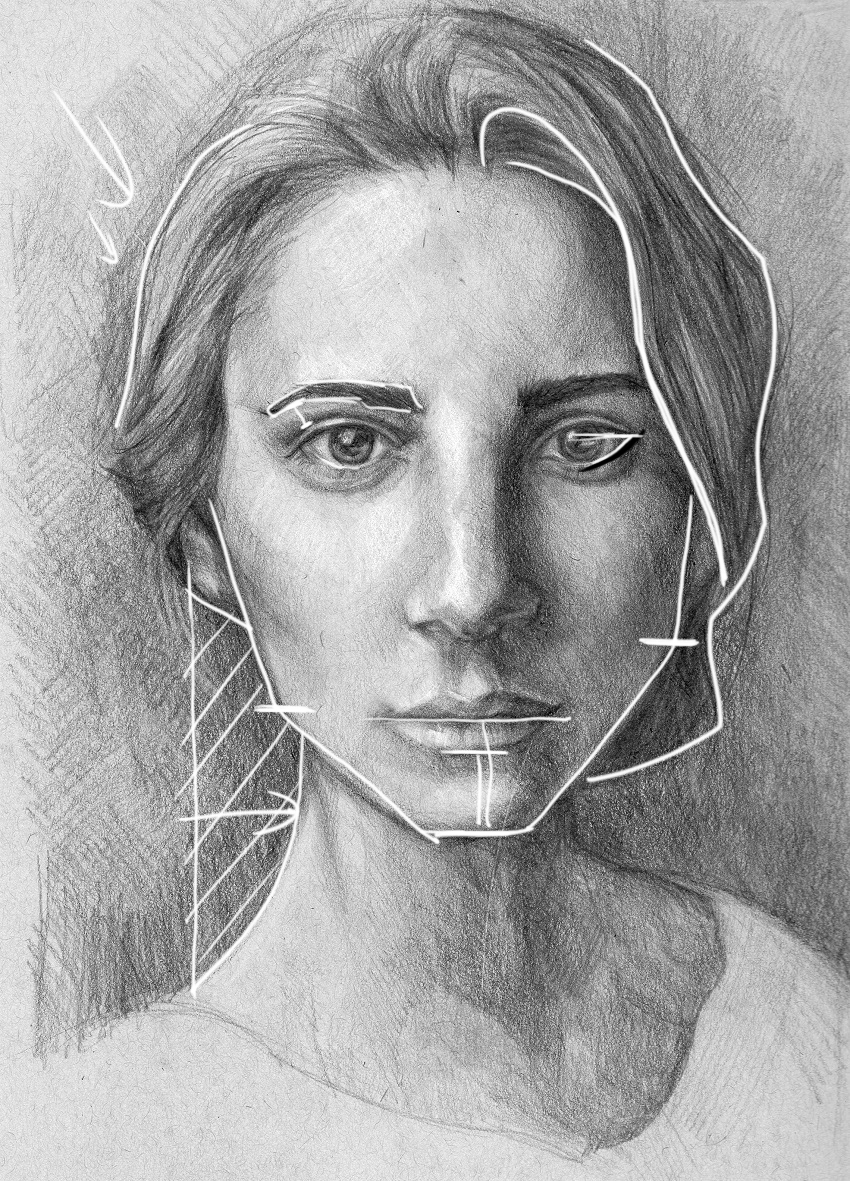
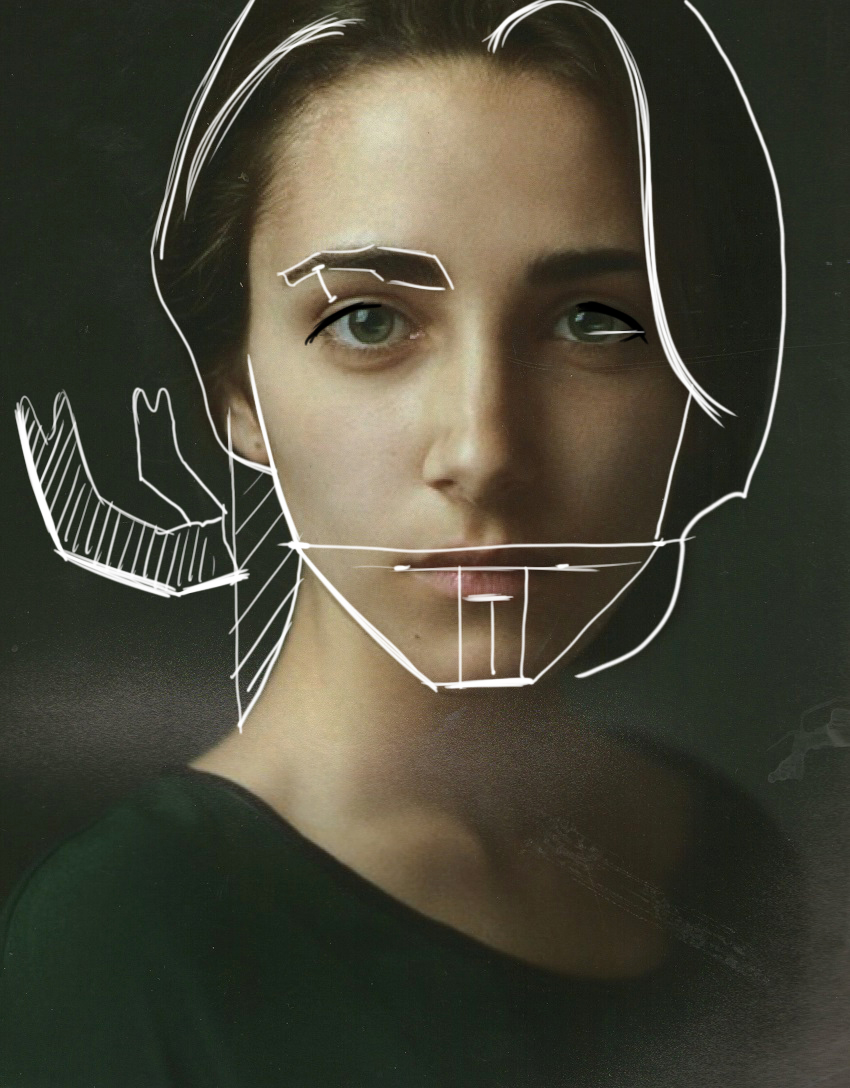
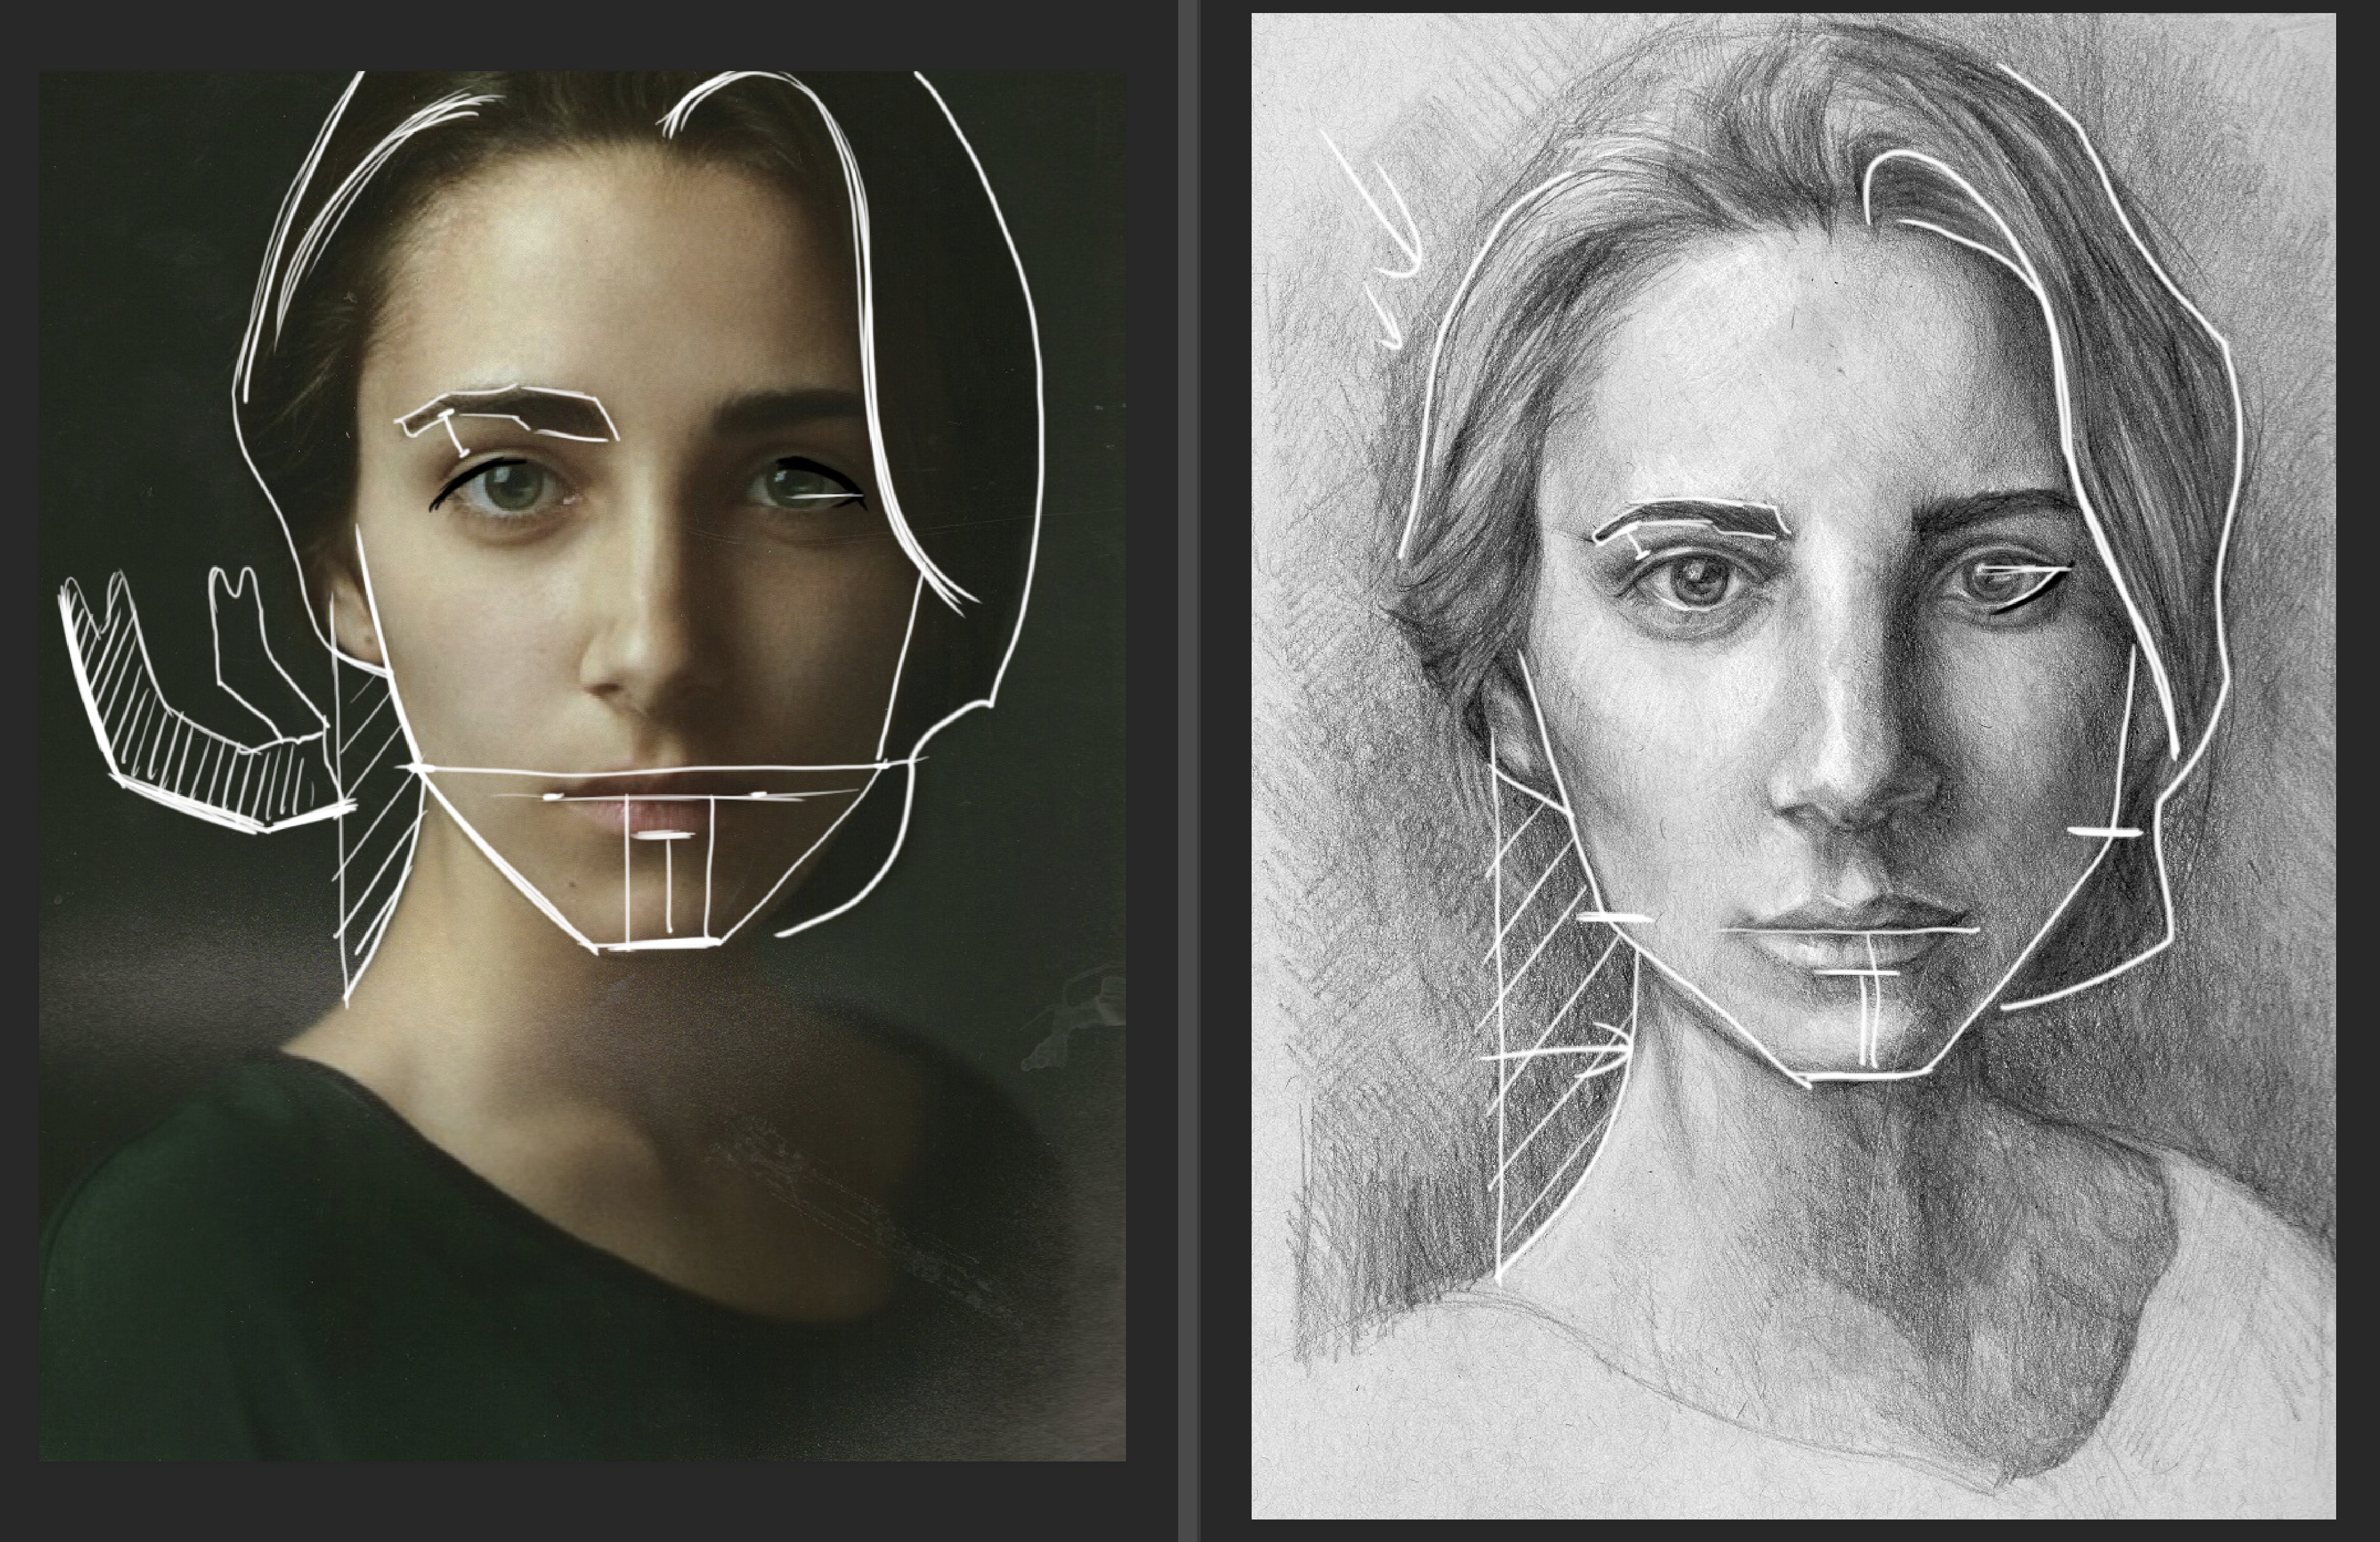
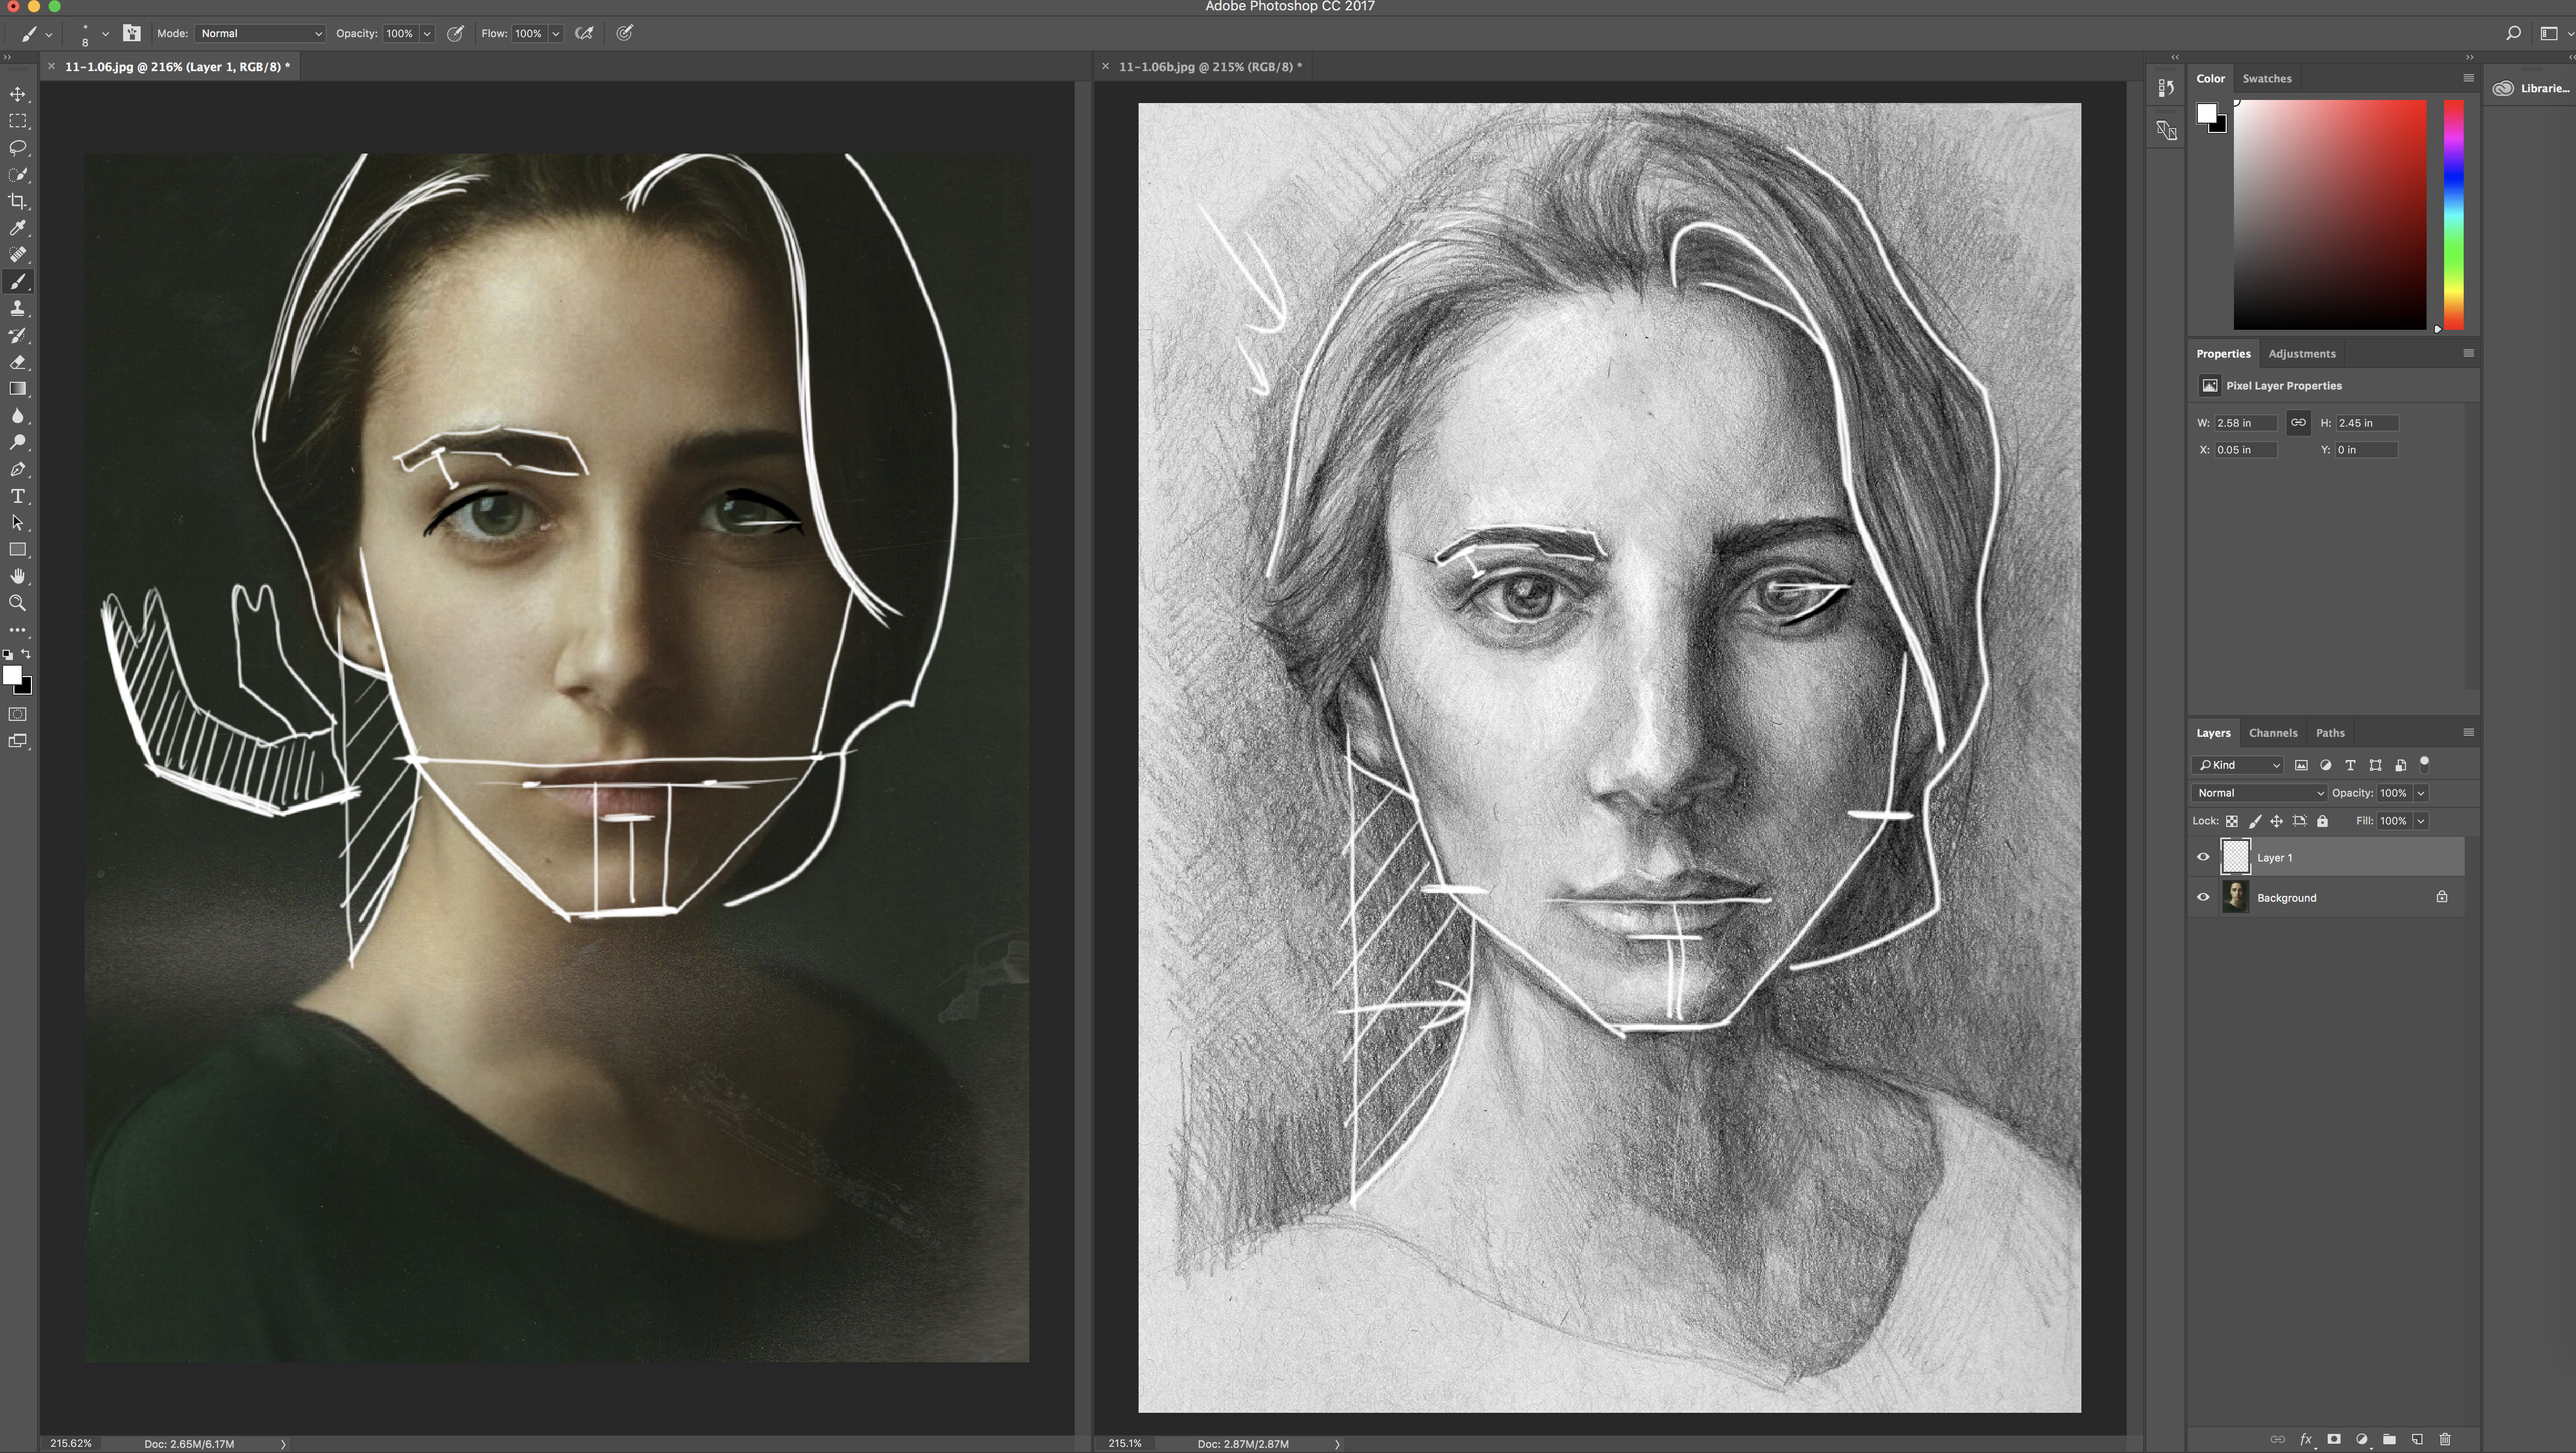
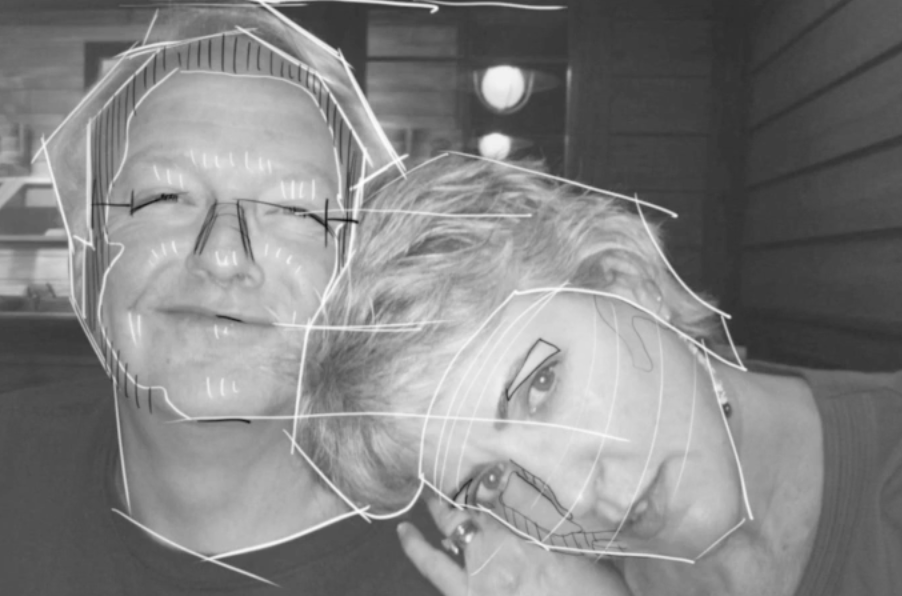
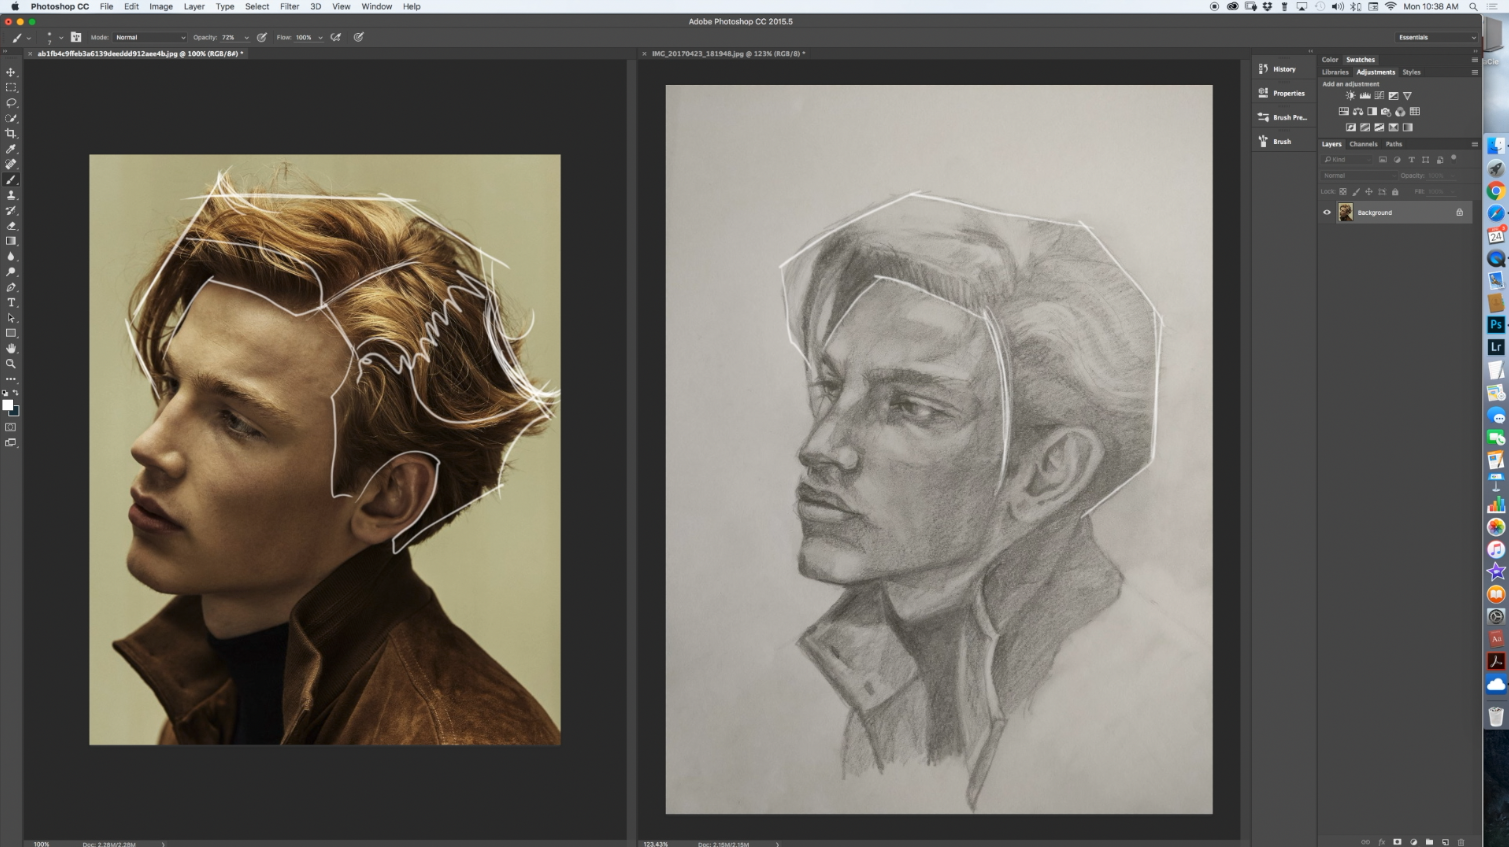
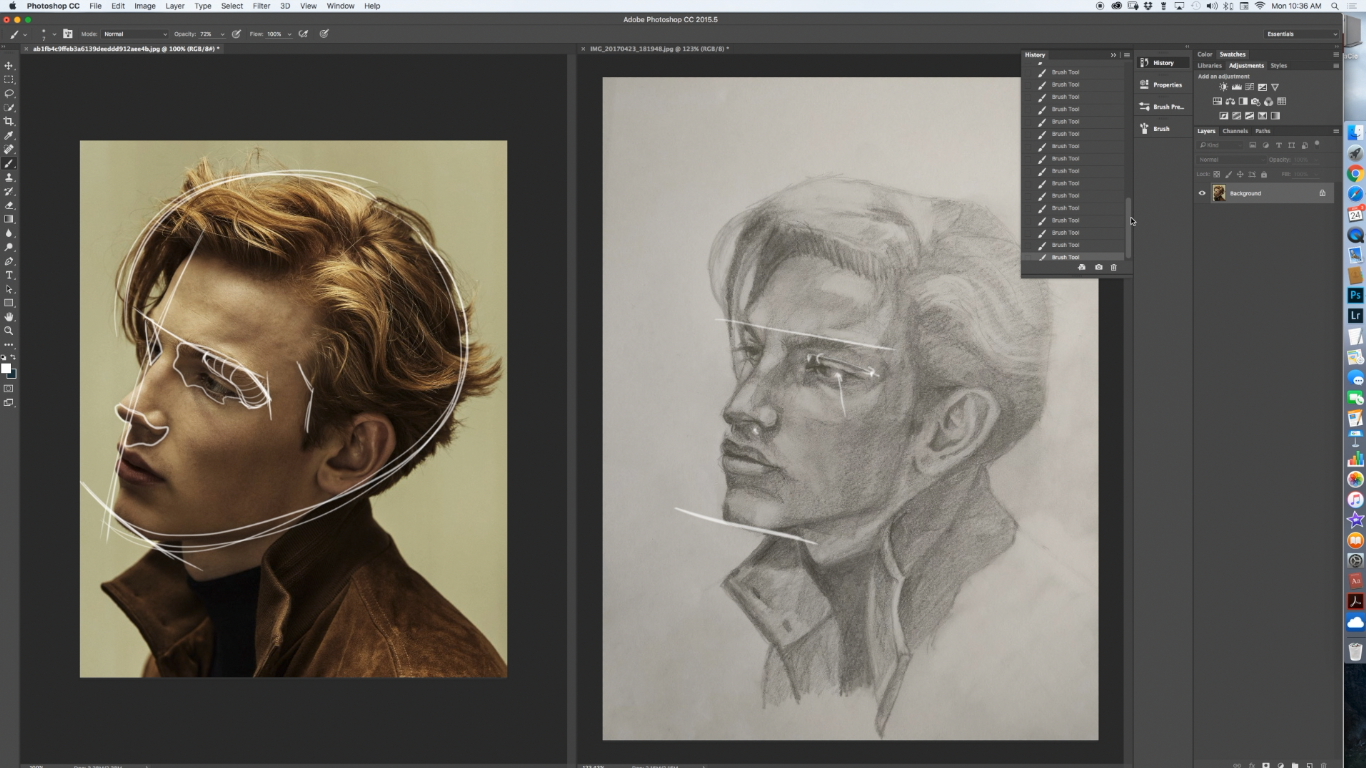
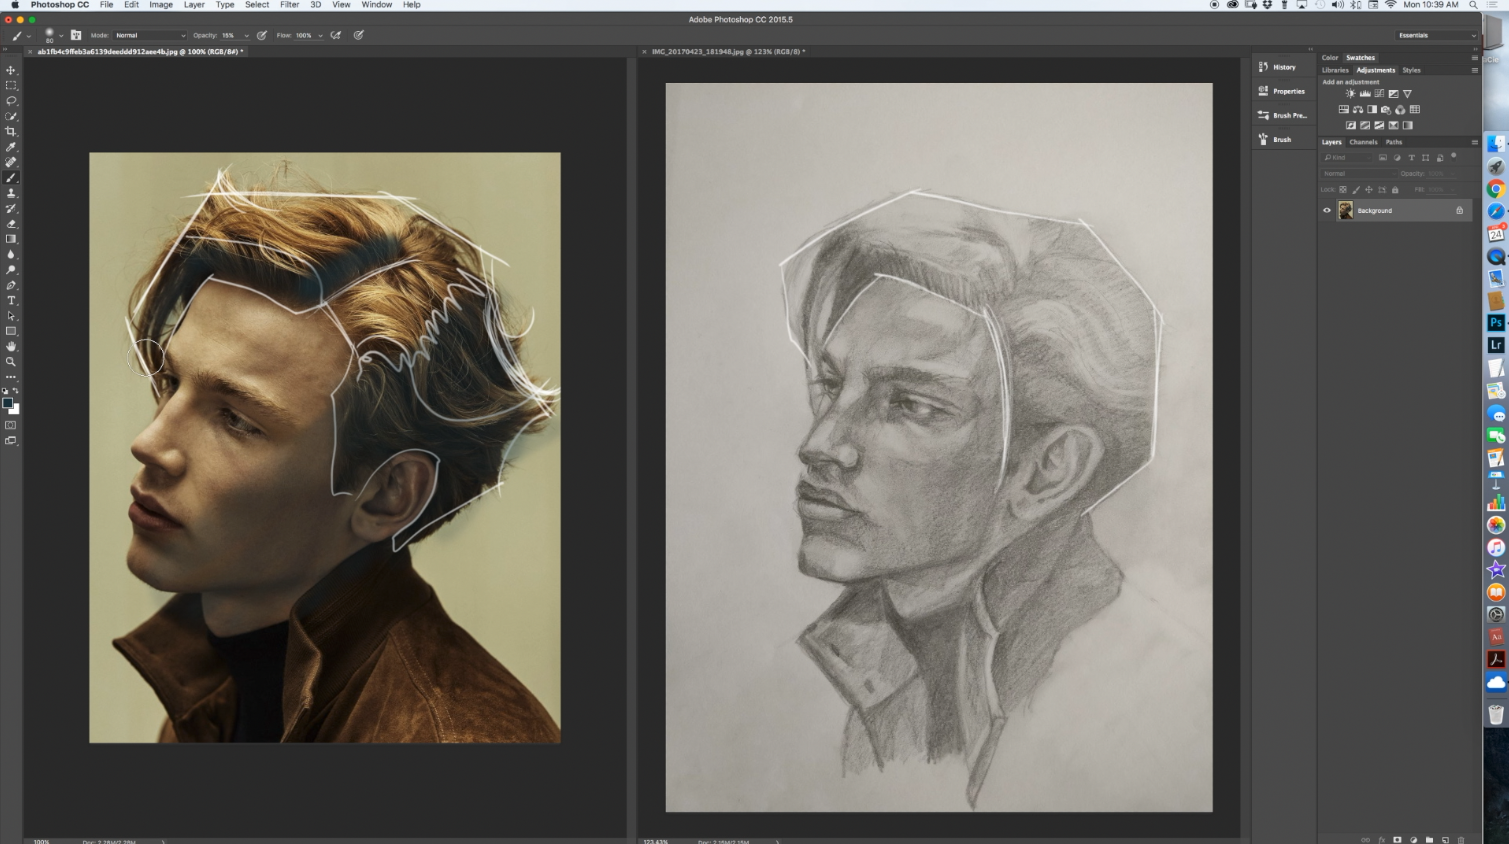
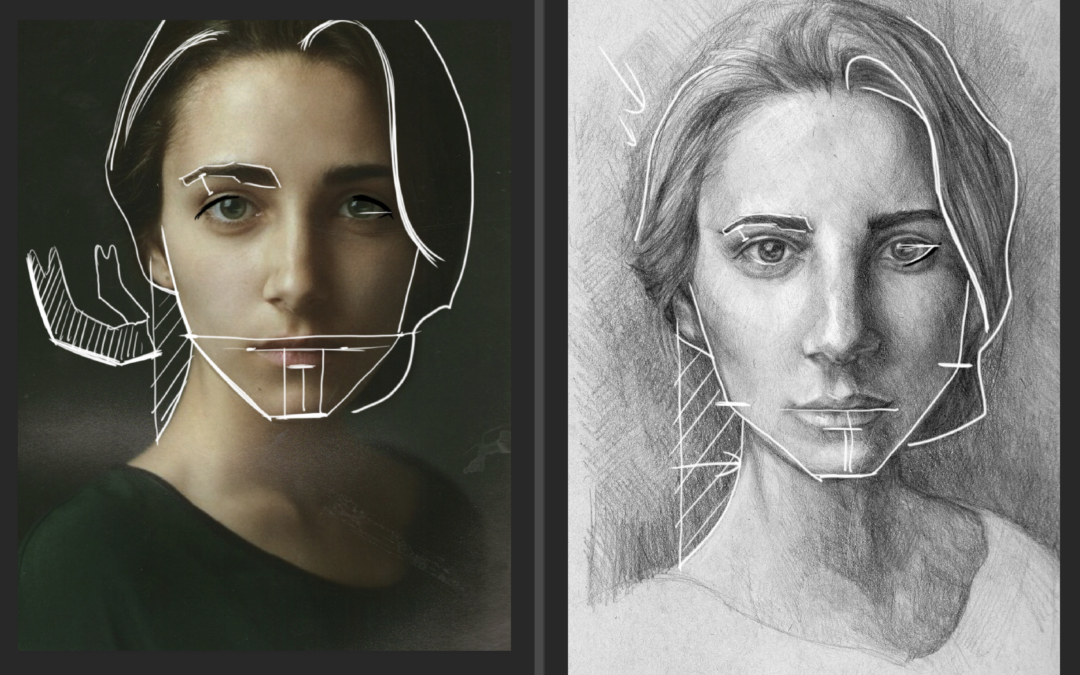
One of the biggest portrait drawing techniques I teach in the classroom is shape of hair versus the shape of face. If you can draw the shape of the models hair, that is half the battle to drawing a likeness.

In this video I talk to the gesture of the models hair as well as the edge. If you can find the gesture or flow to the models hair that will help you tremendously. If you can establish a clear, soft outside edge to the hair that will help you too.

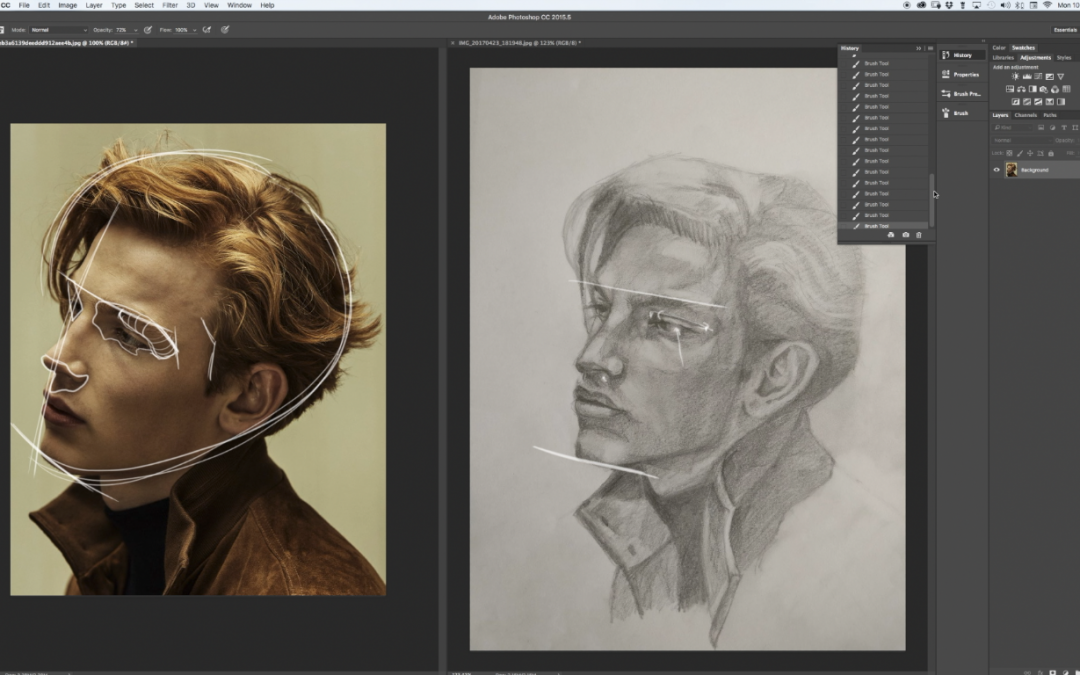
When drawing the jaw bone aka the mandible, with three simple angles, this will go a long way in creating a likeness as well.

Plus measure, measure, then measure some more. There are some simple techniques in the video that I use all the time. I trust if you master these techniques you will be able to draw anyone’s likeness with ease.

Thanks so much for watching!!

To find out how you can get your drawings critiqued visit Drawing Tutorials Online.

Understanding How To See Surface Planes

Understanding How To See Surface Planes

Understanding form is paramount when trying to incorporate three dimension into your figure drawings. We have a pretty cool lesson for members of Drawing Tutorials Online in our Begin Here Step By Step course titled, you guessed it, “Understanding Form”.

I really enjoyed creating this lesson. It brought me back to my George Bridgman days. I’m a big fan of Bridgman. Studying his books over the years has really helped me to understand form.

However trying to see, then draw form from looking at the figure is a whole other can of worms. It’s super hard for a lot of artist to see the exact location of where the front plane meets the side plane. Not to mention all of the layers including shallow ovals.

Hopefully in this video critique you can see how I start to map out the surface planes on this models body. If you struggle with this always try to draw from a model that has form light. Yes you should be able to see surface planes in front light, but form light is best for this exercise.

If you need both feedback and photo reference we are here to help you.

Consider a membership to Drawing Tutorials Online. You can post your art up for a critique and download our figure photo reference!


I’d love to hear what you have to say about this video critique. Leave a comment below!!

Thanks for watching.

Do You Draw With Too Much Detail?

Do You Draw With Too Much Detail?

Have you ever looked at your drawings and something seemed not quite right? The drawing was beautiful but a touch flat. I know I certainly have. Both my paintings and drawings had a flat look at one time.

After many years of trial and error I finally learned why my paintings and drawings looked flat. I was putting much too much detail everywhere. I was putting detail in the light, I was also rendering detail in the shadows. I was putting details in the background as well as the foreground.

If you are detail orientated like me you most likely love to render. You love to put details all over your images. You might want to consider using less detail to create more depth and atmosphere.

For example keep your shadows shapes fairly simple. Add details and texture in the light instead. Another tip, don’t put too many details in the background of your images. Think more shapes in the background, less texture. Render most of the texture and detail in the foreground.

These are simple tips for you to consider in order to create a well balanced drawing or painting. Letting go of detail in these two specific areas, the shadows and background will enable you to create an image that has depth and atmosphere.

If you have questions about this topic leave them in the comments section below.


Are you looking for feedback on your artwork? If you are check out what we have to offer in our membership area.

Thanks for watching!

Drawing From The Wrong Photo Reference

Drawing From The Wrong Photo Reference

Have you ever tried to draw a portrait for a friend that didn’t go so well? You had a great photo of a friend or family member and when you tried to draw from it, it was not a good experience.

It’s most likely the photo had front lighting from flash photography. Your friends looked great, but the photo had no shadow shapes to cling onto. Drawing a portrait from front lighting is super difficult. Of course it can be done, however you have to be well versed in seeing subtle value shifts.

The key to drawing from flat front light is practicing matching values. It’s also all about understanding form. Once you understand form and can match values you can pretty much draw from any photograph.

I see many new members of Drawing Tutorials Online struggle when trying to draw a portrait from front light. I get it, you might have a photo of a dear friend and you want to draw a portrait for them.

My suggestion is that you invite them to your studio in order to take a new picture of them. Make it fun, have a drink, relax and definitely use form light. Turn the flash off. Form light will provide you with shadow shapes that you can actually use. Drawing shadow shapes accurately is the key to drawing a likeness.

Take a moment to check out the video below. It will definitely help you if you have to draw from a flat photo.

If you would like a critique of your artwork definitely consider a membership to Drawing Tutorials Online!

Thanks for watching:)

How To See Gesture

How To See Gesture

This video will teach you how to see the gesture of just about any pose. It’s important to be able to see through complicated fabric folds. Fabric certainly will mask your ability to see the clean gesture lines within a figure.

You want to see gesture from the top of the figure to the bottom. Seeing what I like to call “Long Gesture” is crucial to drawing figures that have grace and flow.

Without gesture what you have is a stiff figure drawing. One technique that can really help you is the “Opposite C” technique. The “Opposite C” technique provides you with a physical way to draw the natural flow of the human body.

If you need help with your figure drawings consider a membership to Drawing Tutorials Online. Through our weekly video critiques we can help you to see the gesture in just about any pose that you try to draw.

Thanks so much much for visiting our blog. Enjoy the video below.

Read more about what Drawing Tutorials Online has to offer you.

How To Draw A Three Dimensional Portrait

How To Draw A Three Dimensional Portrait

If you are looking to improve your portrait drawings watch the video critique below. In this video critique we help out Ilse with drawing a better likeness of the model within the photo.

We also show her how to create more three dimension through the use of shadow shapes. I’m a big believer of shading in shadow shapes in a solid way. If you leave white paper showing through your shadows, not only will you loose the likeness, you will also loose that three dimension look and feel.

Lastly in the video we show Ilse how to handle drawing the hair. Once again it’s all about light and shade. However with hair it’s also very much about drawing cylindrical shapes. Making sure that when you draw strands of hair they are in the form of a cylinder. Especially with the hair within the photo reference Ilse is drawing from.

I hope that you learned something from this video critique. If you are looking for some feedback and guidance regarding your portrait drawings visit members.drawing-tutorials-online.com to read up on what our site has to offer you.

Thanks for watching!


Feedback and guidance from a respected teacher means everything to your growth. We are here to help you reach your artistic goals big or small. Visit http://members.drawing-tutorials-online.com to take a site tour.