Portrait Drawing – Lesson Four

Portrait Drawing – Lesson Four

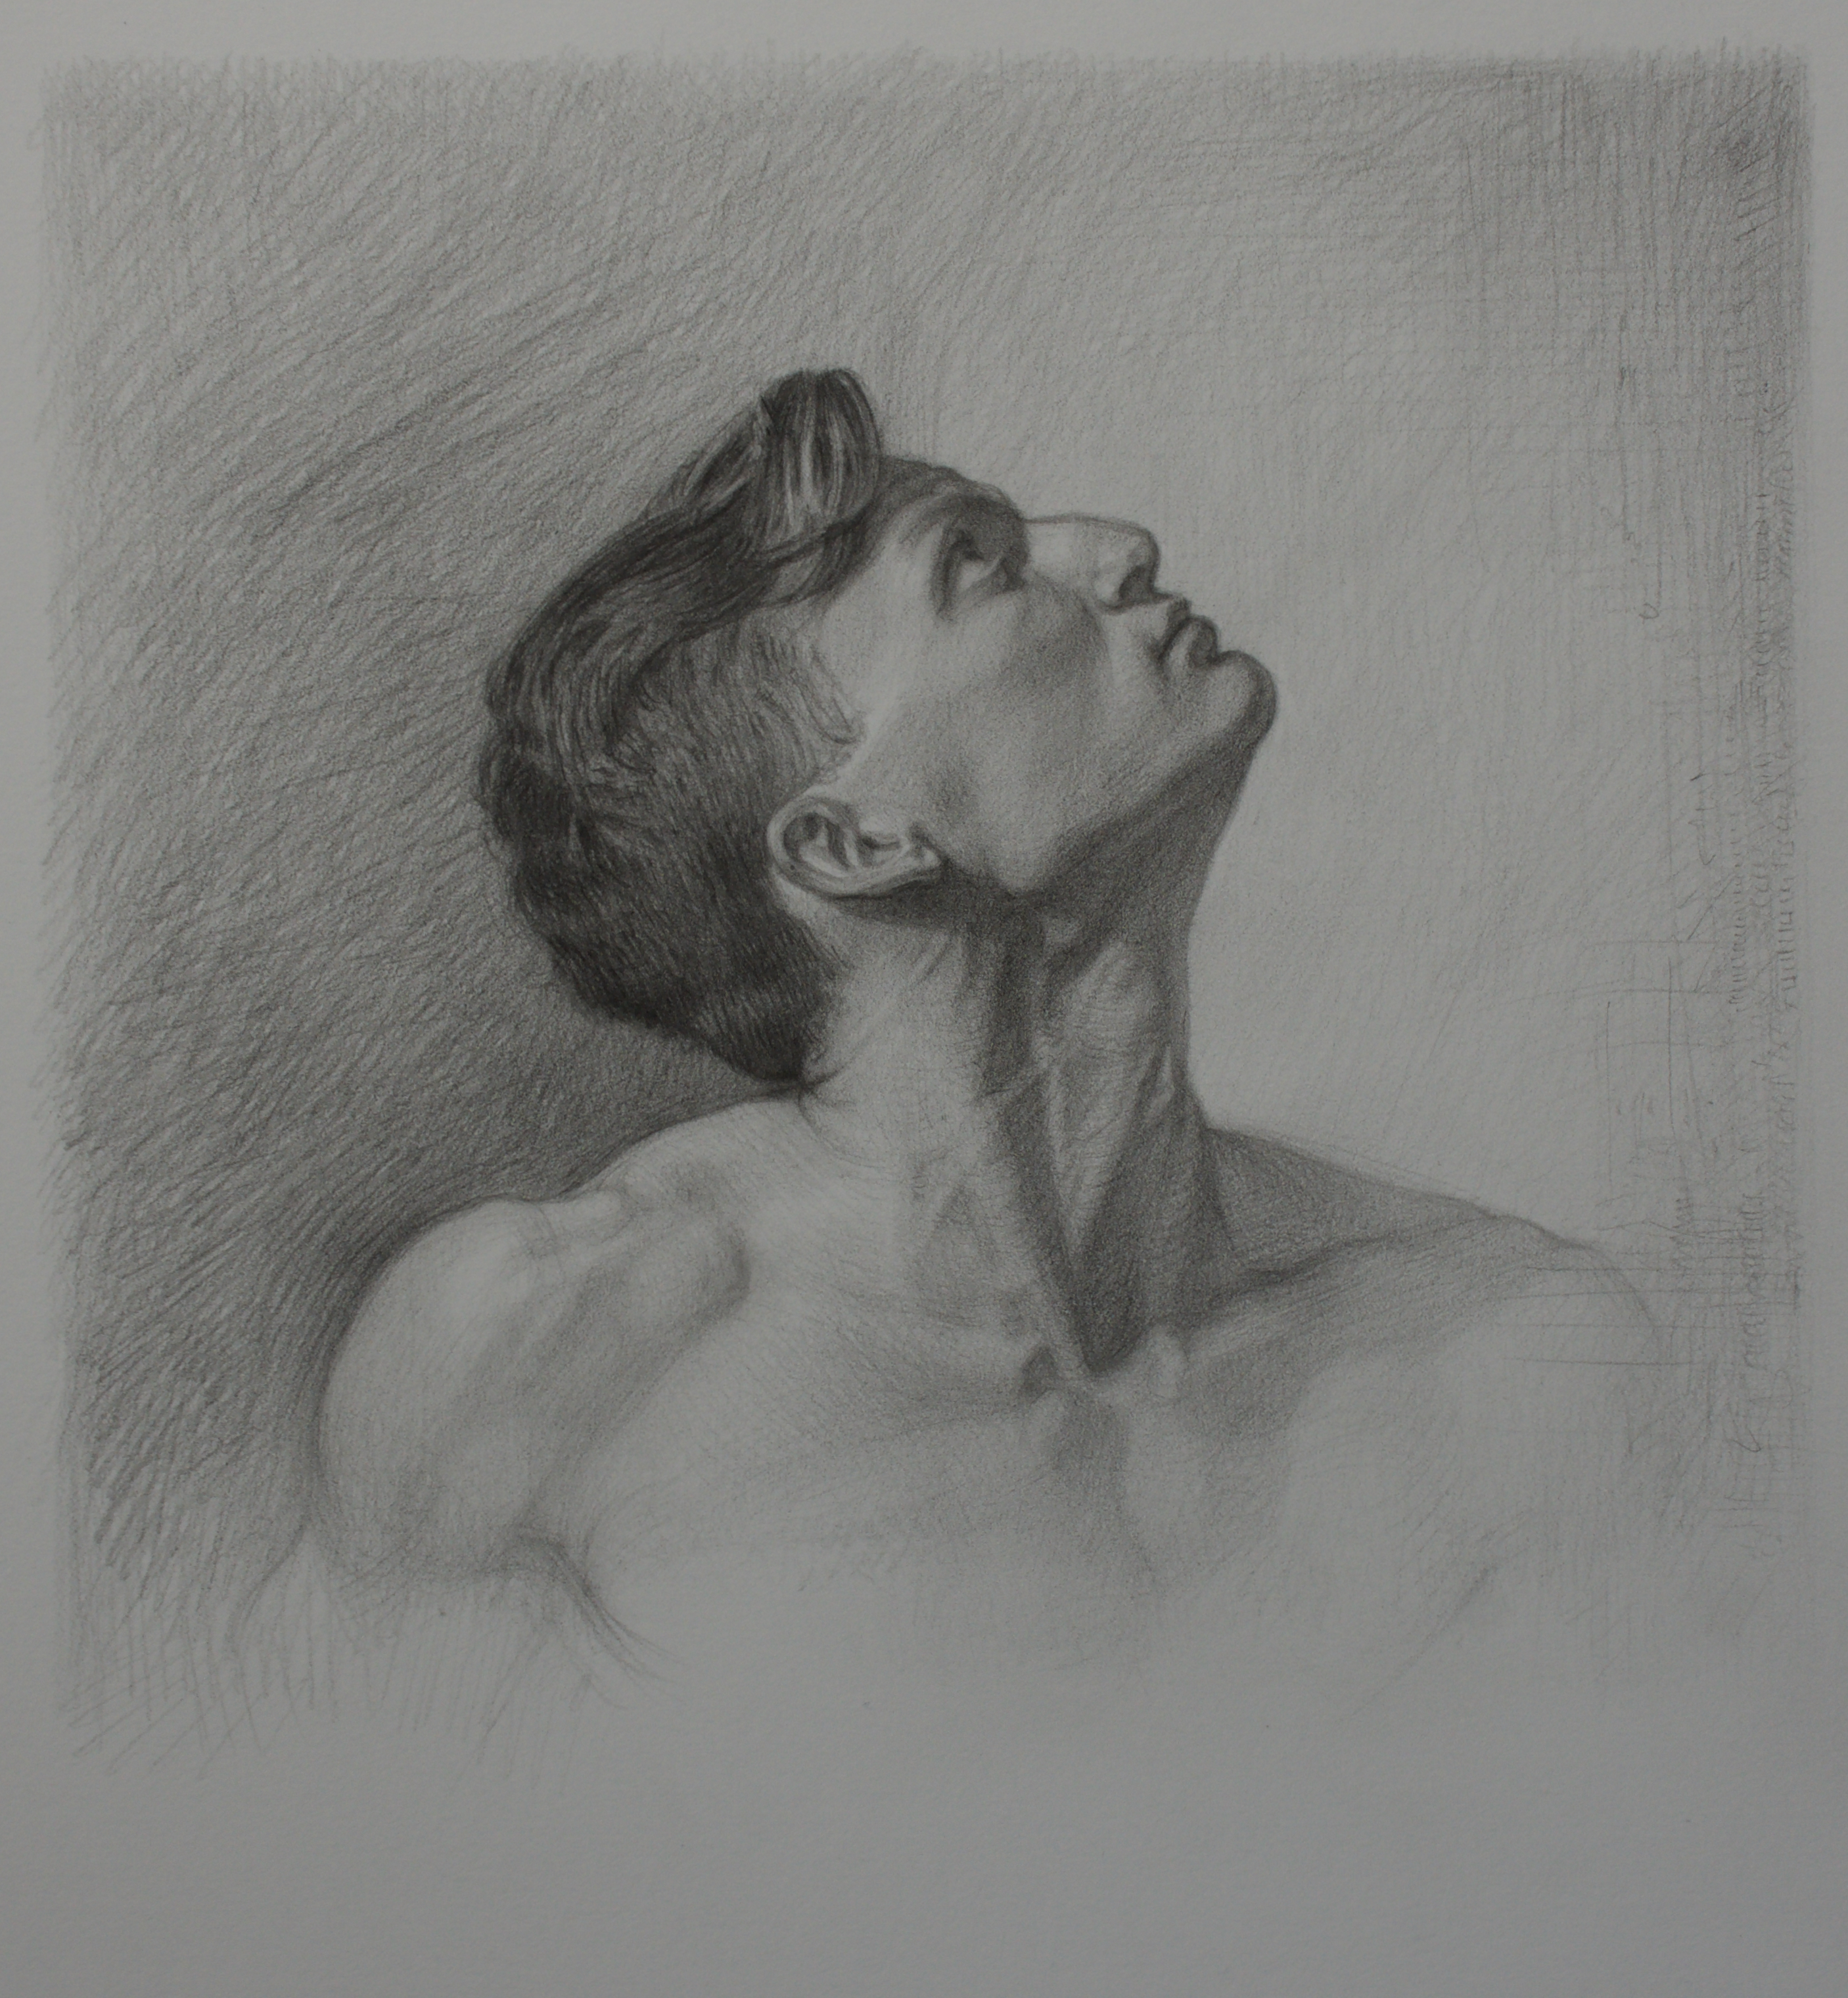
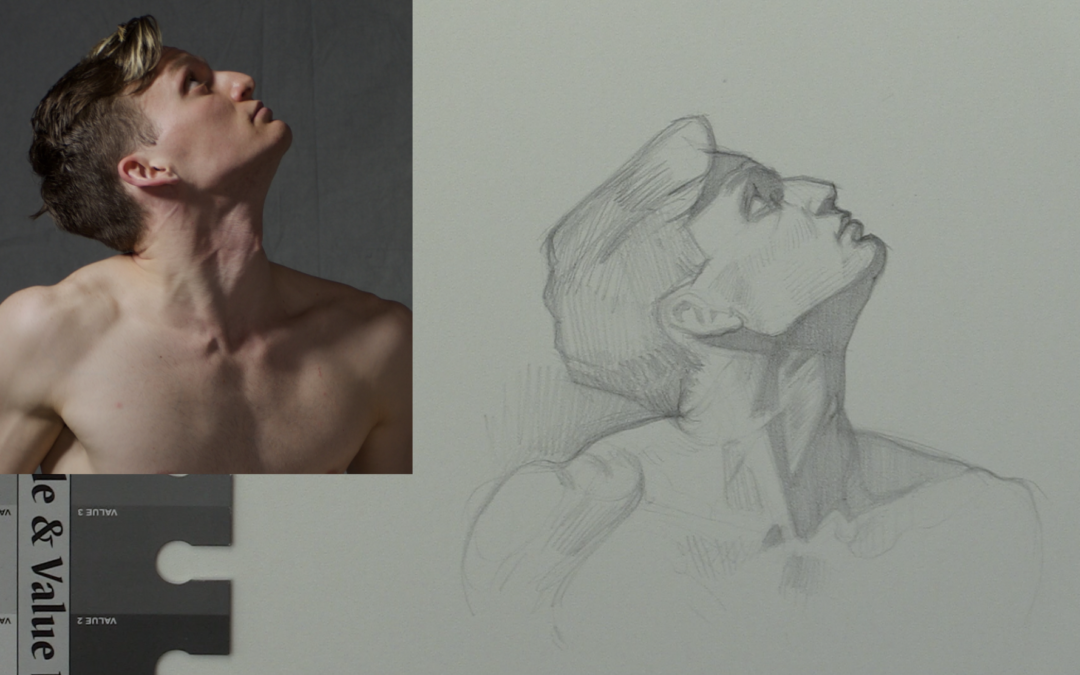
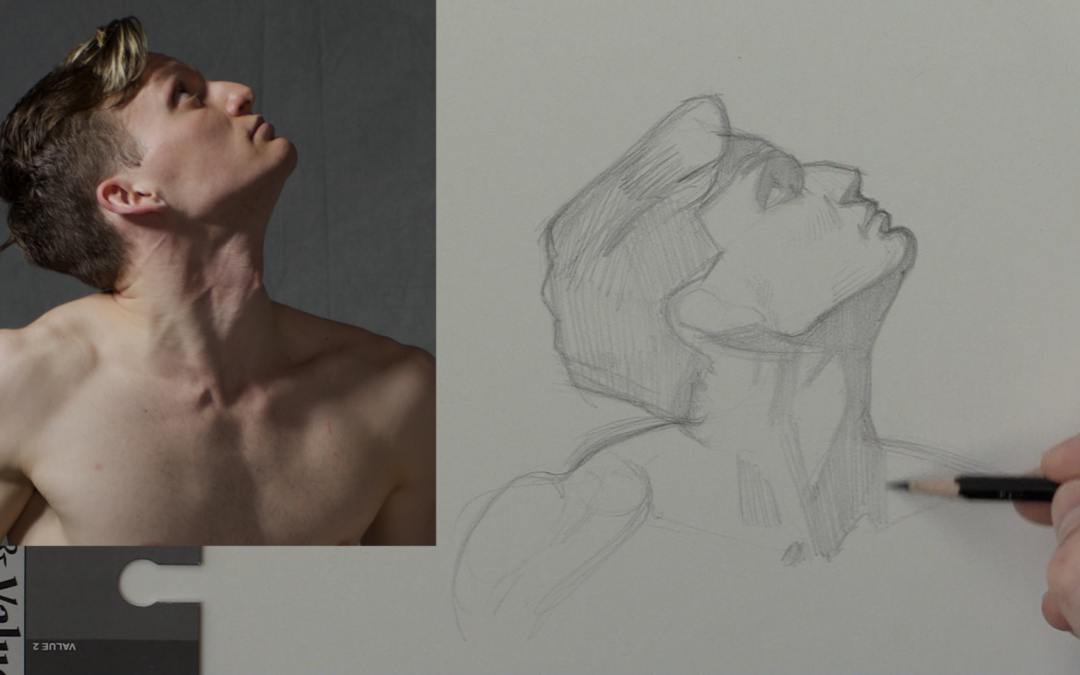
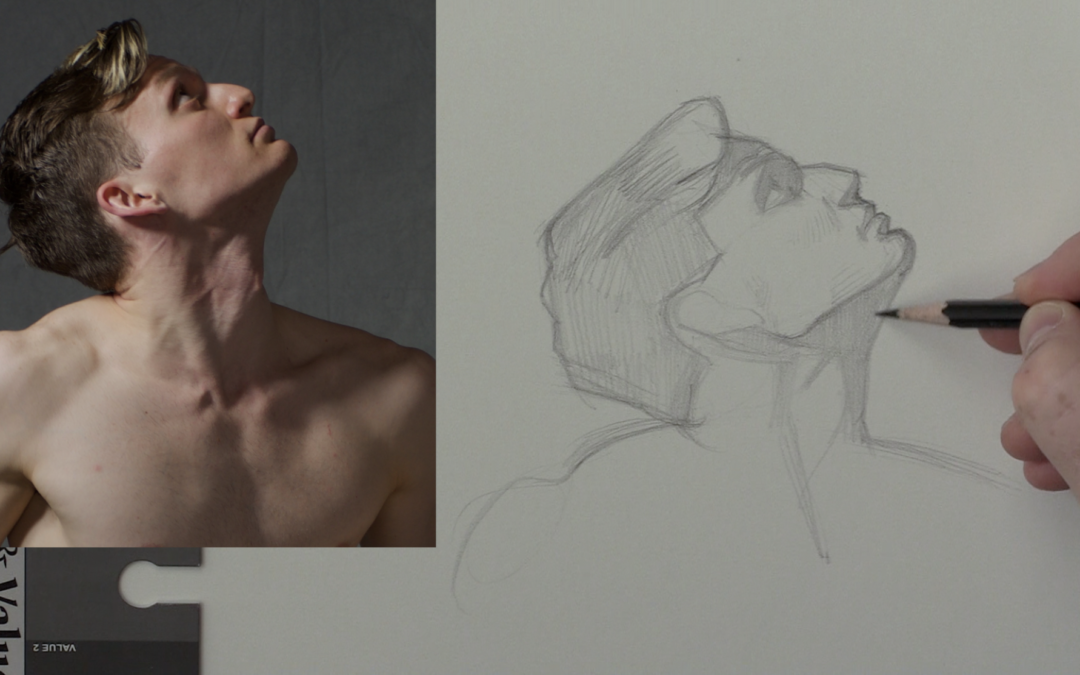
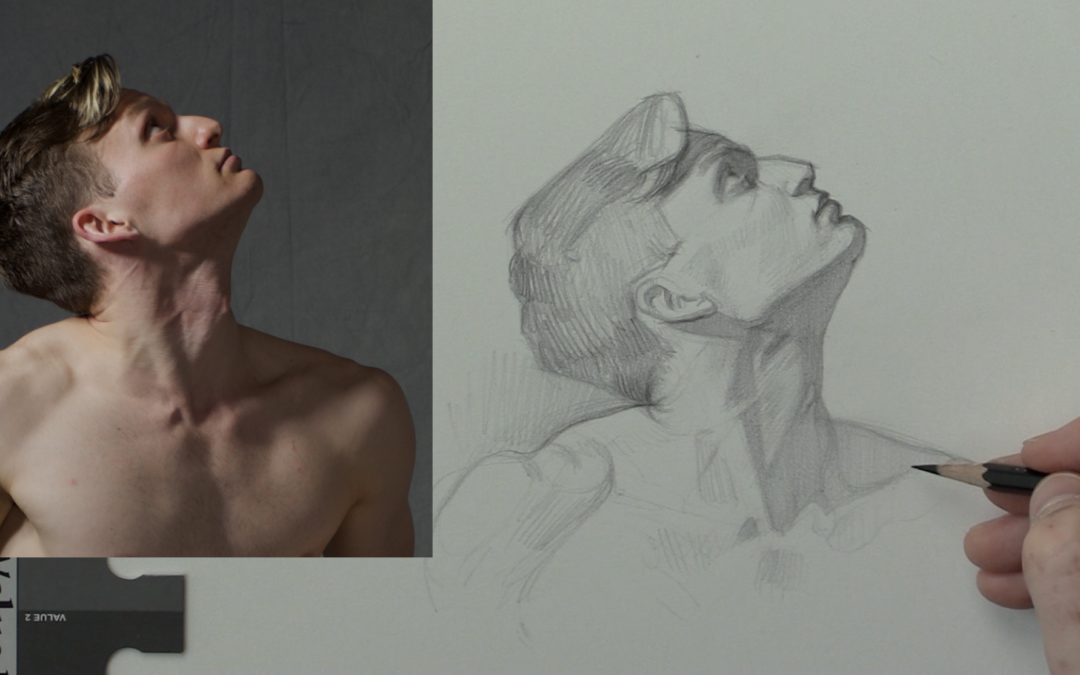
Okay great you have made it to lesson four. Once you have taken the time to get the basic shape of the head with a light middle tone it’s now time to dive in deeper. In essence you have basically drawn big shapes, then drawn smaller shapes within the big shapes.

Start progressing into refining the features of the face, getting a bit more aggressive with a darker middle tone.

You can accomplish this by looking more at the photo reference than you look at your drawing. You also will want to have a value scale nearby to ensure that you are using the proper value structure. Not too dark, not too light.

You will also want to start adding more value to the shape of the hair as well. This will really start to balance your drawing out.


Thank you so much for watching. I appreciate you taking the time to watch these portrait drawing tutorials

If you like this style of drawing definitely consider a membership to Drawing Tutorials Online. My main goal for the website is to help members create better art, period. Learning through well thought out courses as well as getting your portrait drawings critiqued will help you to improve in a much faster way.


Portrait Drawing – Lesson Three

Portrait Drawing – Lesson Three

In this lesson three I share with you the importance of adding shapes within shapes and refining edges.

One you have established some basic shapes it’s then time to add smaller shapes within the big shapes. For instance once you have drawn the eye socket shape it’s time to place the eye within the eye socket shape.

You will want to see the eye not as an eye but as a series of shapes. For instance the white of the eye is a triangle. The iris is a rectangular shape etc.

Work on refining the edges of each shape. It’s the edge of each shape that will enable you to get a likeness

I see too many artists ignore the quality of the edges in their drawings. Trust me I know, I was one of those artists. I used to have way too many inconsistencies in my edge quality. In this particular portrait drawing the model’s profile edge is a major component in achieving a likeness. Draw the edges correctly and you will most certainly achieve likeness.


I want to thank you for taking the time for watching the portrait drawing tutorial above. I will be creating many new portrait drawing courses this Fall. If that sounds interesting to you definitely take a moment to check out Drawing Tutorials Online.

Now get out there and draw something that you love.


Portrait Drawing – Lesson Two

Portrait Drawing – Lesson Two

In this sped up drawing tutorial world that we see on YouTube and Instagram we tend to forget that a good drawing takes time. It really takes time for me. A fourteen minute video clip up is basically a nano second in my drawing world.

It’s really important that you figure out what about drawing makes you happy. For me it’s all about sitting in my studio and creating something worth while. I love rendering for hours with a pencil while listening to music and drinking good coffee. I also get satisfaction from doing a five minute gesture drawing from life.

However long drawings are where my passion is. What about you, what part of drawing makes you happy? Once you figure that out you are on your way to drawing success.


I want to thank you for taking the time for watching the portrait drawing tutorial above. I will be creating many new portrait drawing courses this Fall. If that sounds interesting to you definitely take a moment to check out Drawing Tutorials Online.

Now get out there and draw something that you love.


Portrait Drawing – Lesson One

Portrait Drawing – Lesson One

I just recently finished a brand new portrait drawing course over at Drawing Tutorials Online. I wanted to share with you a few of the chapters since the drawing has gotten a lot of positive feedback.

It’s been while since I’ve posted any drawing tutorials outside of the members area. The six lessons to be posted here at the blog should give you some insight as to how to get started drawing a portrait.

The drawing took me roughly seven to eight hours to complete. My process is quite slow, however if there is a technique within the video that helps you by all means run with it.


This is lesson one, I will be posting six lessons in total here at the blog. Thank you so much for watching.

Please leave a comment below. I’d love to hear your thoughts.

If you would like to jump ahead and watch the course in it’s entirety visit our sign up page at Drawing Tutorials Online. The course comes with a PDF, screencast tutorial and photo reference. Plus when you sign up to Drawing Tutorials Online you will be able to receive feedback on your portrait drawings. 


How To Draw A Portrait With Minimal Shadow Shapes

How To Draw A Portrait With Minimal Shadow Shapes

Have you ever tried to draw a portrait where the person in the photo reference had no contrasting shadow shapes? In other words the lighting within the photo was very flat.

When there aren’t many shadow shapes to draw it’s much more difficult to capture a likeness. In this video critique I help out Marjan, a member of Drawing Tutorials Online, with trying to capture a likeness. As you can see in the video below the young girl does not have many shadow shapes to cling onto.

In my latest Begin Here Step By Step course I teach a lesson called “Seeing Shadow Shapes”. Just about every member loved this lesson because shading in shadow shapes makes the process of portrait drawing much easier.

So keep in mind that it’s best to light your subject using form light in order for there to be some recognizable shadow shapes.

Now if you already have photo reference displaying flat light then you want to focus your efforts on drawing the shape of the hair first. Why you may ask, because the shape of the hair acts as a frame for the face. You want to take your time with measuring and drawing the angles of the face where the edge of the face touches the hair.

You also want to look for non contrasting shadow shapes. Practice shading in light non contrasting shadow shapes. Shadows shapes don’t always have to be super dark. You just have to practice being able to recognize subtle values shifts on the face of the person you are drawing.

I hope this video critique helps you with your portrait drawings.


Thank you for watching! If you want more drawing tips on a weekly basis click here.