Starting A Portrait From The Eye – Anthony Van Dyck Master Study

Starting A Portrait From The Eye – Anthony Van Dyck Master Study

This live class was held on August 22, 2020. The focus of this class was to say that there are many ways to start a portrait drawing. In this class I started with the eye.

Starting a portrait drawing from the eye is a great option. It’s called spiraling out from a place that you understand.

It’s important that you take some time to practice portrait drawing using diverse technique. This way you will find the one that works best for you.


Anthony Van Dyck at the National Portrait Gallery.


The Four Boxes Technique

The Four Boxes Technique

Jan recently posted up this portrait drawing for a critique. It was from my Shea Portrait course. Jan is looking to get a likeness when drawing a portrait.

Being able to get a likeness is difficult. Sometimes a student will need to use many diverse techniques. Some techniques click with certain students while others do not. You will need to experiment with multiple techniques until you find the one that works for you.

In this video, I share with Jan the Four Boxes Technique. It’s pretty simple. First, you should draw the exact size of your photo reference frame. So if your reference is 8 x 10 inches, draw an 8 x 10-inch boarder on your piece of paper.

You will need to split the frame vertically down the middle, then across the middle. This will leave you with four boxes. You then draw what is in each box. Nothing earth -shattering here.

this is just a drawing technique that will help you look at drawing a portrait differently. Again, this is just an exercise. This four boxes technique just give you a different perspective on drawing correct proportions.

Thanks so much, Jan for sharing your artwork in DTO’s member critique gallery. 


If you are looking to get your artwork critique definitely check out Drawing Tutorials Online. I offer member critiques every Monday. If you are looking for a more in-depth approach to having your artwork critique read more about my one to one coaching.


How To Draw The Ear

How To Draw The Ear

I recently just finished uploading the last lesson in a course titled ‘How To Draw The Features Of The Face. This last lesson focuses on the ear.

Drawing the ear can certainly be tricky. There a few techniques that you really want to keep in mind.

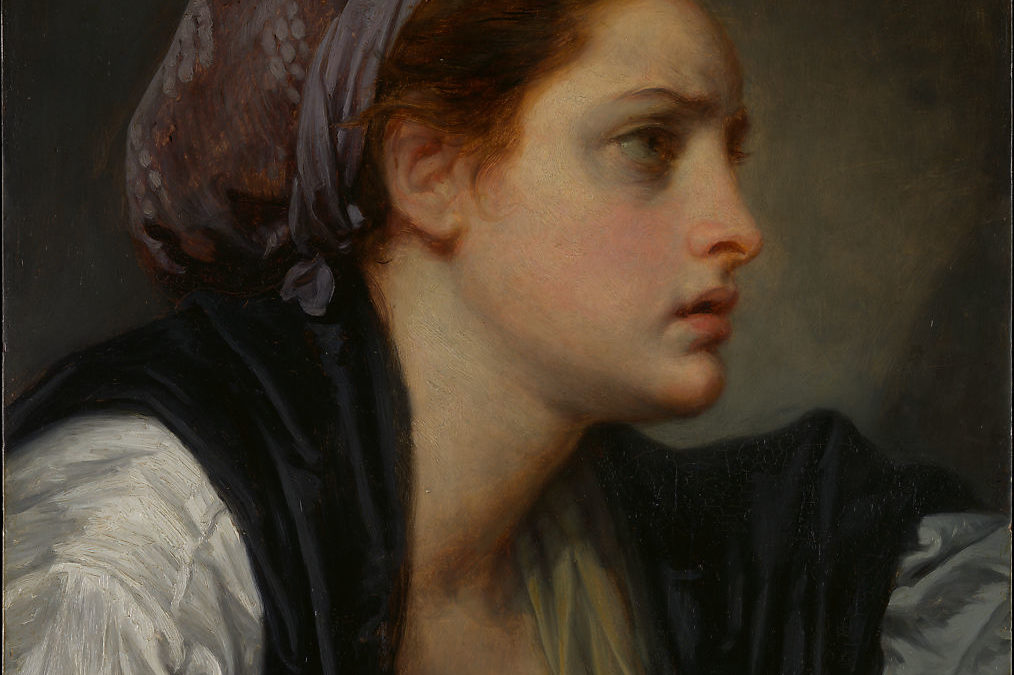
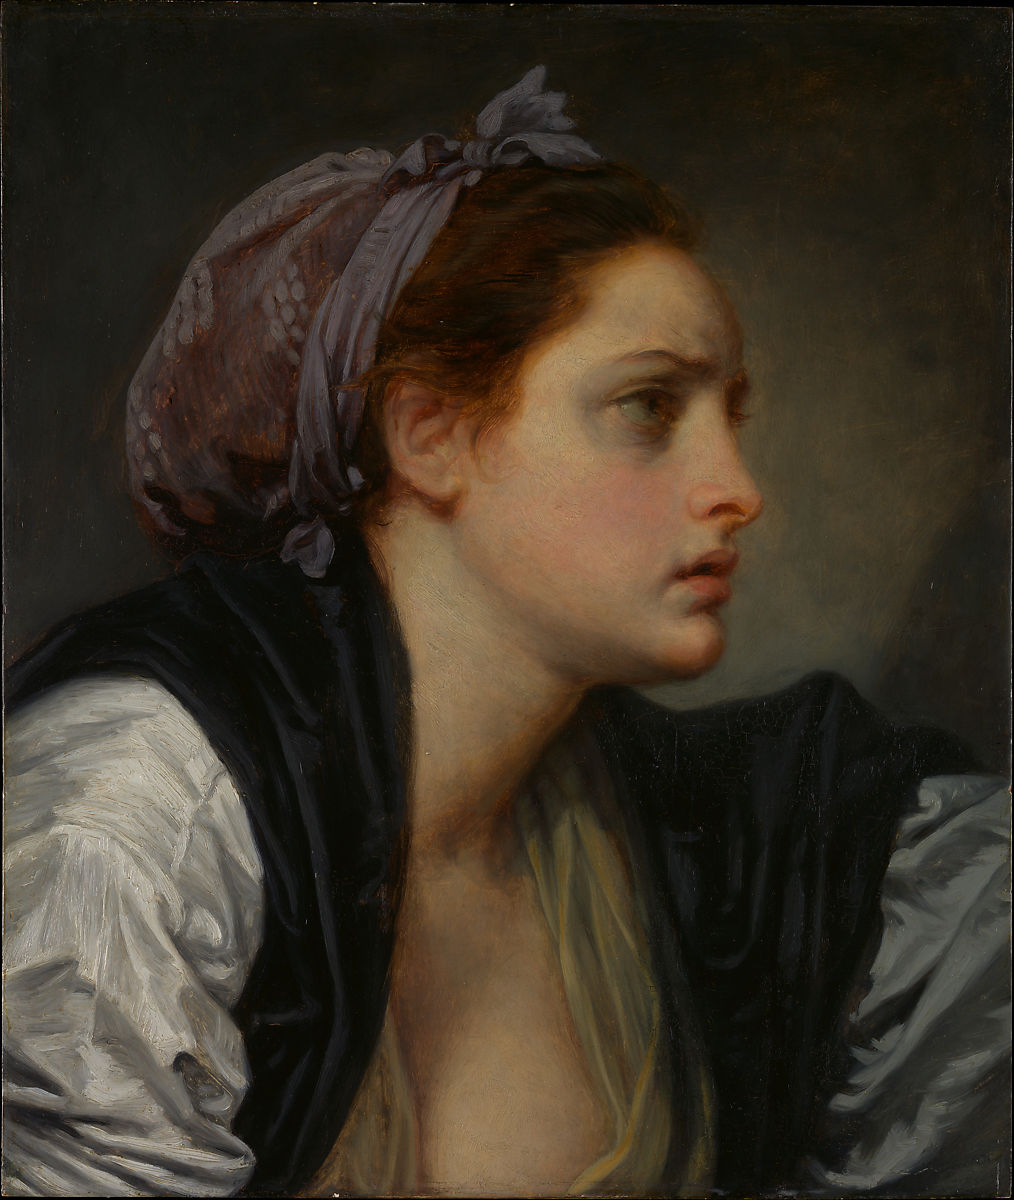
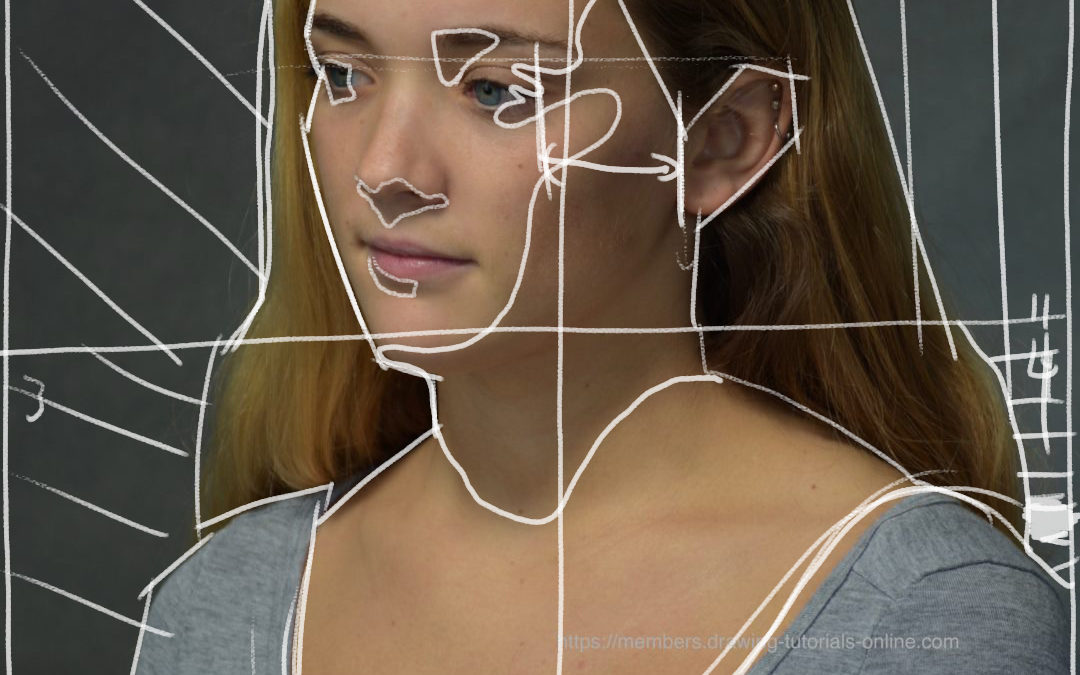
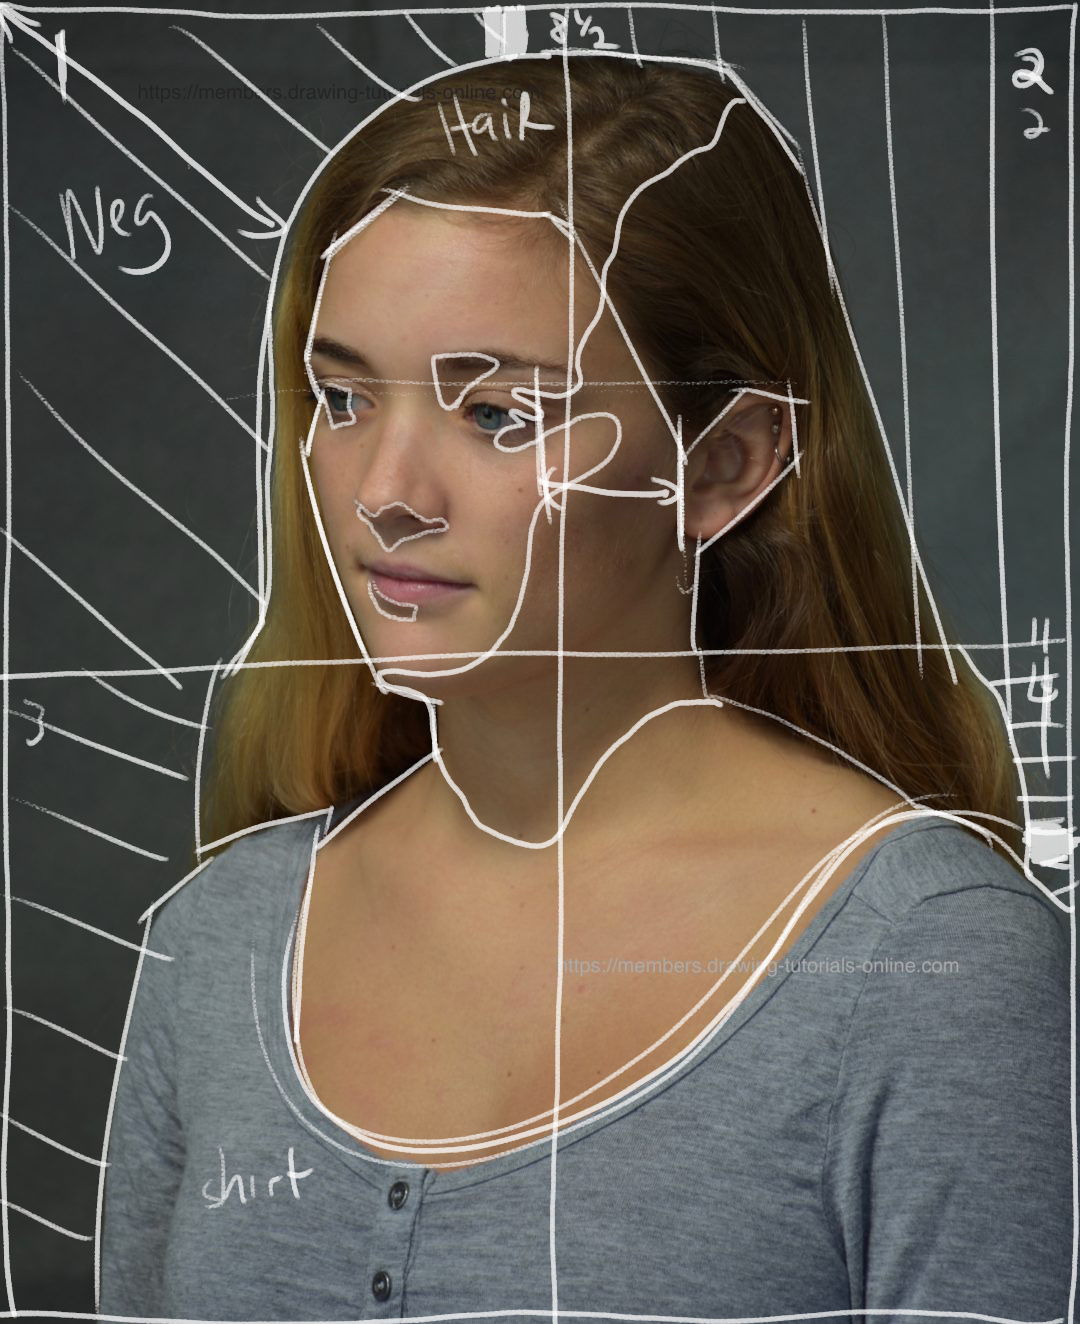
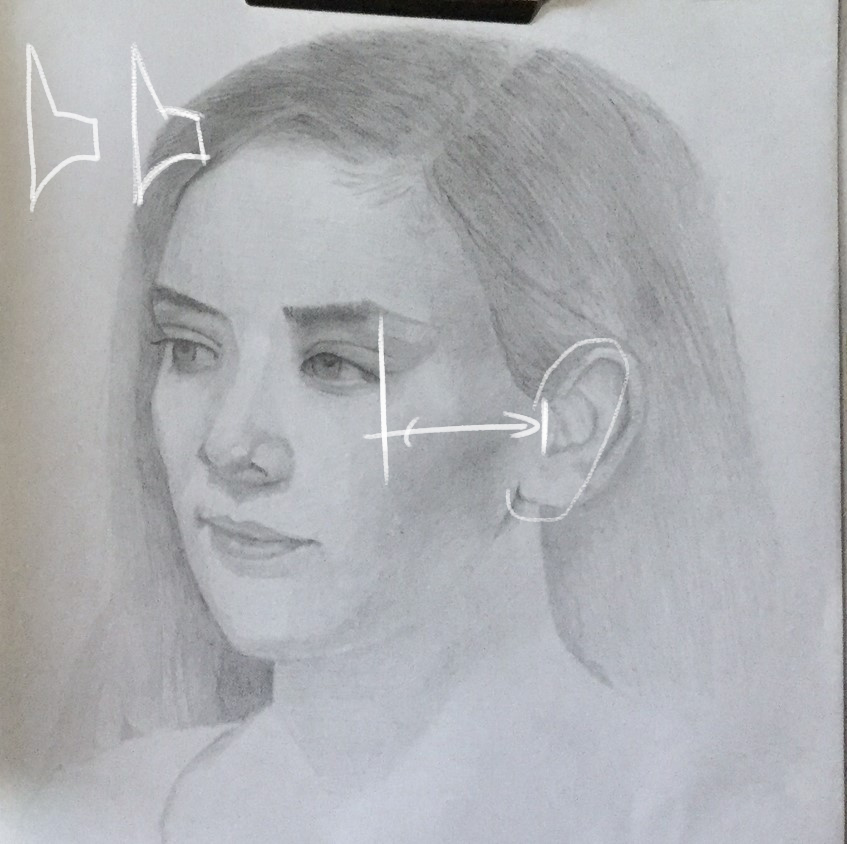
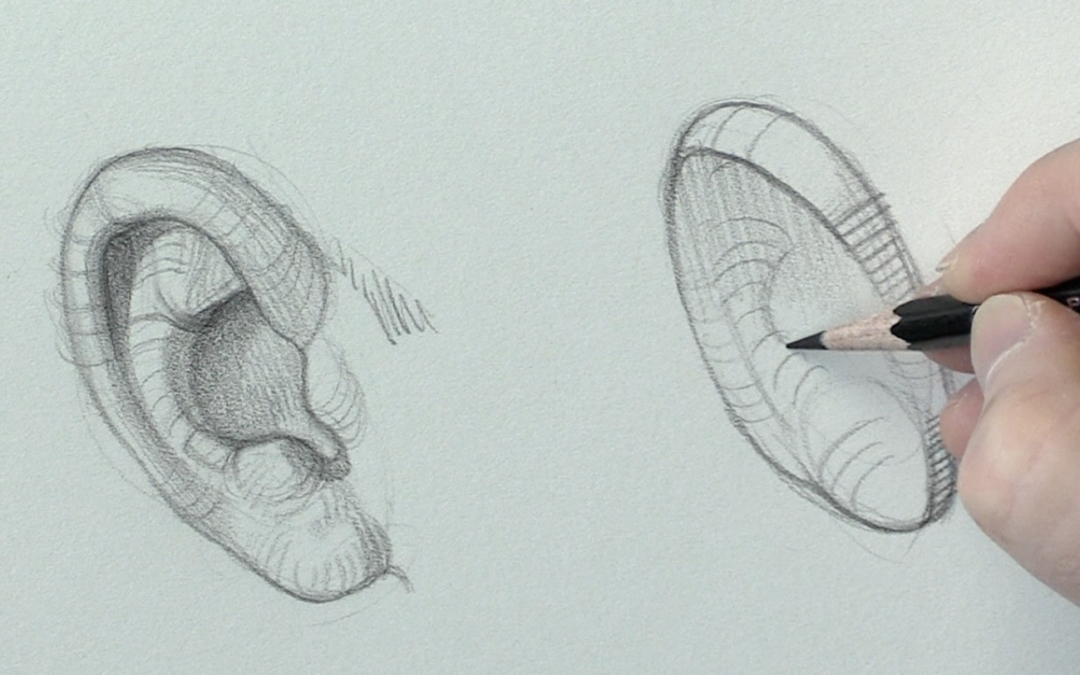
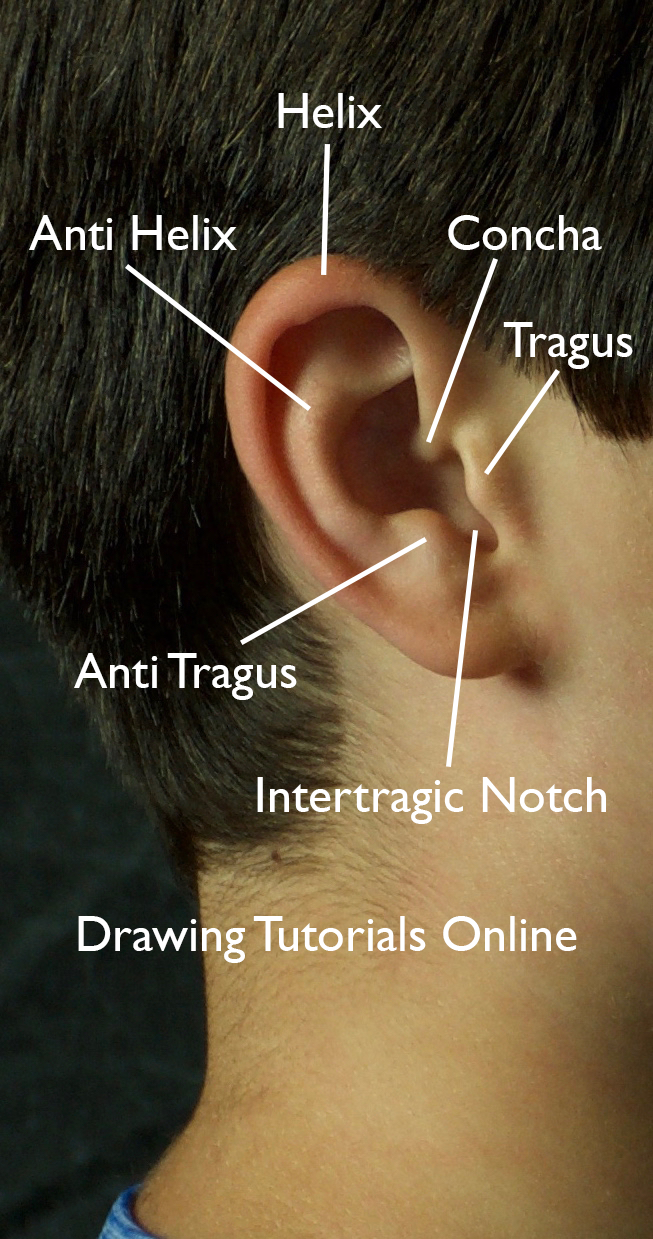
First, think of the entire ear as an oval. All of the detail of the ear is housed in that simple oval.

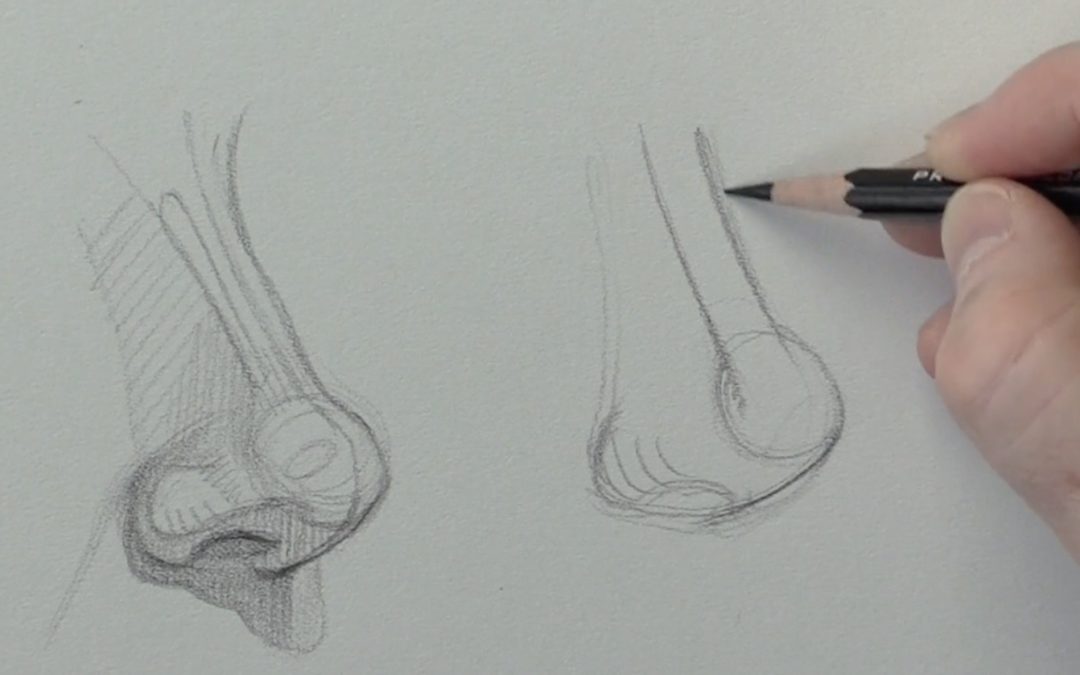
Second, the details located inside of that oval, those details are basically cylinders. To be more specific they are cylinders that are curved. What makes these curvey cylinders hard to draw is the type of light that is hitting them.

I always place my light source above and to the side of my subjects, in essence creating form light.

Third, shade in the shadow shapes of the ear. Keep the shadow shapes more of a middle tone, do not go too dark. I learned my lesson the hard way a long time ago while working on a book cover painting. Let’s just say the ears were a bit too dark.

Ears are very translucent, shade the shadows with a middle tone. This will allow for a glow in the shadow.

Fourth and last, implement the modeling factors to really promote the three-dimensional quality of the Helix and the Anti-Helix.

If you have any questions or comments leave them below. I’d love the hear from you.


Don’t forget to check out myInstagram. I’m always adding new drawings.


How To Draw The Nose

How To Draw The Nose

I just recently uploaded a brand new portrait drawing course in the member’s area of Drawing Tutorials Online.

This new course focuses on short sketchy type drawings that teach you how to draw the features of the face. Most of the video range about ten to fifteen minutes each. They are super easy to get through.

This lessons seven showcases how to draw the nose from the three-quarter view. This video tutorial will show what to do and what not to do when it comes to drawing the nose. No, this video is not about drawing a finished polished drawing, instead, it’s about teaching how to see structure.

This video will teach you how to utilize form lines to promote a three-dimensional look and feel to the nose. You will learn how to see and use tone on the diverse surface planes.

As mentioned above this video towards the end, will show you what not to do. The one thing you do not want to do is make the nostril super dark. Especially in a pencil drawing. Using your darkest dark for the nostril will create a keyhole effect in your drawing.

That said enjoy the lesson. Definitely try your own version of the drawings.


If you would like to sign up to gain access to the entire course today, check out our membership options. This course primarily covers how to draw the features of the face.

I’m teaching small group drawing classes at the Metropolitan Museum Of Art this  Summer. You can read more about them at my personal site, Matthew Archambault.