Have you ever tried to draw a portrait for a friend that didn’t go so well? You had a great photo of a friend or family member and when you tried to draw from it, it was not a good experience.
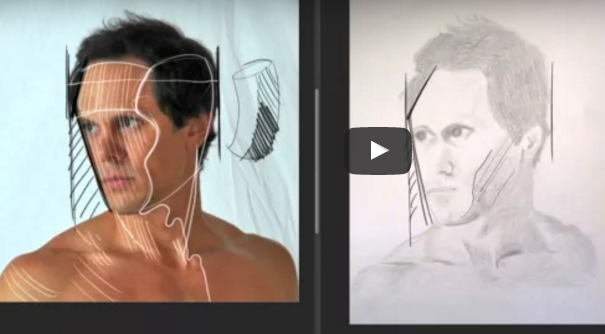
It’s most likely the photo had front lighting from flash photography. Your friends looked great, but the photo had no shadow shapes to cling onto. Drawing a portrait from front lighting is super difficult. Of course it can be done, however you have to be well versed in seeing subtle value shifts.
The key to drawing from flat front light is practicing matching values. It’s also all about understanding form. Once you understand form and can match values you can pretty much draw from any photograph.
I see many new members of Drawing Tutorials Online struggle when trying to draw a portrait from front light. I get it, you might have a photo of a dear friend and you want to draw a portrait for them.
My suggestion is that you invite them to your studio in order to take a new picture of them. Make it fun, have a drink, relax and definitely use form light. Turn the flash off. Form light will provide you with shadow shapes that you can actually use. Drawing shadow shapes accurately is the key to drawing a likeness.
Take a moment to check out the video below. It will definitely help you if you have to draw from a flat photo.
If you would like a critique of your artwork definitely consider a membership to Drawing Tutorials Online!
What is going on in your brain while drawing a portrait? Are you stressing over your pencil paper combination? Are you concerned about not being able to draw the models likeness?
Wow that sounds really familiar to me. I’ve stressed over both of those concerns many many times. Especially when I first started drawing. What works much better is thinking about several core portrait drawing techniques.
Don’t think about what is not working in your portrait drawing, instead focus on what will help you. Take a moment to watch this short video critique below.
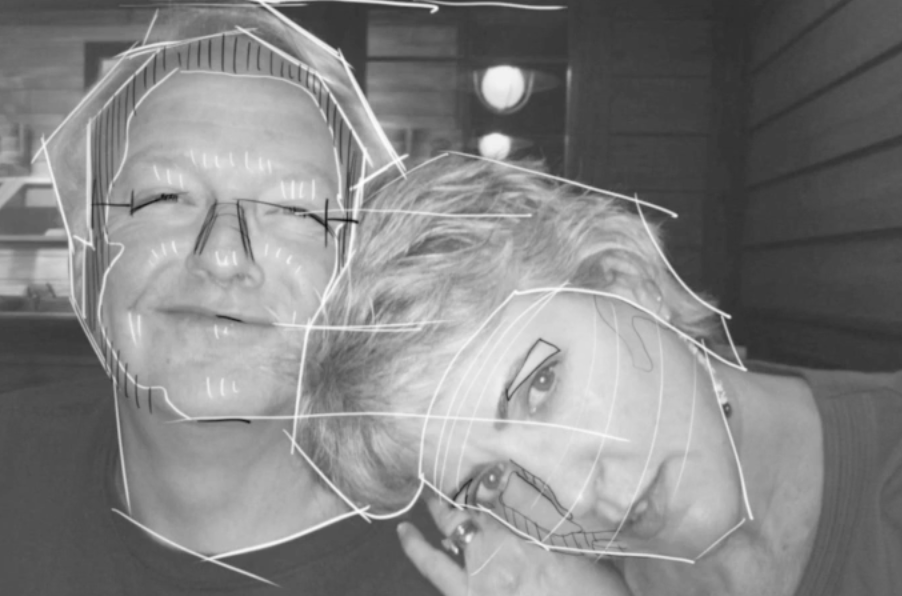
The question you should be asking yourself, where is the light coming from. Get a clear picture of the light shapes and shadow shapes. Of course when you start physically drawing you want to draw with angles and measurements. Specifically with portraits you want to focus on the negative space around the head.
Form is another element you should be thinking about. How are you going to draw a three dimensional portrait? Do you know the major landmarks of the skull?
How about your value set up? Having a clear goal for your value set up in huge when drawing a portrait.
Below is a list of several core drawing techniques you want to focus on. Write them down and keep them close by the next time you start a new portrait drawing.
Start with angles and measurements.
Be aware of the negative Space.
Be clear on the light direction.
Draw the shape of the hair versus the shape of the face.
Promote form, be clear with showing surface planes.
Shade the shadow shapes in a top to bottom solid way. Use a simple three value set up.
Stay loose working the whole drawing, don’t get stuck in one area.
Of course when it comes to teaching portrait drawing words can be clumsy. However rotating this short list of drawing techniques will help you tremendously.
If you would like to learn more about portrait drawing consider subscribing to Drawing Tutorials Online. We love drawing portraits, it is certainly our biggest department.
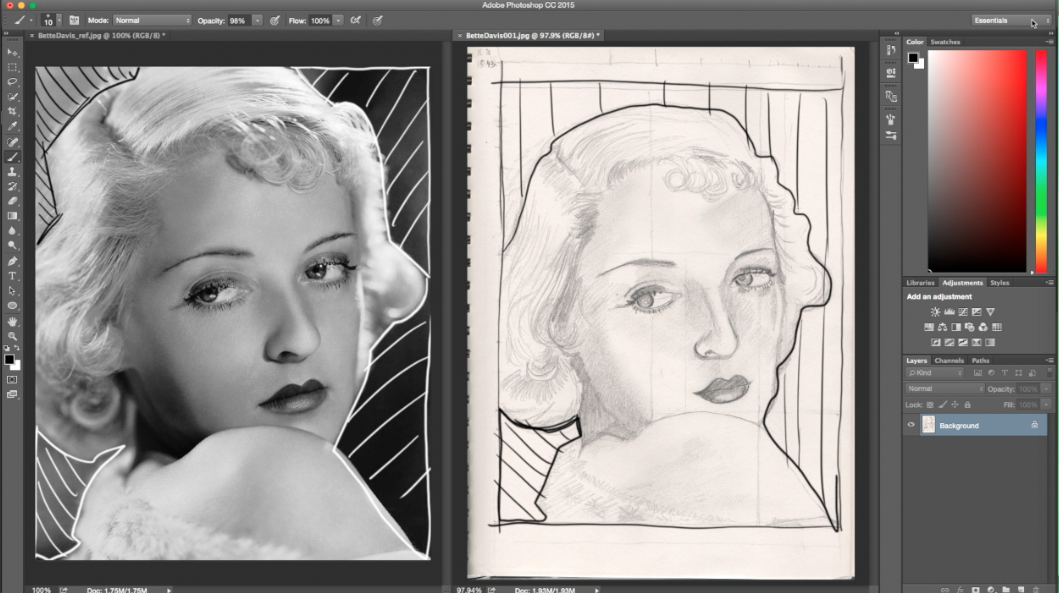
Recently a member posted up a drawing to our Group Coaching Gallery over at Drawing Tutorials Online. The question this member posed was, how do I draw a likeness of Bette Davis in under an hour?
Great question! I’m guessing you have drawn a portrait or two. I guessing you didn’t get the likeness every time. I know there have been many times that I struggled with drawing the likeness of someone too.
There is a combination of drawing techniques that you can use to help solve this problem.
The first technique, draw a boarder. Draw a boarder on your paper to the exact proportions of the boarder of your portrait reference. So if the photo reference has a boarder of 8 x 10, draw an 8 x 10 boarder on your paper. Yes use an old school ruler.
Second, place your photo reference right next to your drawing. A big mistake I see, many artists keep there photo reference far away from their drawing. Keep it super close.
Third, draw the abstract negative shapes that surround the head and shoulders. If these abstract negative shapes are not correct, you guessed it, no bueno. You will never get the likeness of someone’s portrait if you do not draw these negative shapes correctly first.
Fourth technique, draw angles or use a continuous line to separate the hair from the face. Just being conscious of drawing the shape of the hair verses the shape of the face is half of the battle.
Fifth, definitely start to draw in the shadow shapes of both the hair and face. Put some tone in. Don’t make the mistake of just drawing with line alone.
In terms of the features, it totally depends on the type of light. Was the portrait reference taken in form light, rim light or front light? Each one of these light sources requires a different skill set to get the likeness.
So the next time your want to draw Bette Davis or the girl next door start with a boarder.
This techniques works. It has helped many of my coaching students. It has taken the mystery out of how to draw a likeness when drawing a portrait.
Did you need help with learning how to draw a better portrait? We have dozen’s of portrait drawing tutorials within our member area at Drawing Tutorials Online. Those tutorials combined with weekly coaching will help you improve with speed and confidence.