How To Draw The Structure Of The Eye

How To Draw The Structure Of The Eye

In this screencast portrait drawing lesson I share with you how I think about the structure of the eye. Thinking about the structure of the eye is completely different than using angles, shapes and tone to map out an eye on paper.

The key element to keep in mind when drawing an eye is that you are simply drawing a sphere. You are not drawing an eye, you are drawing a sphere. That sphere has lot’s of distractions, eye lashes and highlights. However if you can wrap your mind around the light that hits that sphere this will help you.

Too many artists cling onto the eye lashes like they are gospel. Worse yet many artists outline the eye with linear looking lashes. It’s super important that you approach drawing the eye from the standpoint of, what type of light source is hitting the sphere of the eye.

Most of the time light is coming from above. This simple fact will help you to see that the lower lid is in shadow and the upper lid is catching light. Stay away from using sharp outlines when drawing the eye. Definitely break your line on the lower eyelid. 

I can go on forever in this post, but I think I’ll let the video tutorial do the talking.


If you are interested in learning more consider a membership to Drawing Tutorials Online. You will gain access to every lesson in the course, plus be able to download the PDF that compliments this portrait drawing course immediately.

Thanks so much for taking the time to watch.


Lin’s Sketchbook

Lin’s Sketchbook

Gosh I’m really not even sure where to start with this blog post. Lin was a student enrolled in my drawing class last year at the School of Visual Arts. I guess I can start with the fact that Lin was the heart of the class. She really is the nicest person ever. Lin is the hardest working student truly devoted to improving everyday.

The cool story about Lin was that she started watching student sketchbook videos years ago when she was in Junior High. The student sketchbook videos were what inspired her to attend the School of Visual Arts.

When she arrived in class and told me her story I was blown away. Lin was pretty much the first to arrive each week which was great because we developed a friendship very early on. I really enjoyed talking with Lin about her home state of North Carolina. A place I would really like to move to in all honesty.

I must say Lin is voted most improved student no doubt. Lin arrived to class with a solid base of skill. Her skillset really took off in the Spring semester after a few frustrating classes. It was great to see Lin fight through the plateau’s every artist has to confront from time to time.

Lin continues to visit my class letting me know the scoop of what’s going on at SVA which I love. I also love to see her progression with her latest sketchbooks!


Check out Lin’s Instagram. Thanks again Lin for sharing your sketchbook.


Shea Portrait – Shading In The Hair

Shea Portrait – Shading In The Hair

This may not be my most exciting lesson, however it is an important one. Sometimes drawing a realistic portrait takes time. In this short three minute YouTube world that we live in it’s easy to loose sight of the fact that quality takes time.

Now every artist obviously is different. Every artist has their own personal style. For my portrait drawings I really do enjoy spending long hours working on blocking in the tone.

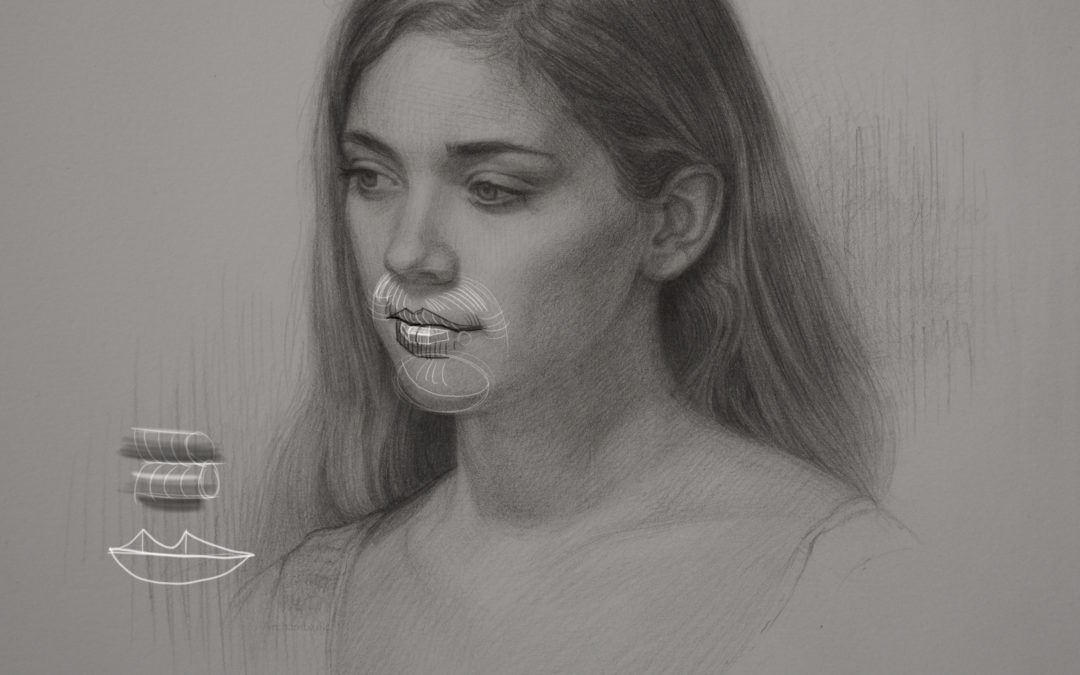
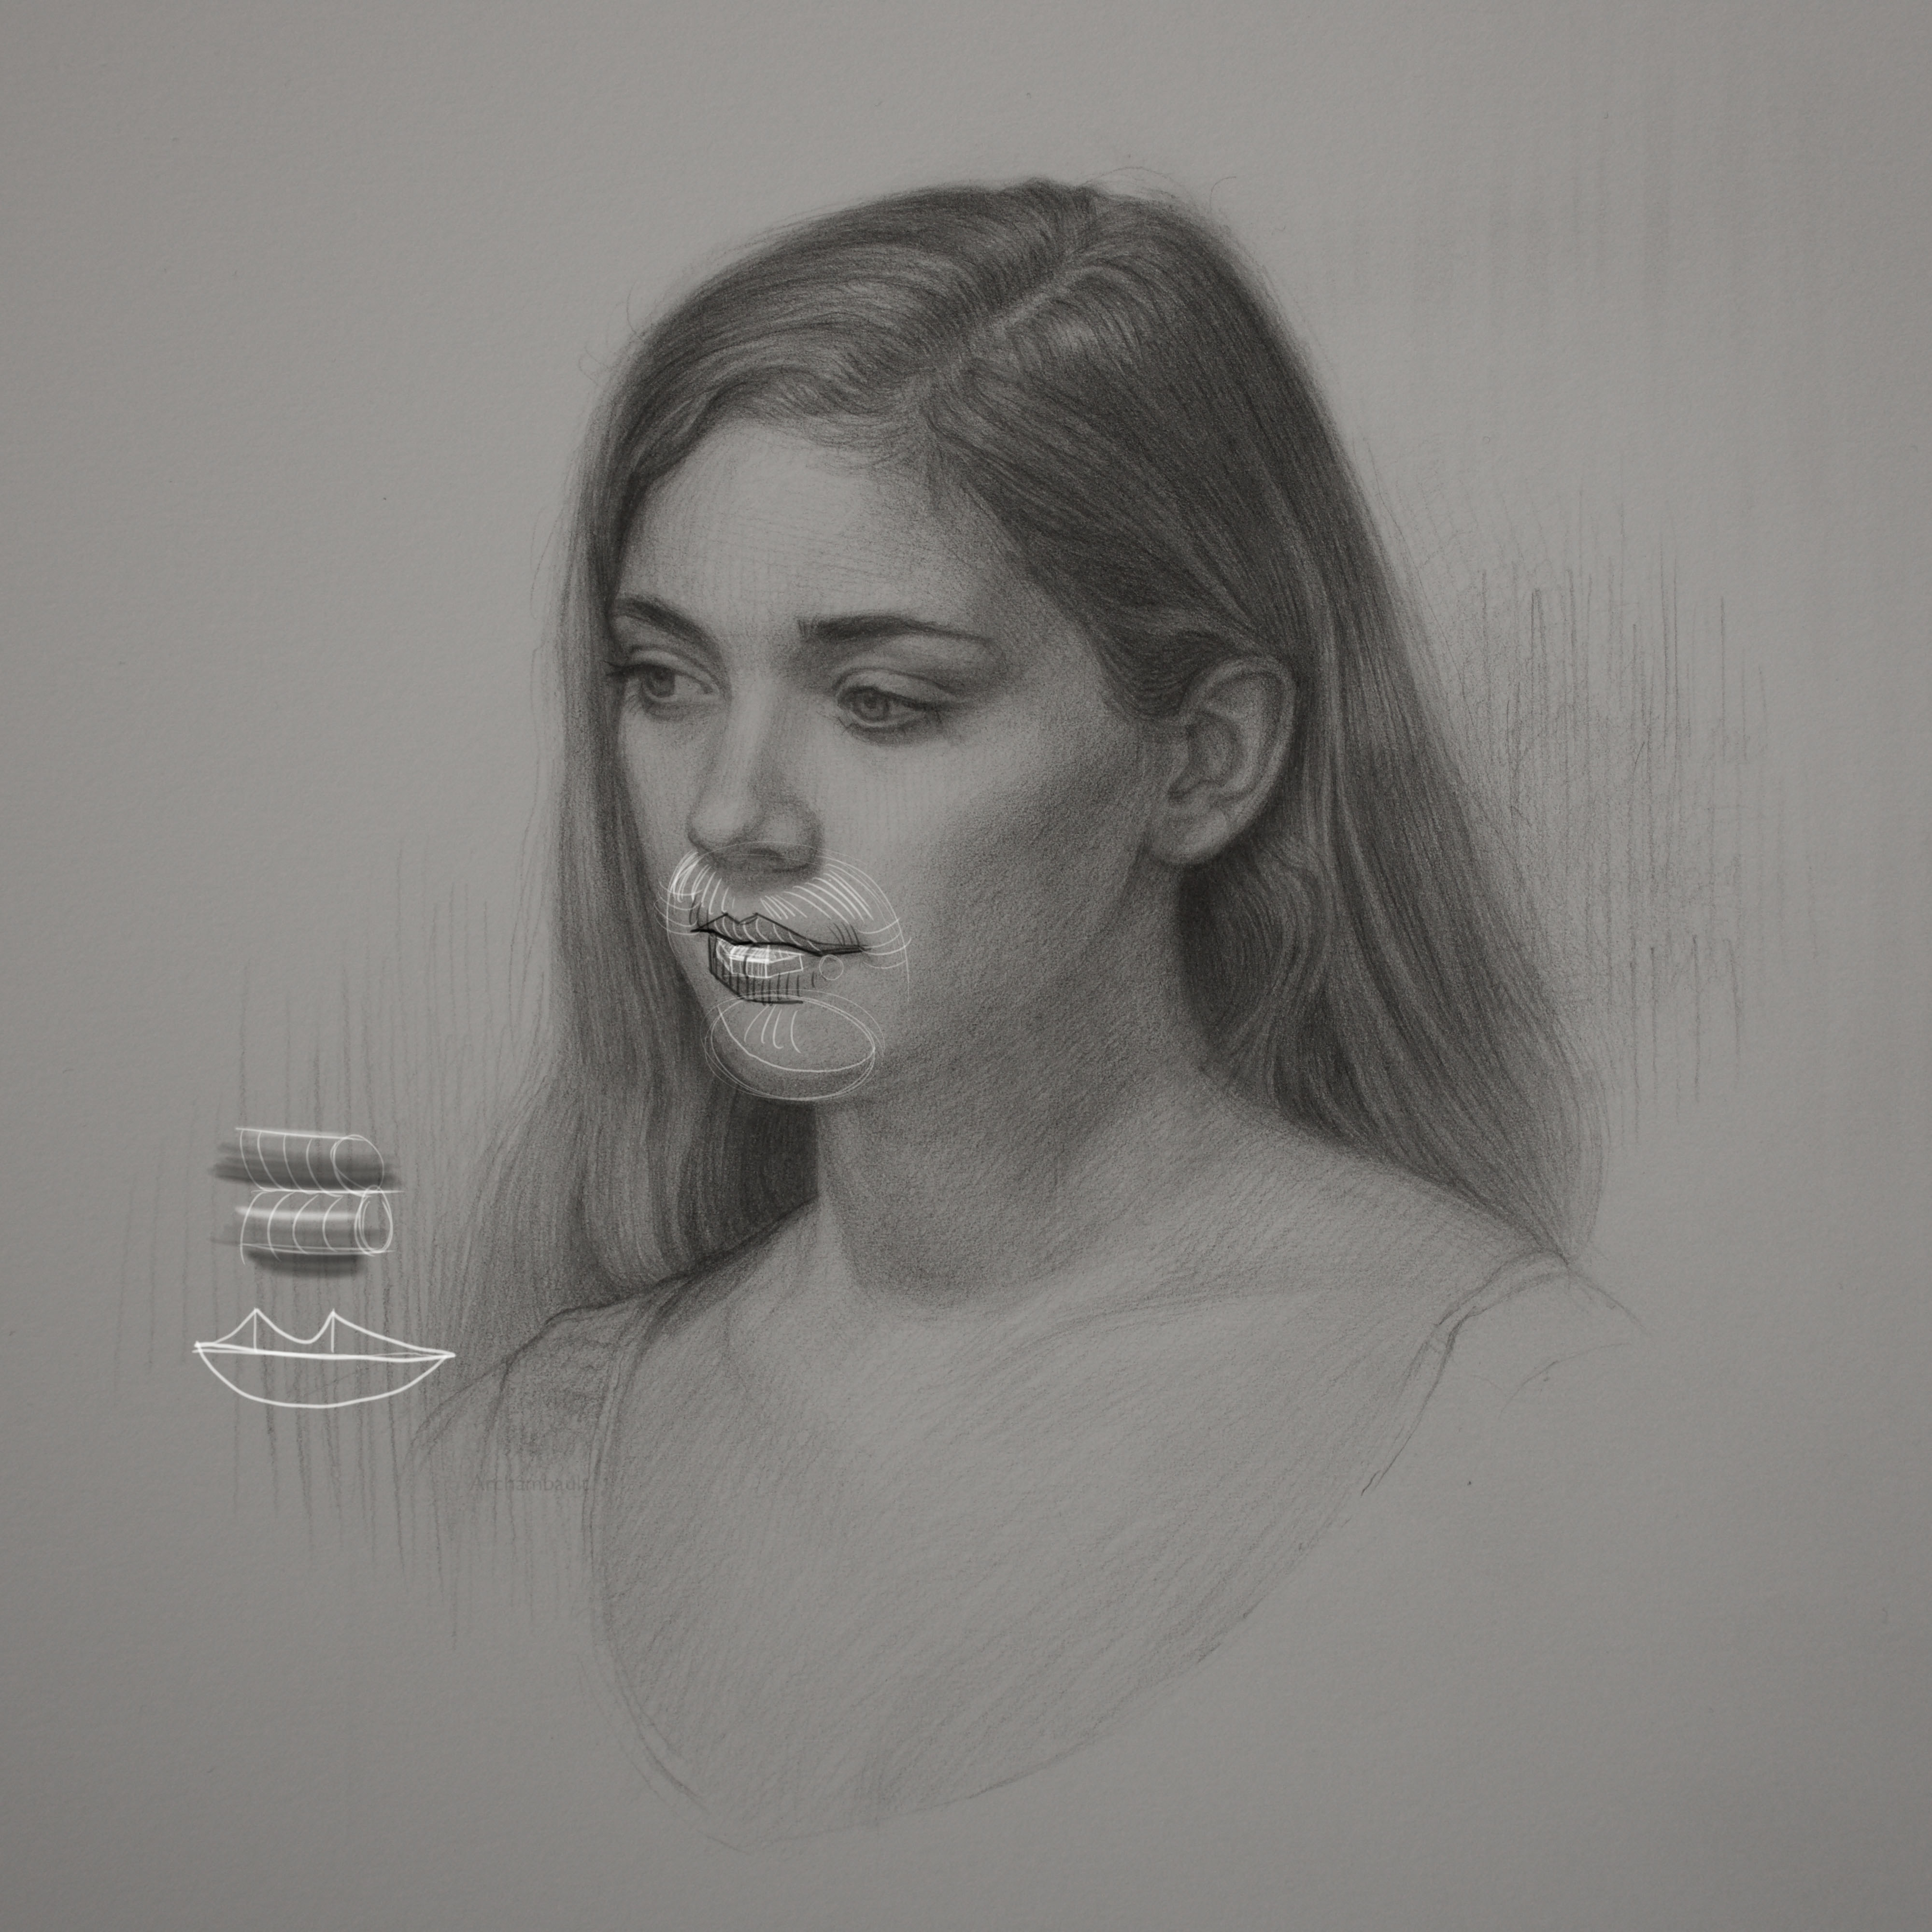
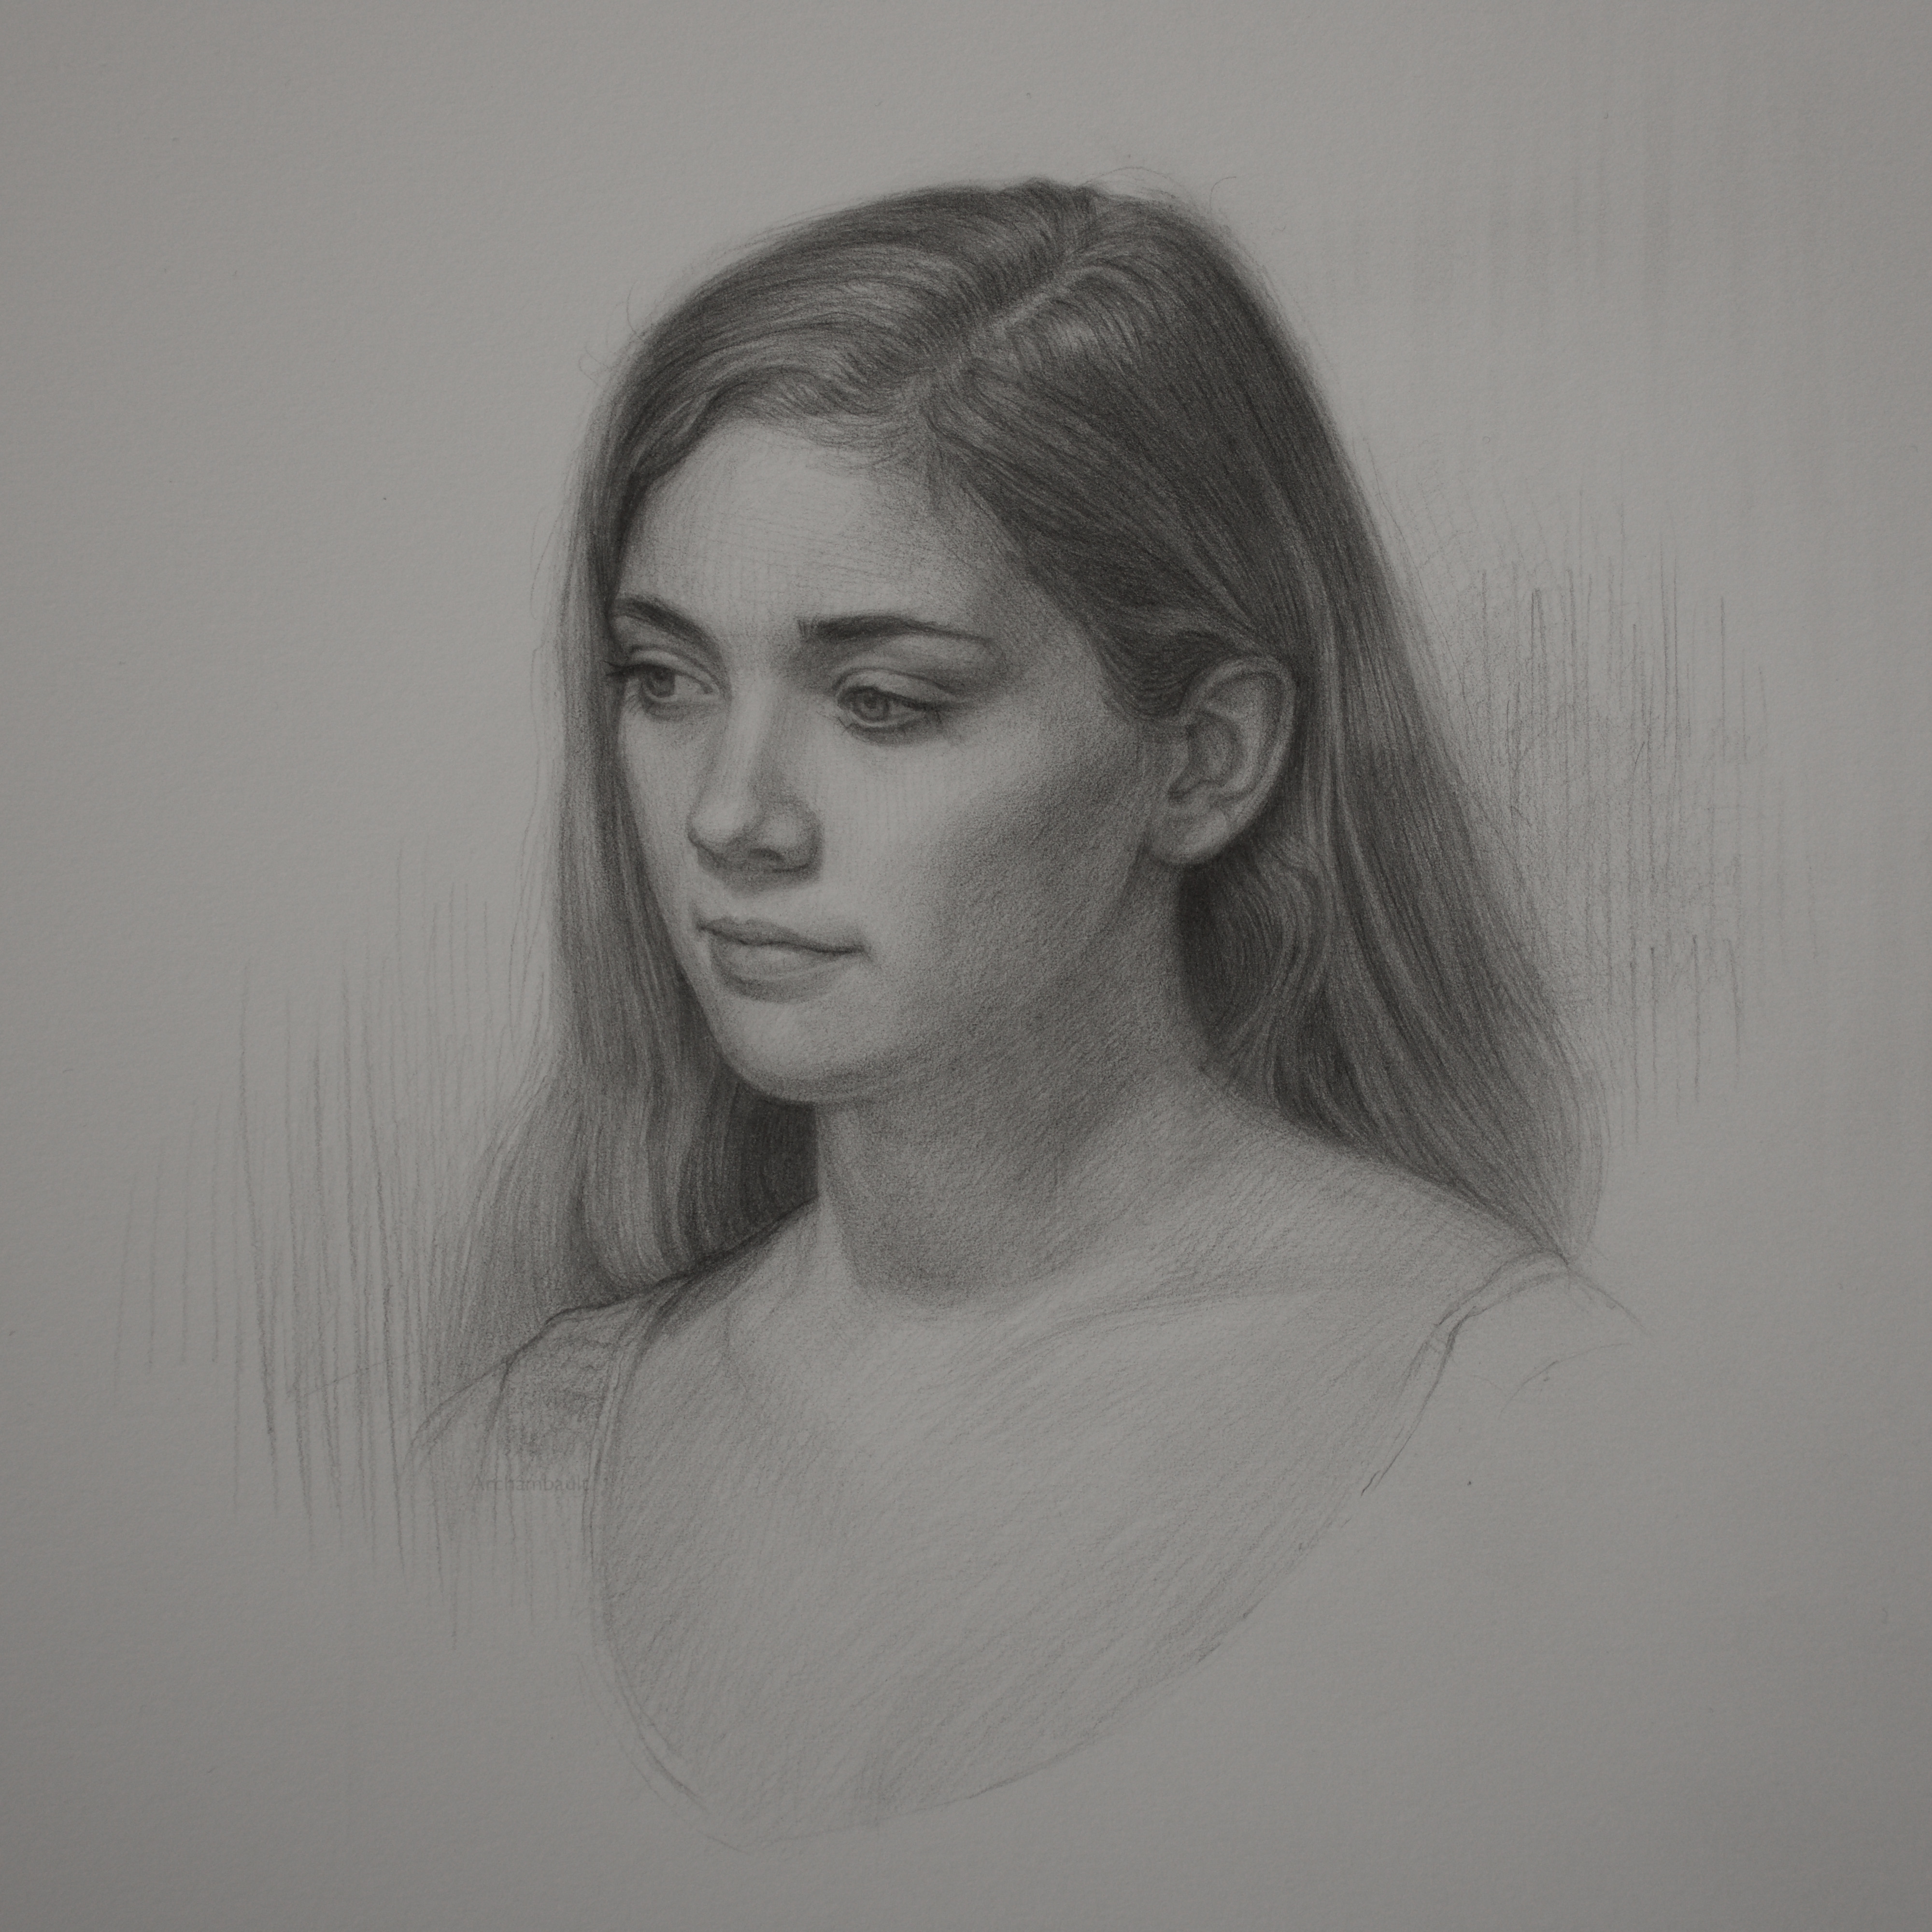
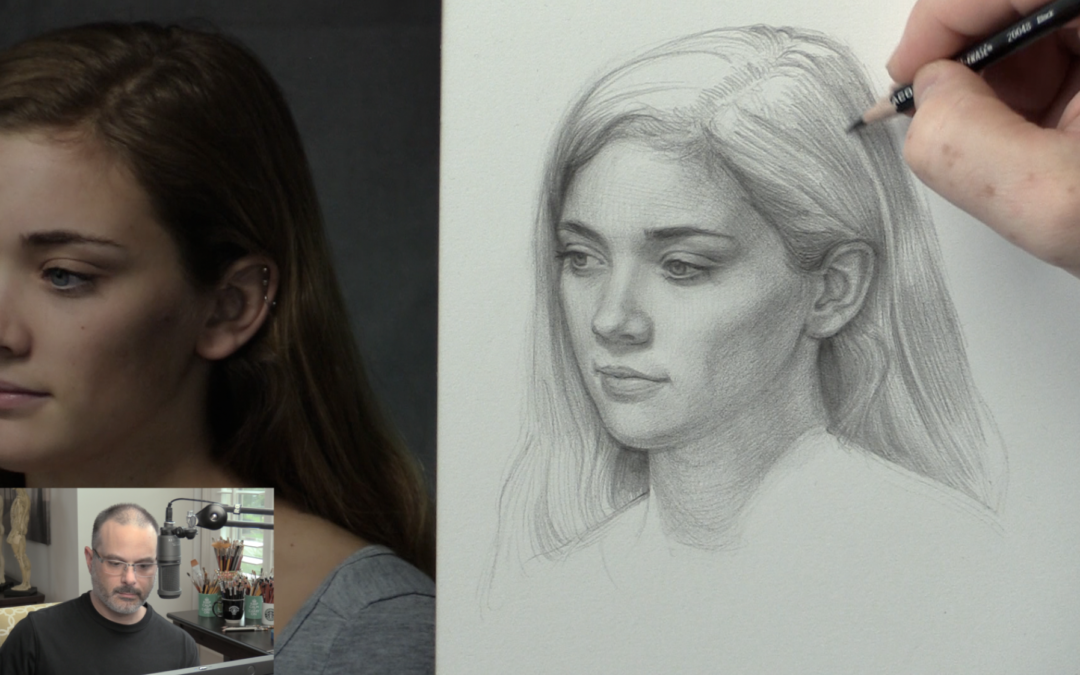
In this particular video tutorial I’m sharing with you how I start blocking in the soft tone of the hair on the shadow side of the head. When drawing hair it’s important to build up your middle tones first before diving into pressing down super hard on your pencil.

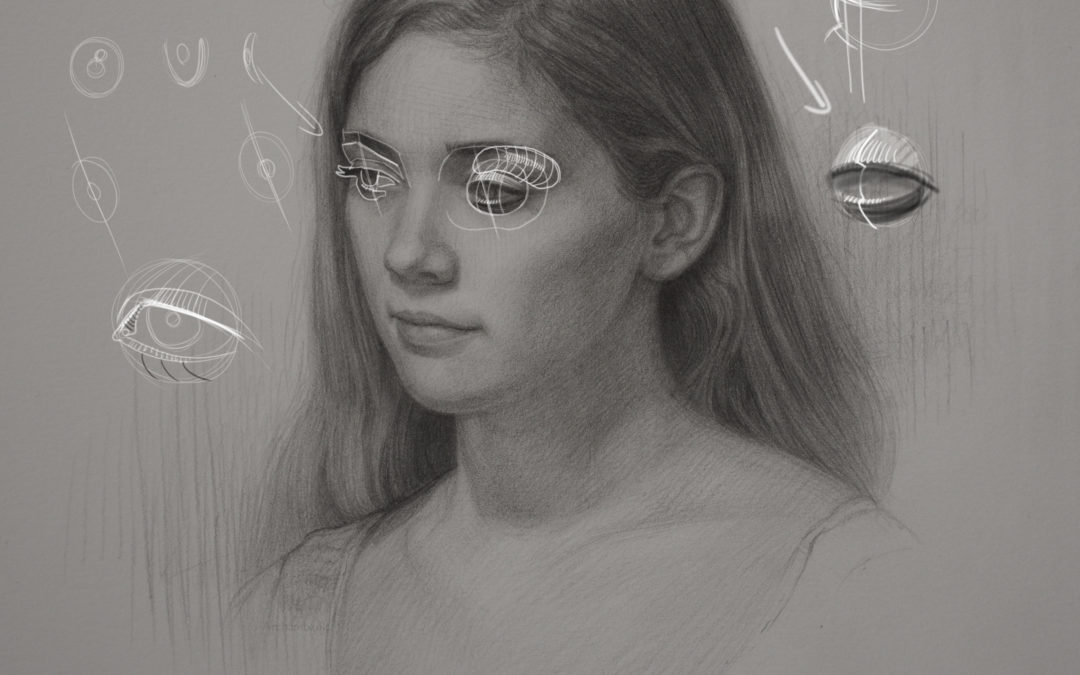
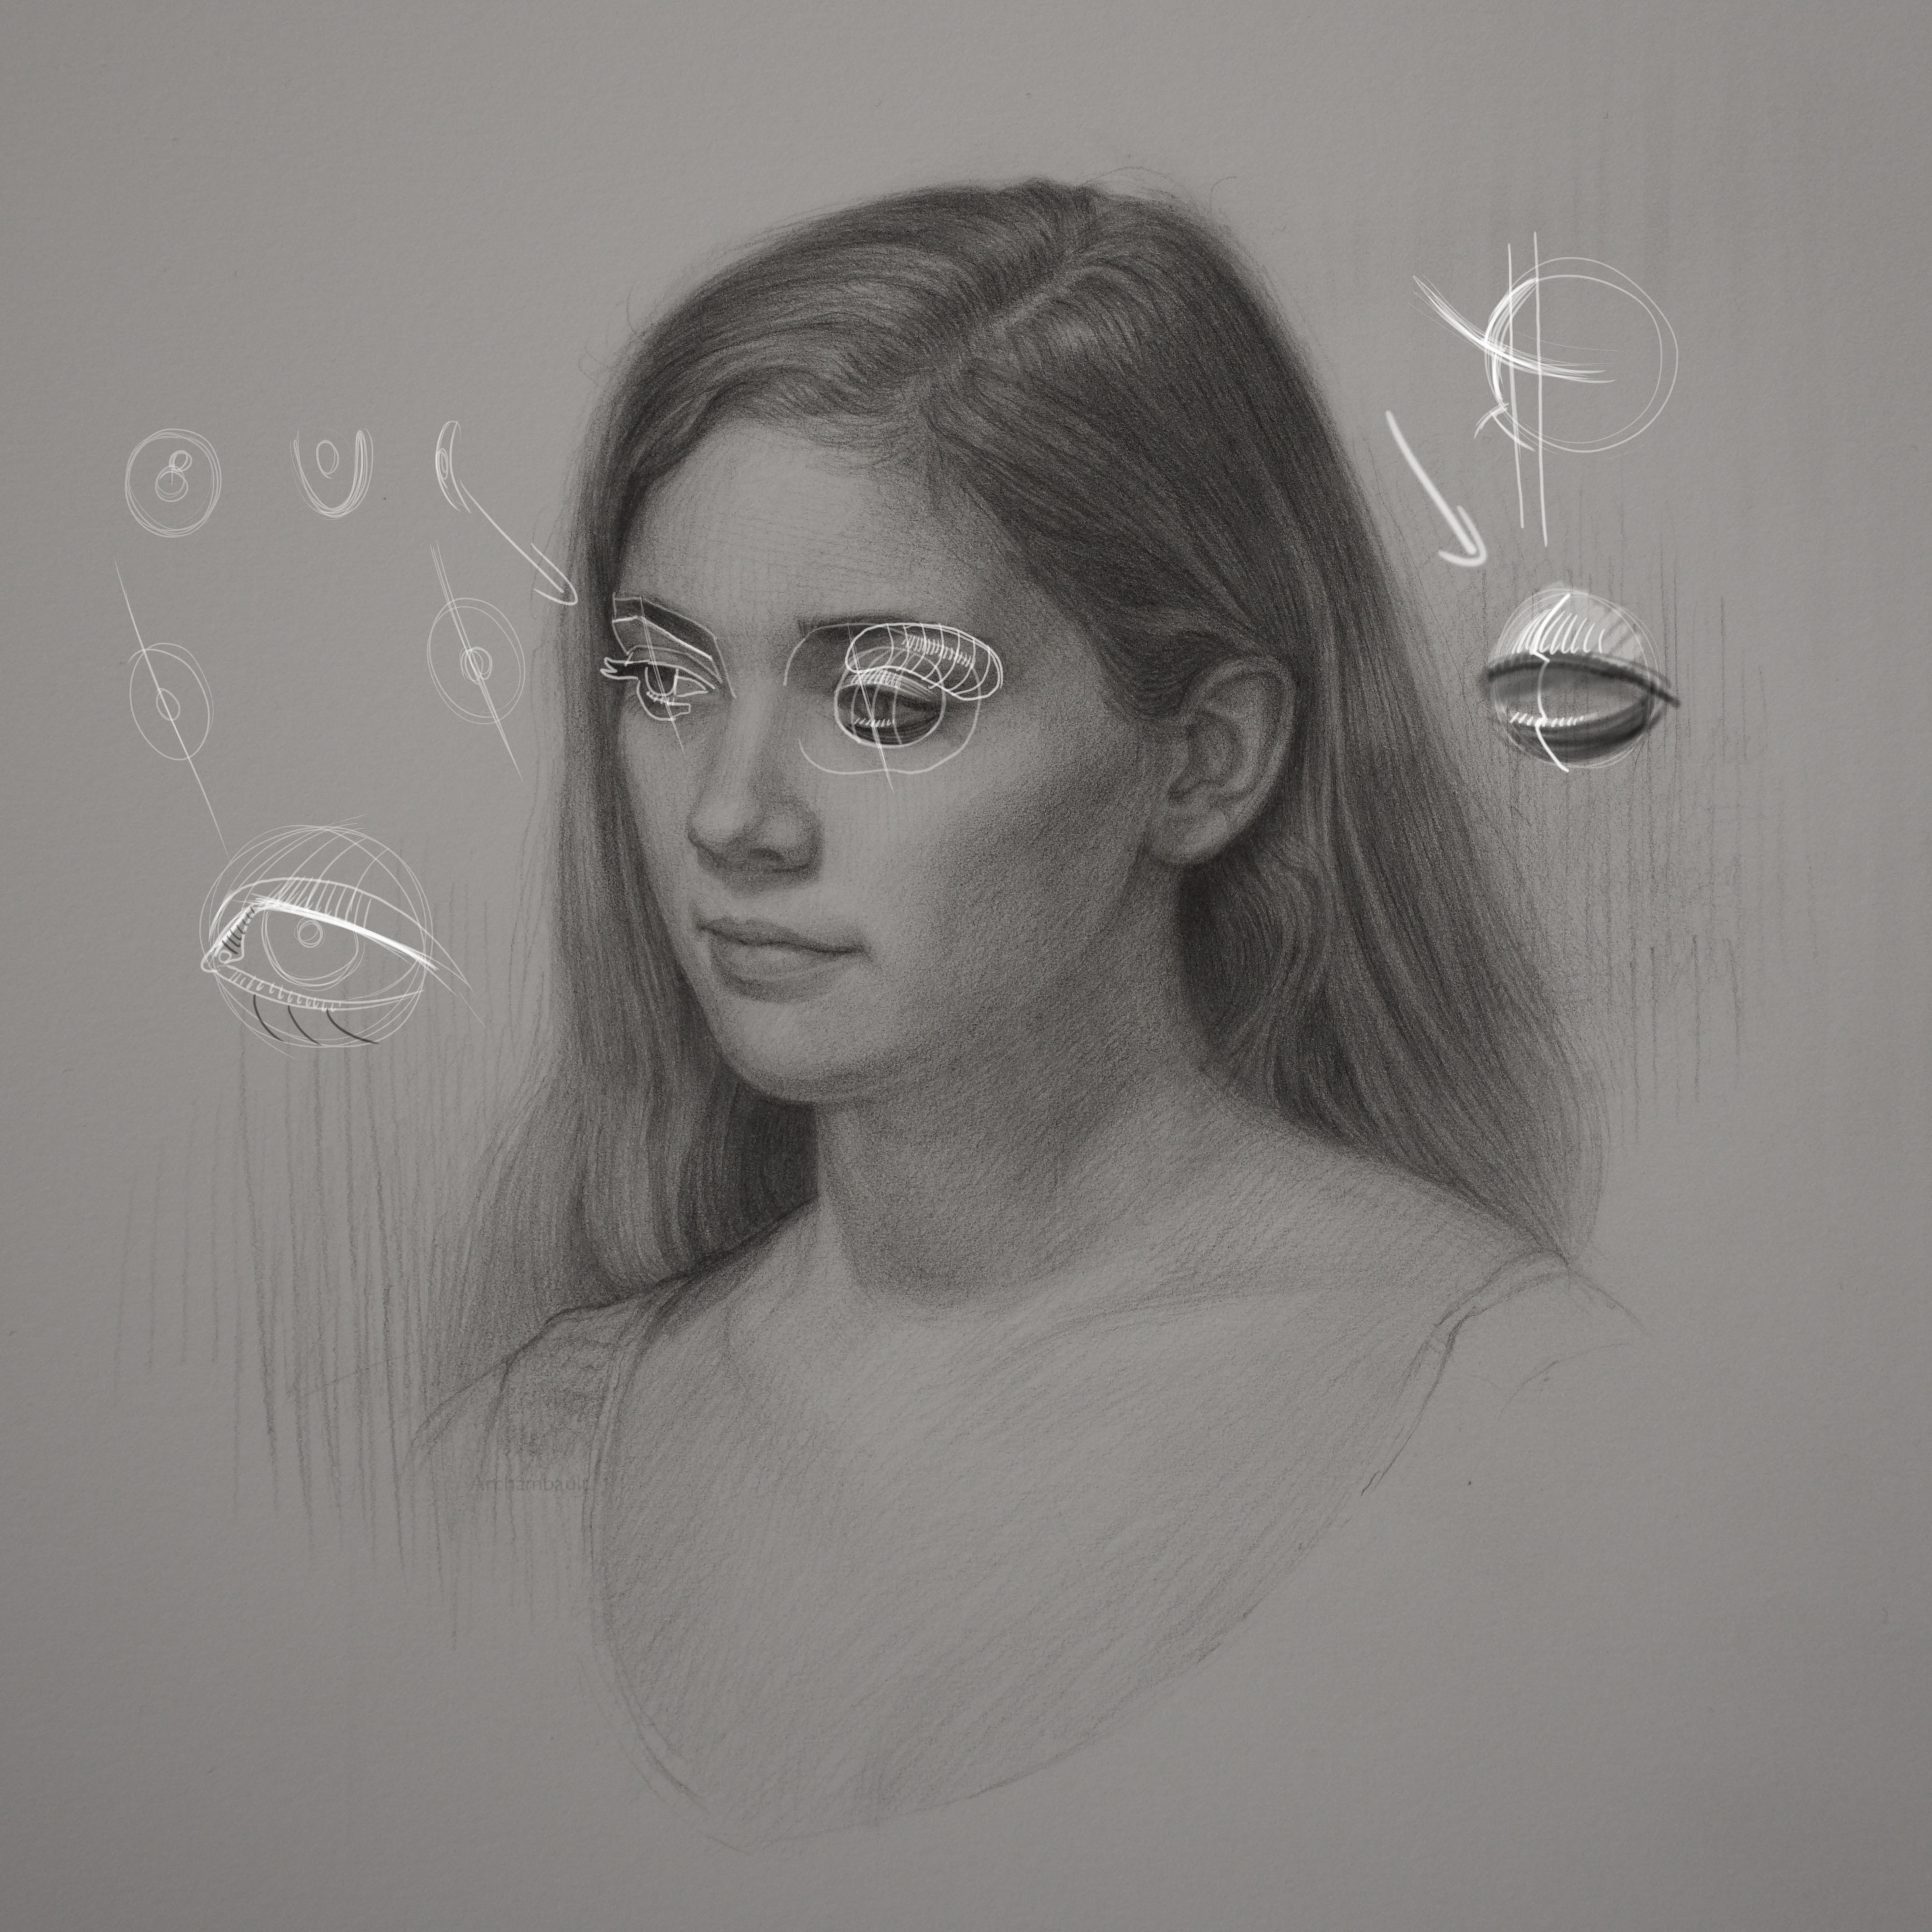
The key takeaways from this portrait drawing lesson, hair is soft, draw it in a soft way. If hair is long, use long pencil strokes. Hair is made up of many cylindrical shapes, think of how the light is hitting those cylinders.

It’s so very important to be clear on your personal style of portrait drawing. You might decide that you really don’t want to draw every strand of hair. You might want to leave some areas of the hair void of detail. Remember, make it fun and keep it original.

If you got something from this very quiet video please leave a comment below.


Improve your portrait drawing skills to today with a membership to Drawing Tutorials Online. Select from a monthly or annual plan, cancel anytime.


Portrait Drawing – Lesson Five

Portrait Drawing – Lesson Five

Okay lesson five, this video will show you the importance of solid shapes. It seems so simplistic, shading in a solid way. However I cannot stress the importance of being able to squint and see shapes, then shading them their appropriate value.

I have critiques literally thousands of portrait drawing in the member gallery at Drawing Tutorials Online. The biggest struggle many artists have is having no shapes within their portrait drawing. If they have shapes they are soft and fuzzy without the proper value.

I absolutely love to draw with both line and shape. However likeness really comes with shape when it comes to drawing with both line and tone.

In your daily practice continue to shade shapes in a solid way. Sometimes what we think is complicated is actually pretty simple. It’s all about drawing accurate and shapes and shading them with the correct value.>/p>


Thanks so much for watching!


Portrait Drawing – Lesson Three

Portrait Drawing – Lesson Three

In this lesson three I share with you the importance of adding shapes within shapes and refining edges.

One you have established some basic shapes it’s then time to add smaller shapes within the big shapes. For instance once you have drawn the eye socket shape it’s time to place the eye within the eye socket shape.

You will want to see the eye not as an eye but as a series of shapes. For instance the white of the eye is a triangle. The iris is a rectangular shape etc.

Work on refining the edges of each shape. It’s the edge of each shape that will enable you to get a likeness

I see too many artists ignore the quality of the edges in their drawings. Trust me I know, I was one of those artists. I used to have way too many inconsistencies in my edge quality. In this particular portrait drawing the model’s profile edge is a major component in achieving a likeness. Draw the edges correctly and you will most certainly achieve likeness.


I want to thank you for taking the time for watching the portrait drawing tutorial above. I will be creating many new portrait drawing courses this Fall. If that sounds interesting to you definitely take a moment to check out Drawing Tutorials Online.

Now get out there and draw something that you love.