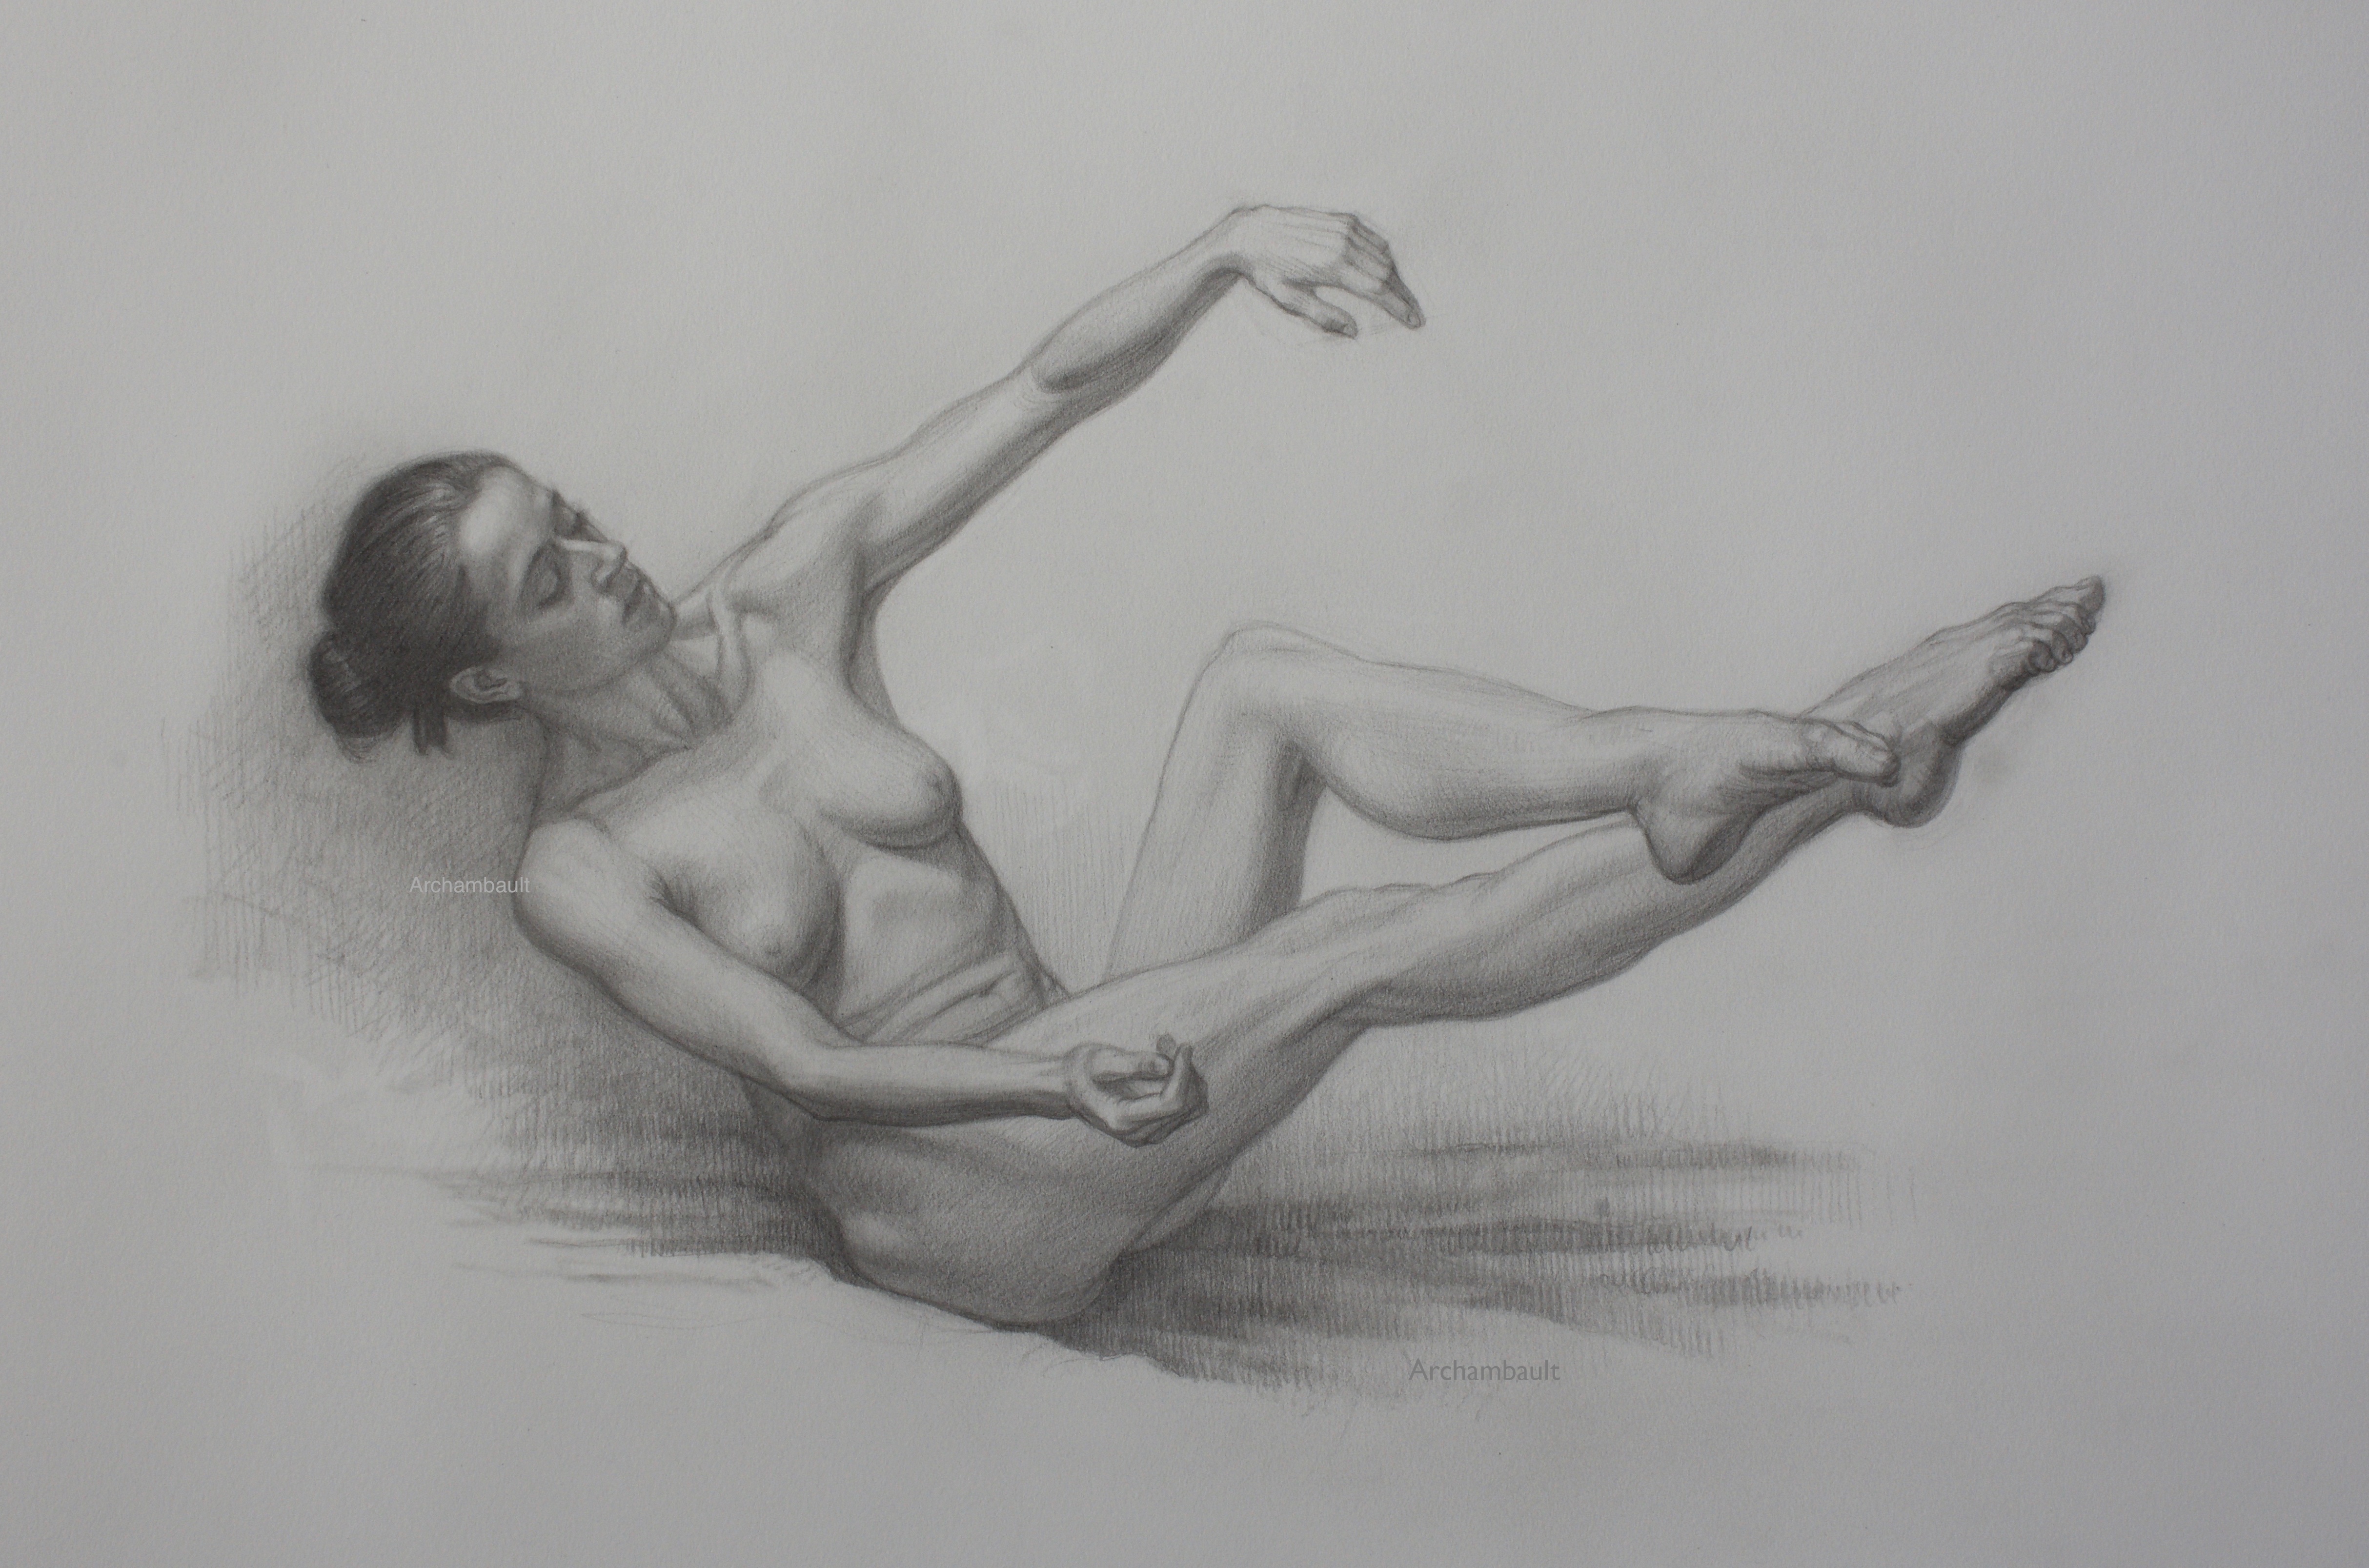
Fitting The Head Onto The Body
In this very short figure drawing lesson I’d like to share with you how I begin to fit the head onto the shoulders. The two key words are short and begin.
In case you have not noticed I am a big believer in repetition in the mother of skill. I tend to teach the same things over and over again because they work for me. I have also seen these techniques work in the classroom on a weekly basis.
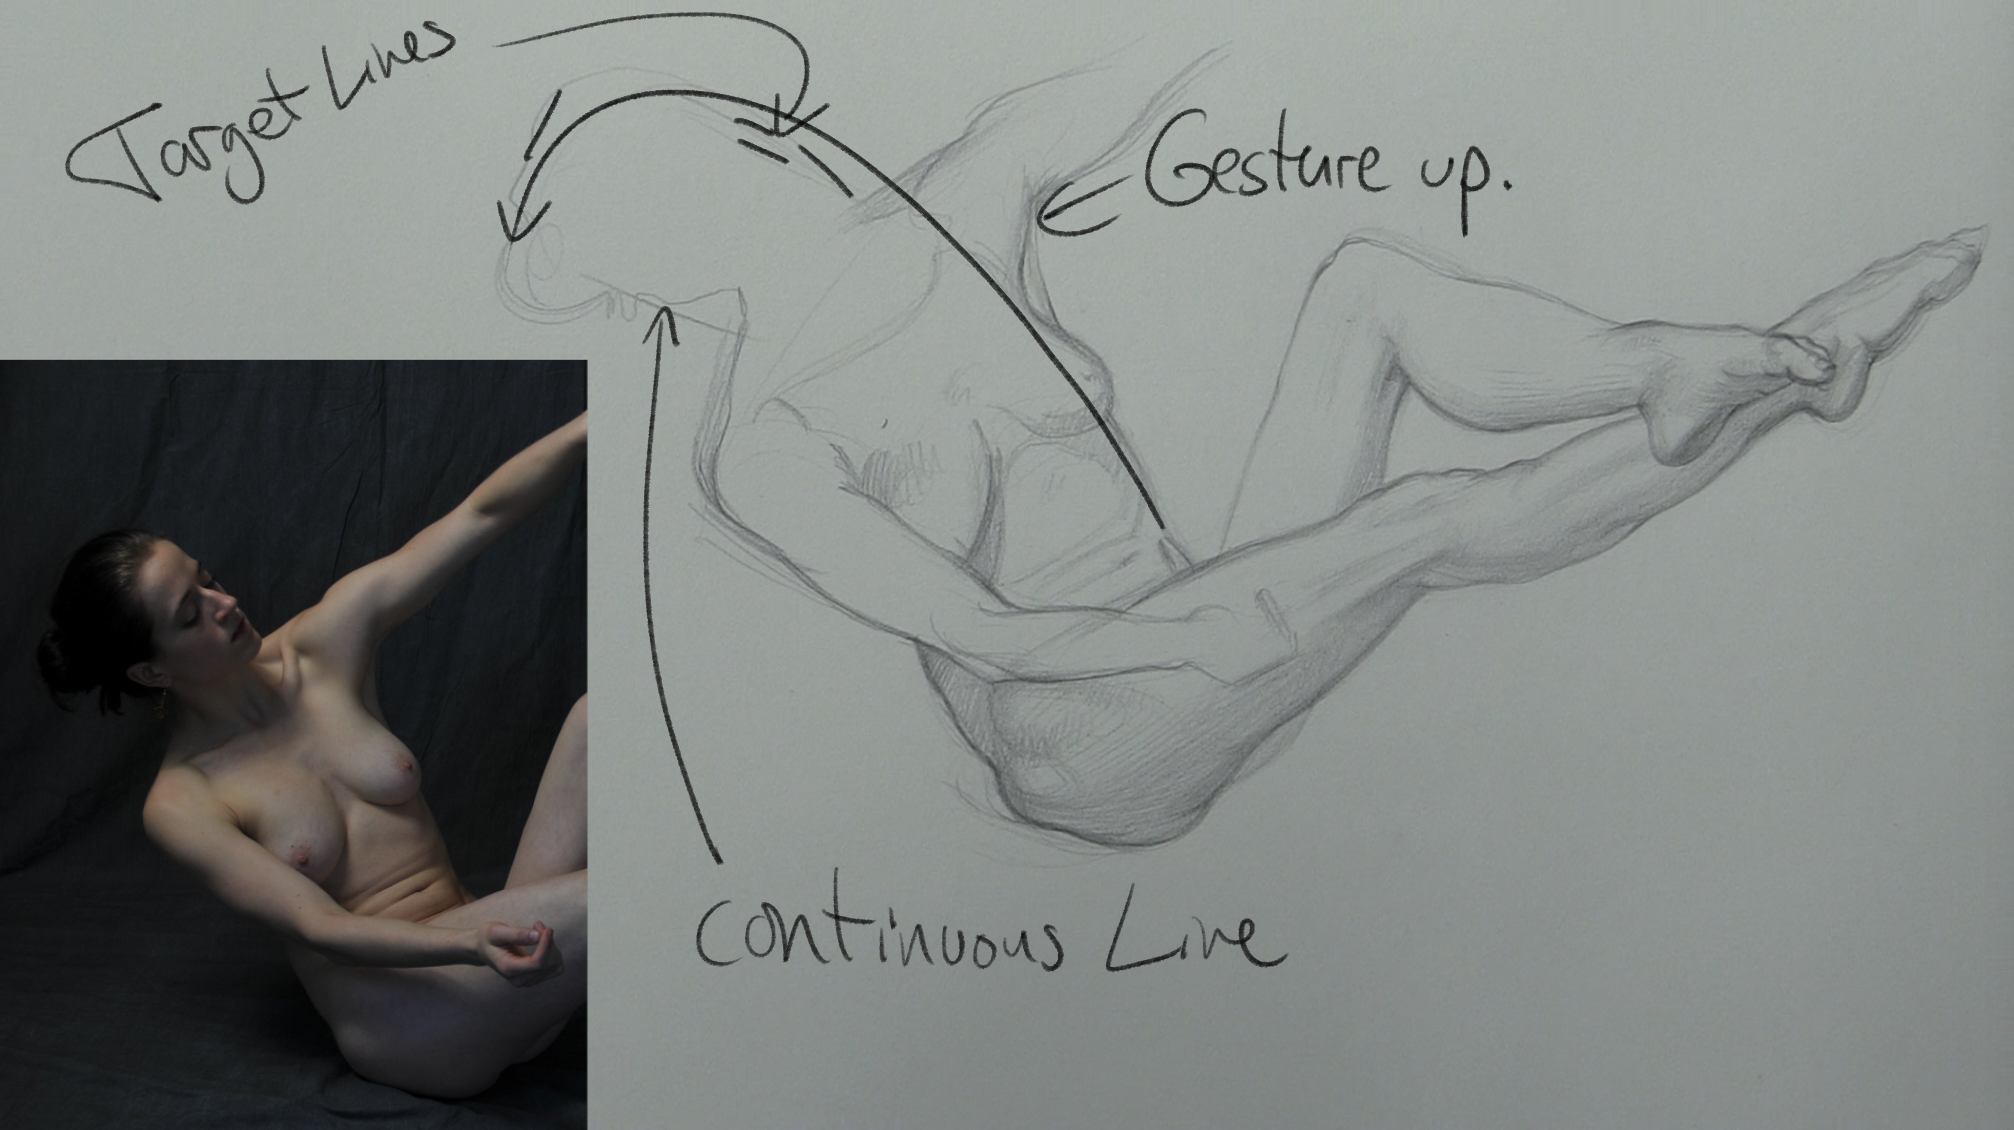
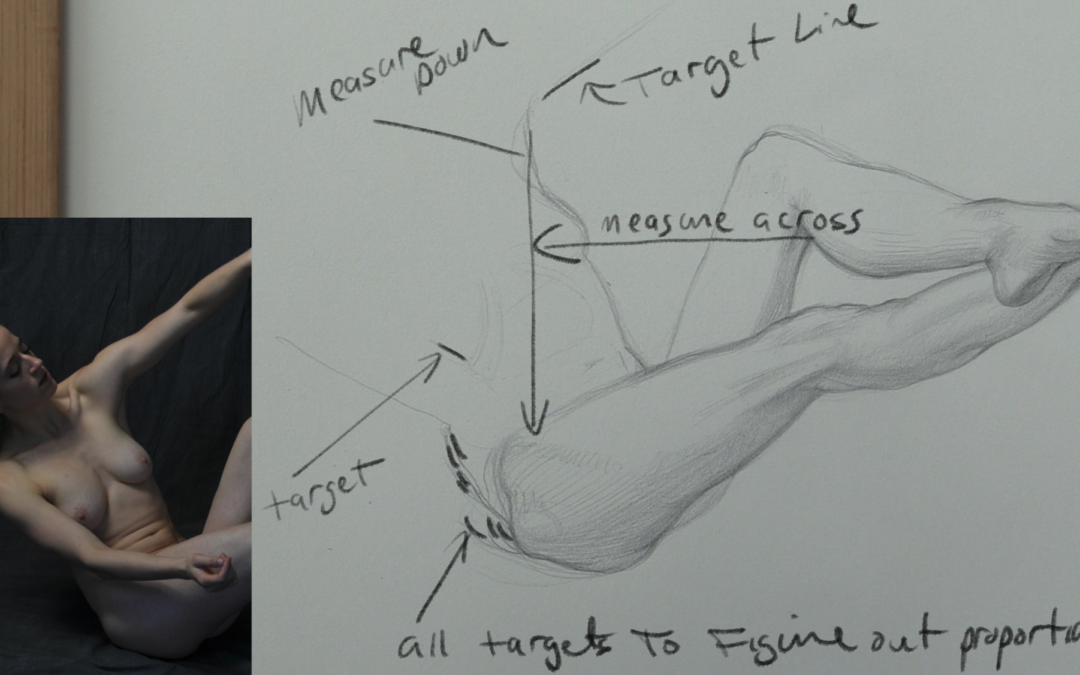
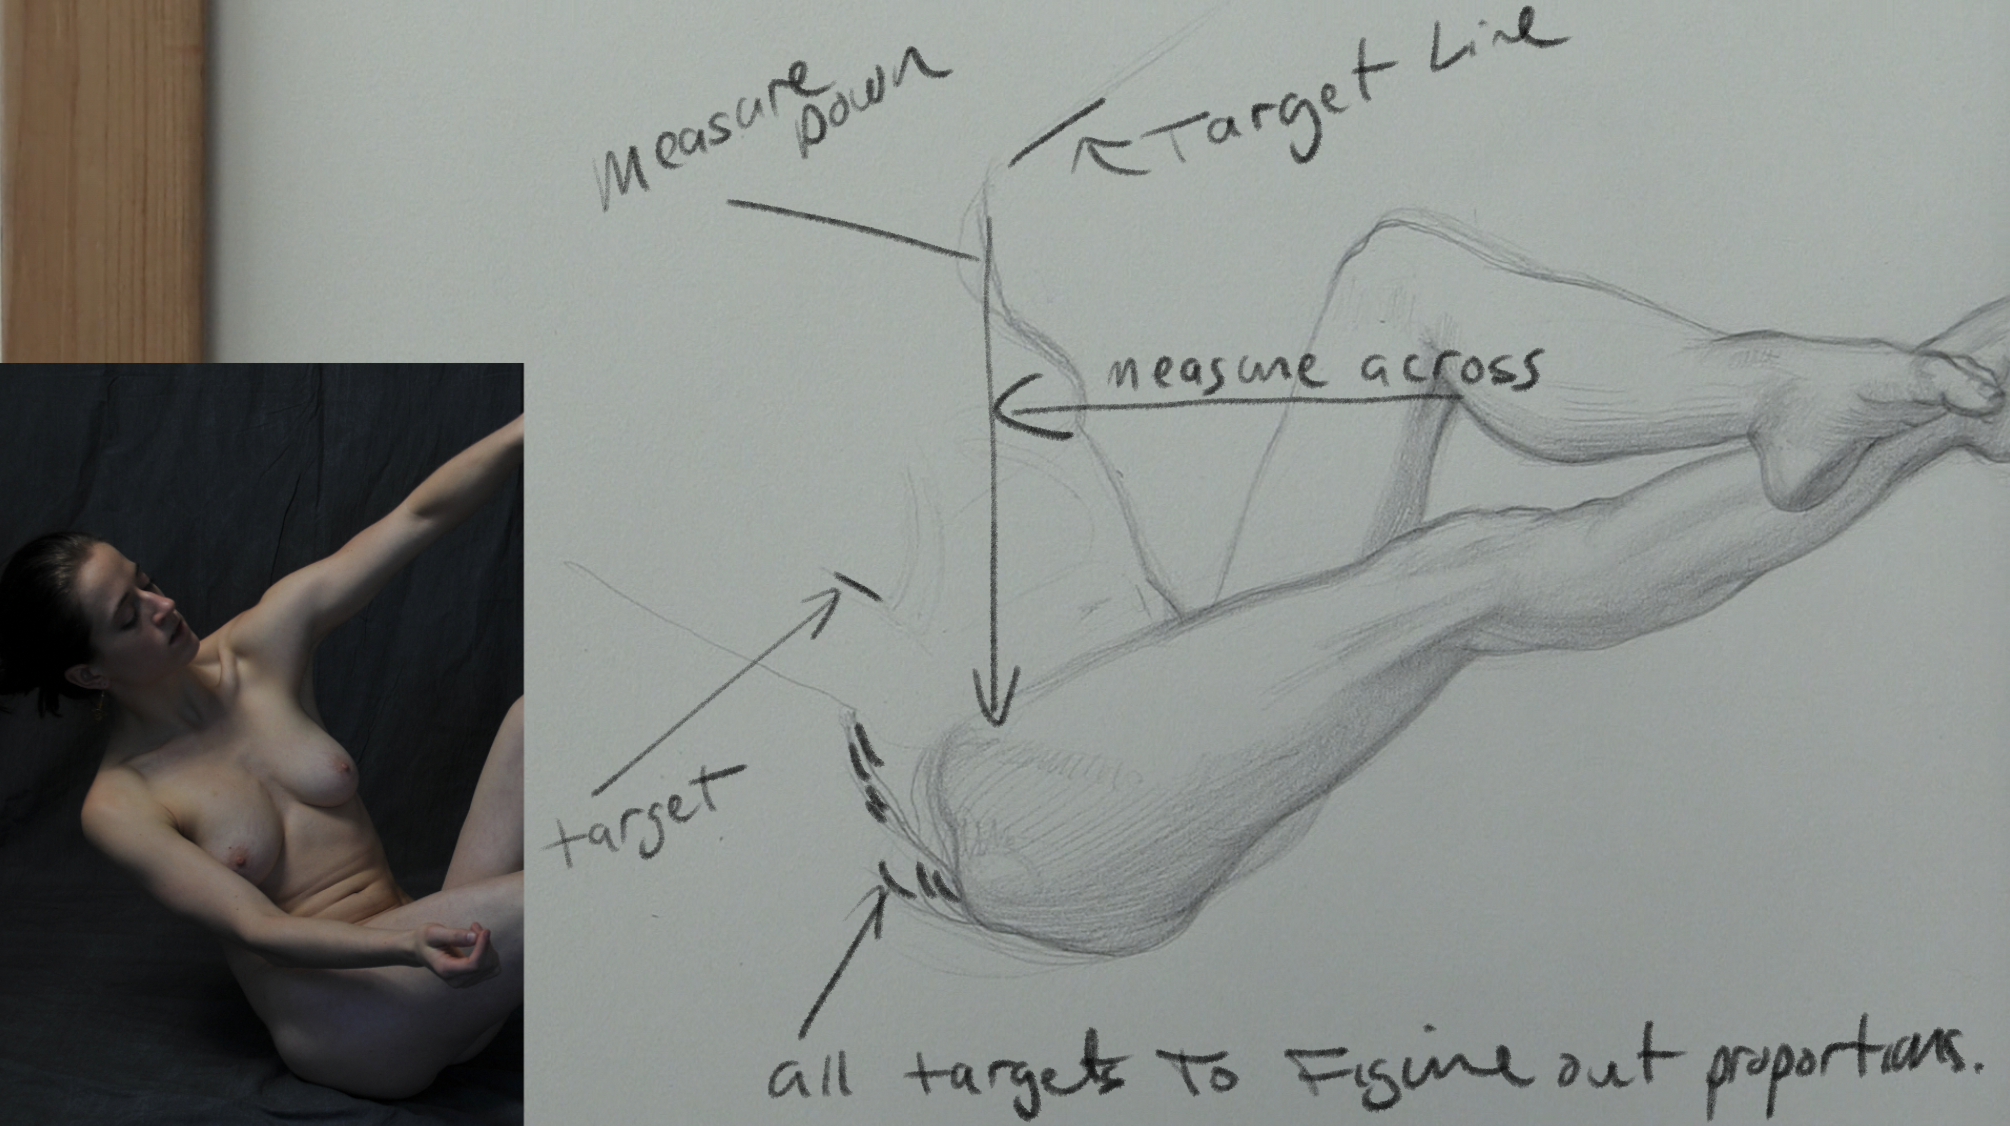
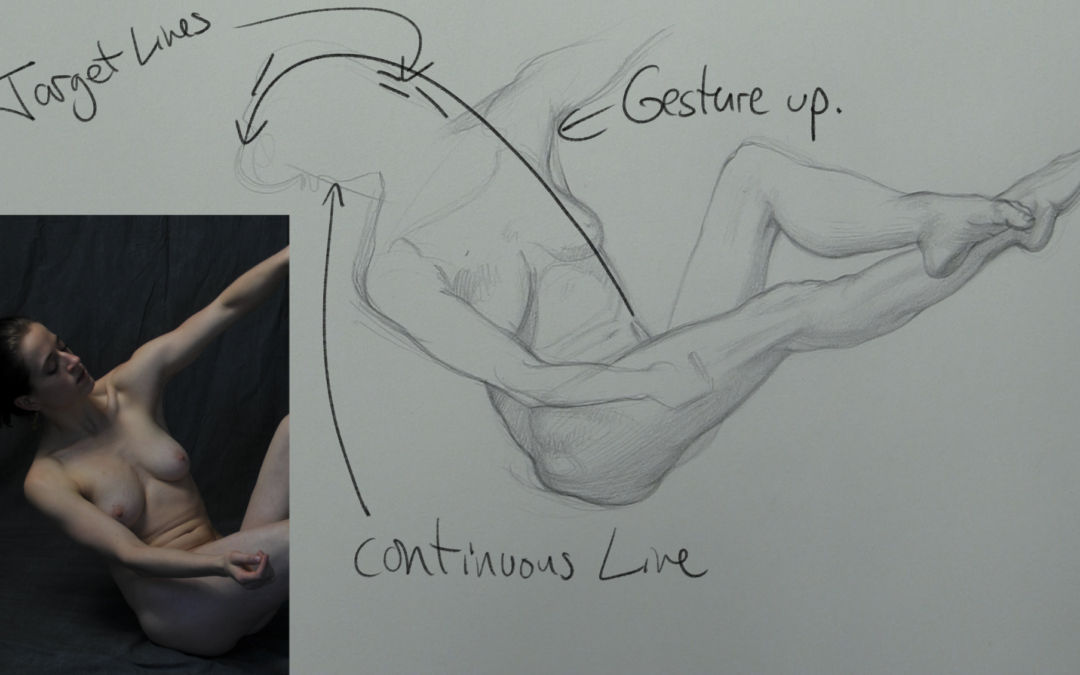
The main crux is to use targets to start fitting the head onto the shoulders. There are few other little techniques you can incorporate into the mix.
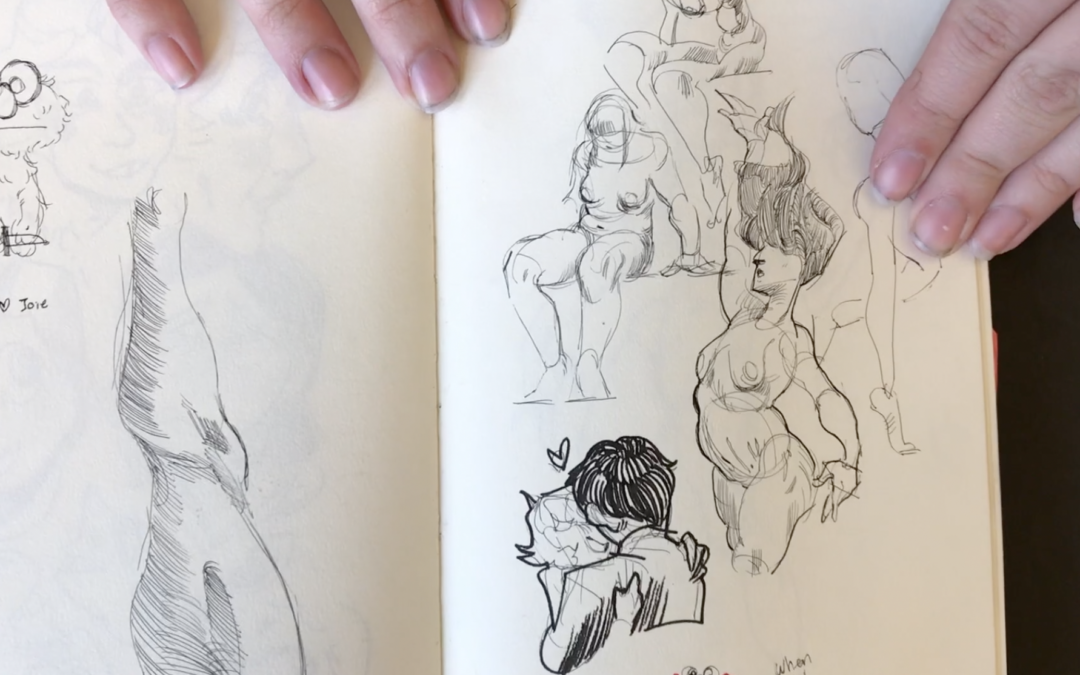
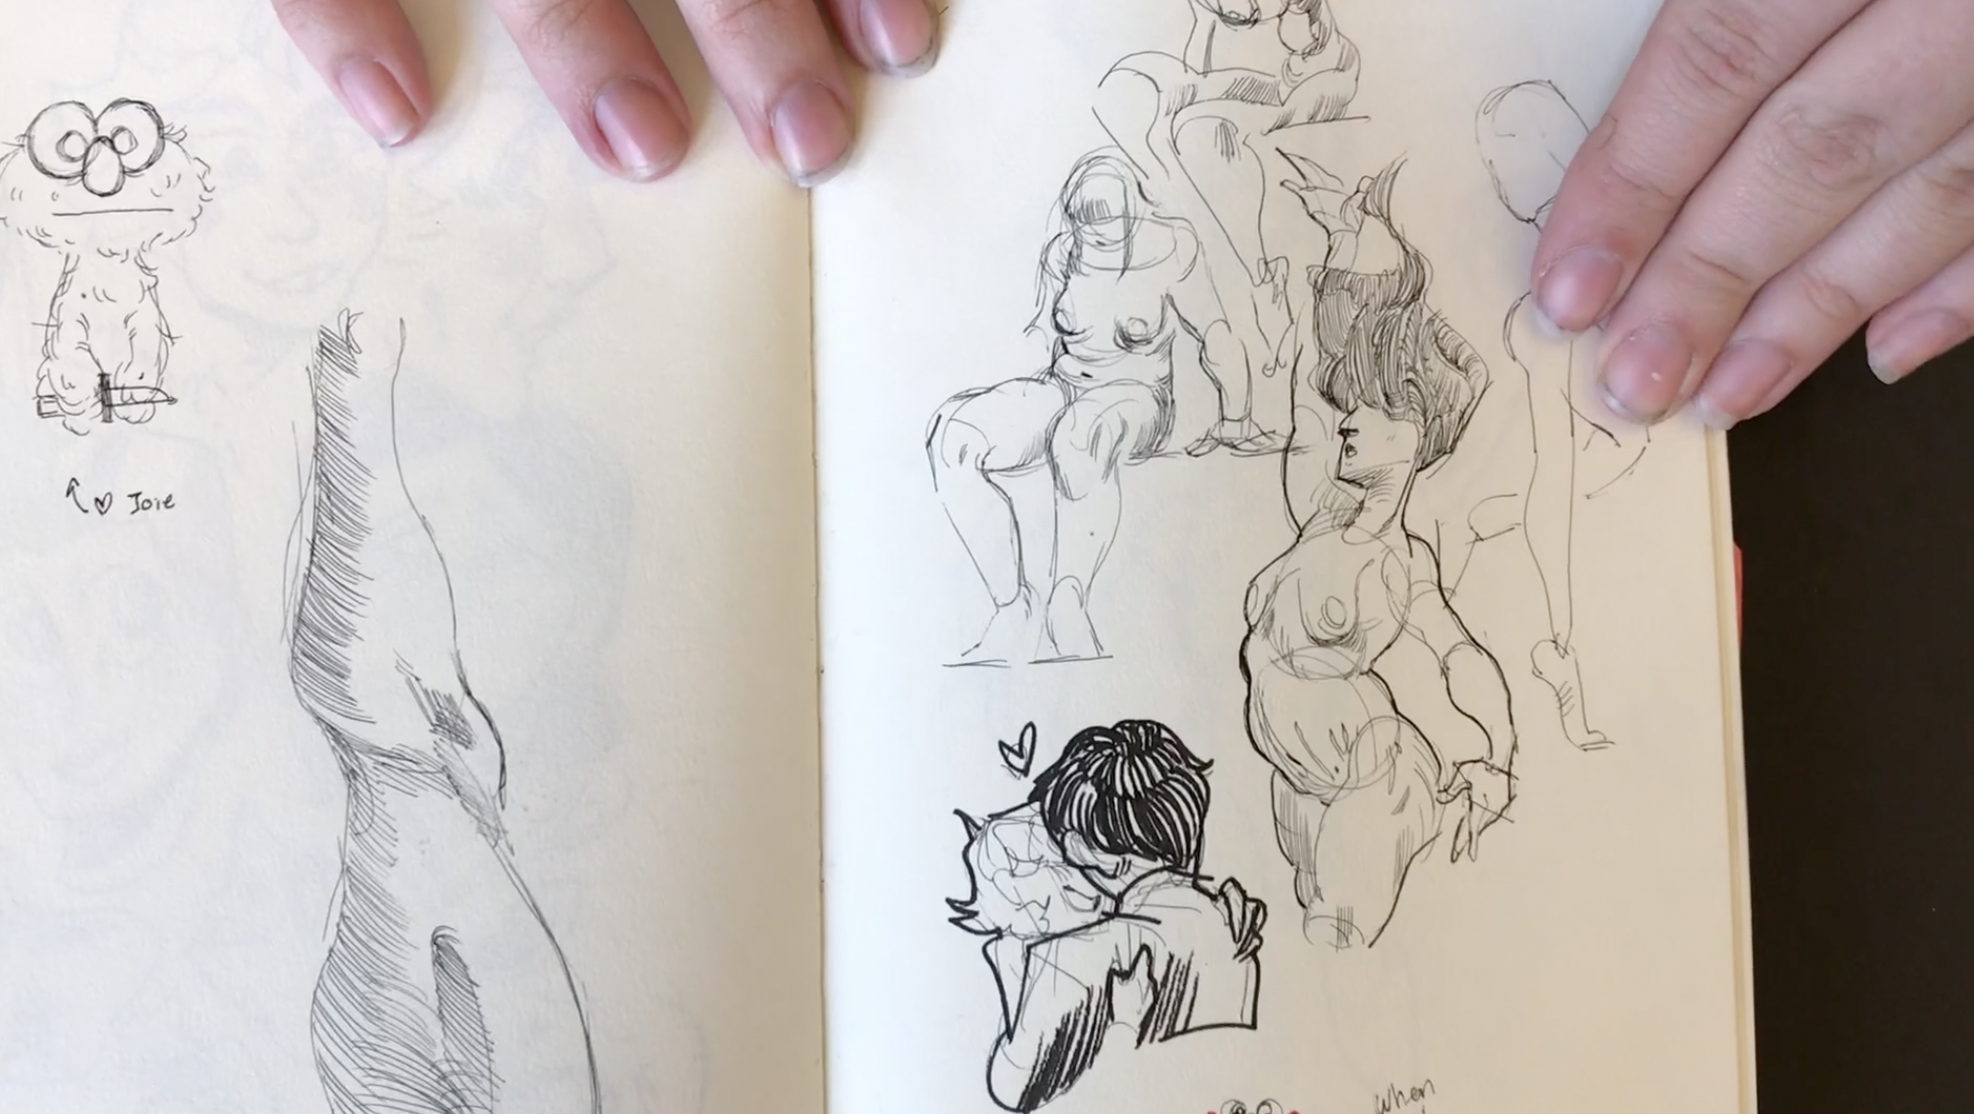
One, do your best to gesture into the head. In the video you can see How I use a gesture line from the side of the breast into the side of the face. Use long gesture lines whens fitting the head.
Two after the first few lines stop and get up off of your chair. Reset your eyes, looking out the window at something far away is a great way to do this. After you have reset your eyes come back to the drawing. You will immediately see what is working and what is not.
When we sit down for long period of time we loose site of the drawing in terms of proportions.
So the three keys, use some light target lines to start placing the head onto the shoulders. Incorporate one or two gesture lines to flow into the head as well. Within a minute or two of placing these initial lines get up and look at your drawing from far away.
Try these three techniques the next time you are working on a figure drawing.
If this technique helps you please leave a comment below. I’d love to hear anything you can add to conversation. If you have tried this technique and are still having issues with fitting the head onto the body I would like to help.
I would be happy to critique your work each and every Monday in our members Critique Gallery. It’s a cool place to get feedback on your work without all of the negative commentary you find on social media.