Isaac Levitan – Master Landscape Painter
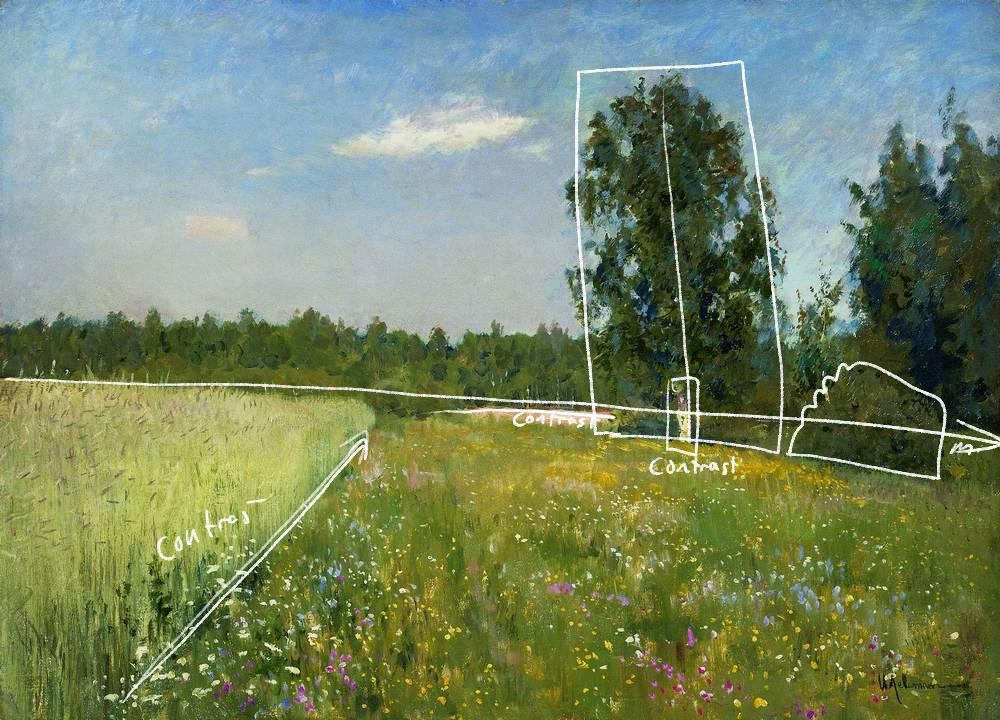
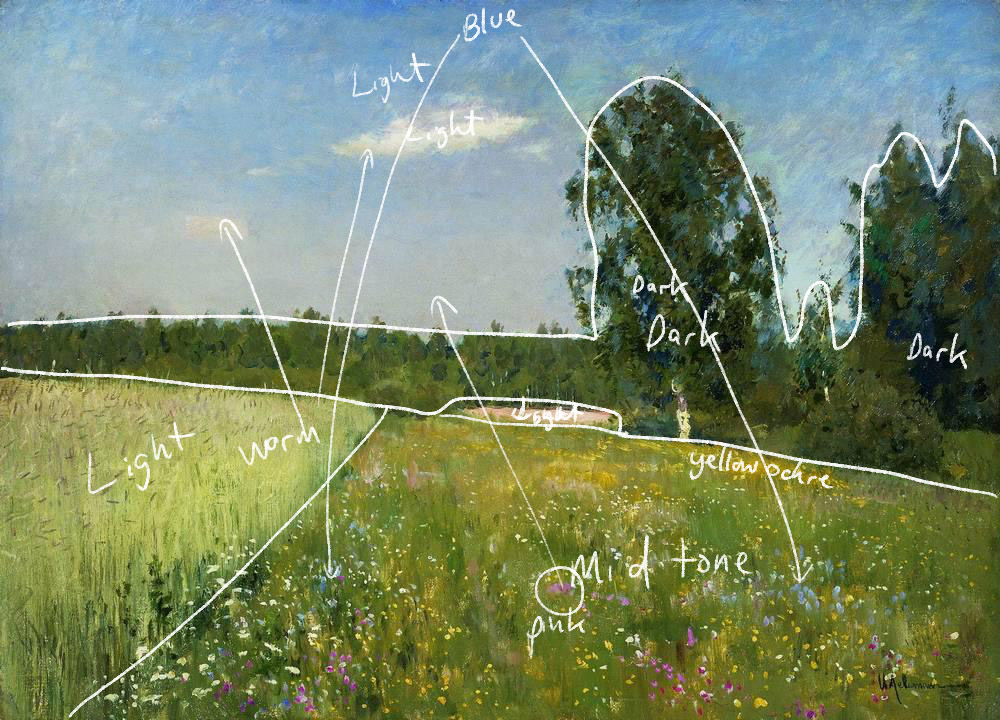
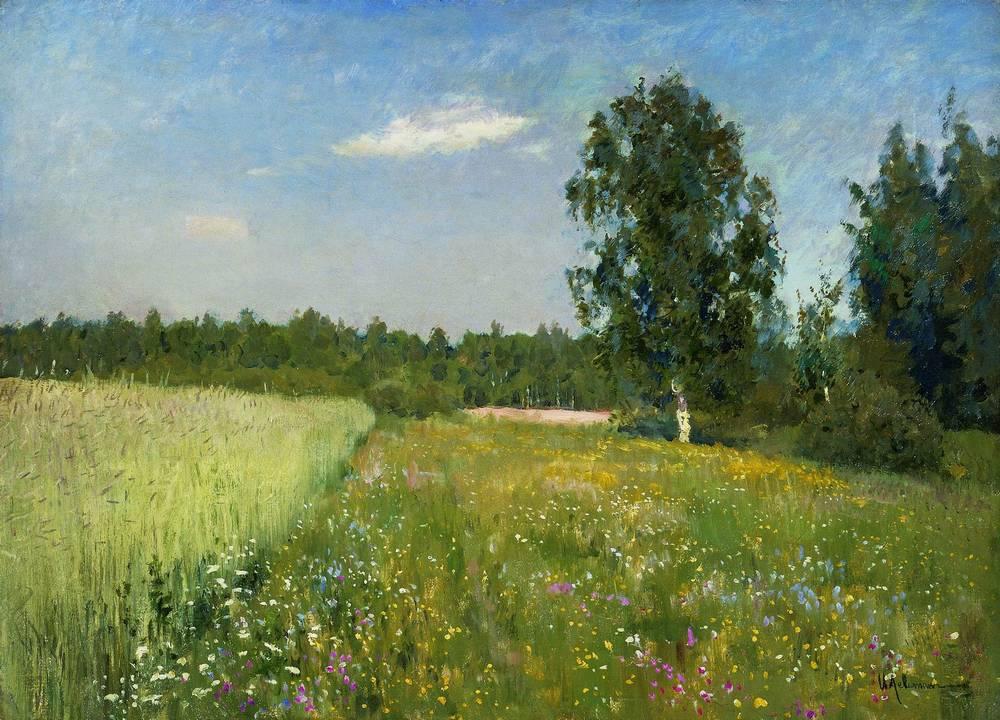
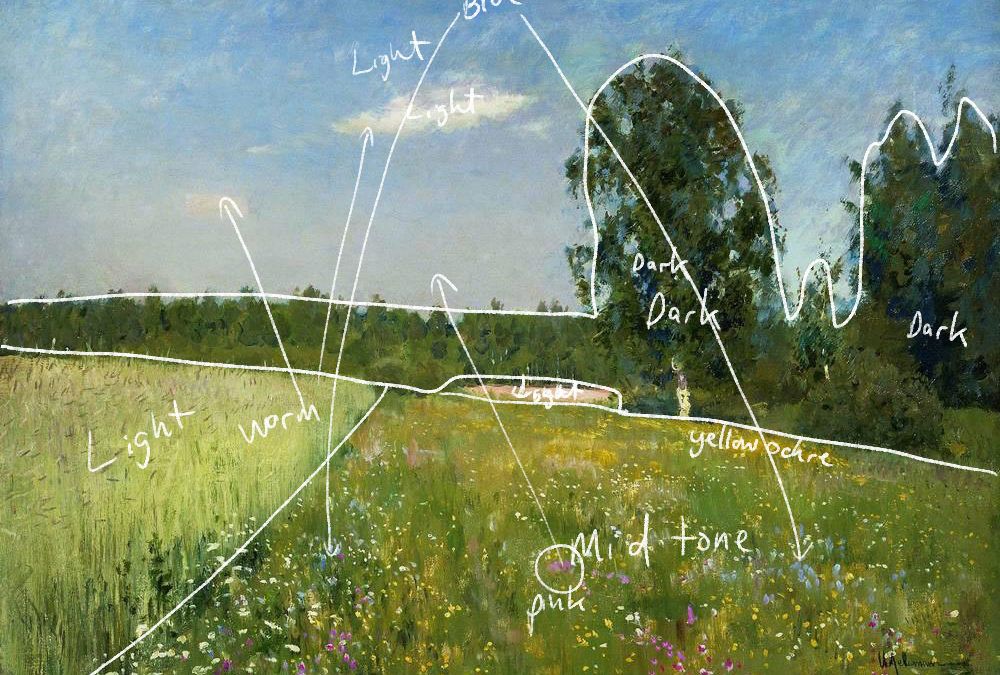
I discovered the work of Isaac Levitan roughly one year ago. I wish I knew of his work back in the day when I first started working as a freelance illustrator. Isaac Levitan is a master landscape painter. You can really see in this one painting how he captures light, squint at it.
He is really known for capturing both mood and light. One of my biggest struggles as a painter when first starting out was capturing light. I simply didn’t know what to do.
I discovered later that incorporating shadows was one way to capture light. Without shadows there can be no light. However what I didn’t realize is that you have to incorporate both shadows and cast shadows. Cast shadows are really where it’s at in terms of capturing light.
As an image maker you always want to think about the time of day. In this particular Levitan painting it is mid day, therefore there are no long cast shadows. One would incorporate long cast shadow during the late afternoon. Makes sense right, however this is really easy to overlook when we sit down to create our art whether with brush or pencil.
I just recently finished a brand new master class lesson showcasing the work of Isaac Levitan. In this master class series I do my best to analyze the work of different artists. Analyzing the work of these old masters is a great way to learn different techniques. When you study a multiple pieces of the artist’s work, that is when you discover trends.
Most artists tend to use the same techniques over and over again. We like to feel comfortable when creating.
Take a moment to study your own work. Not just one piece but a bunch of them. Do you see shadows and cast shadows? If you don’t then you will want to study the work of Isaac Levitan further.
If you would like to watch this MasterClass in it’s entirety along with nine others consider a membership to Drawing Tutorials Online.