I recently just finished uploading the last lesson in a course titled ‘How To Draw The Features Of The Face. This last lesson focuses on the ear.
Drawing the ear can certainly be tricky. There a few techniques that you really want to keep in mind.
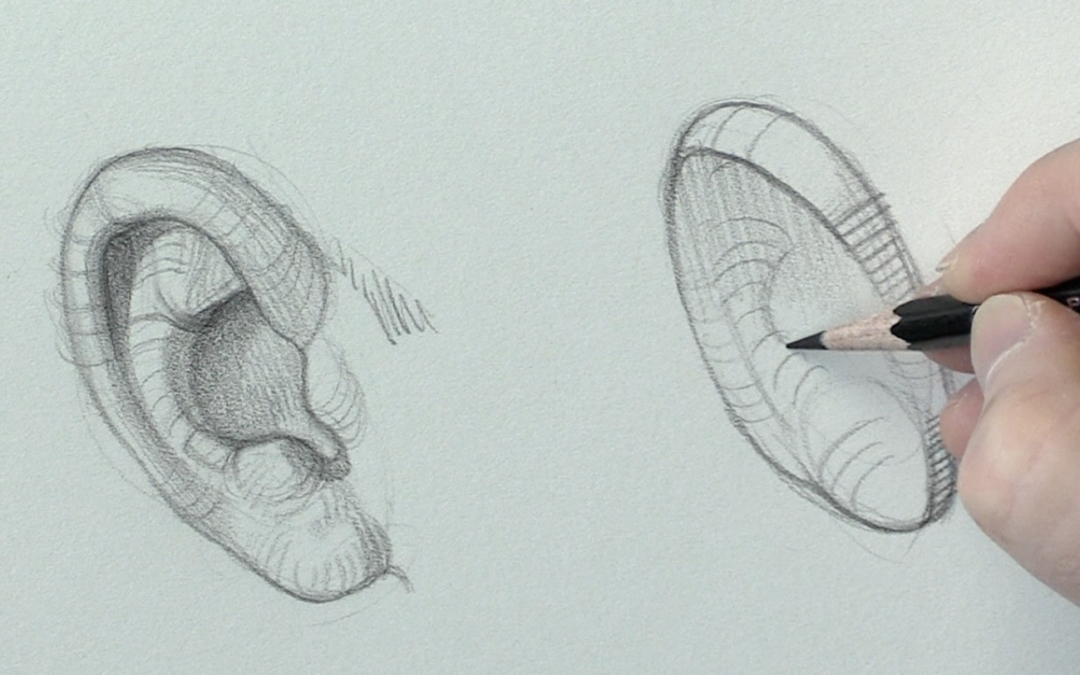
First, think of the entire ear as an oval. All of the detail of the ear is housed in that simple oval.
Second, the details located inside of that oval, those details are basically cylinders. To be more specific they are cylinders that are curved. What makes these curvey cylinders hard to draw is the type of light that is hitting them.
I always place my light source above and to the side of my subjects, in essence creating form light.
Third, shade in the shadow shapes of the ear. Keep the shadow shapes more of a middle tone, do not go too dark. I learned my lesson the hard way a long time ago while working on a book cover painting. Let’s just say the ears were a bit too dark.
Ears are very translucent, shade the shadows with a middle tone. This will allow for a glow in the shadow.
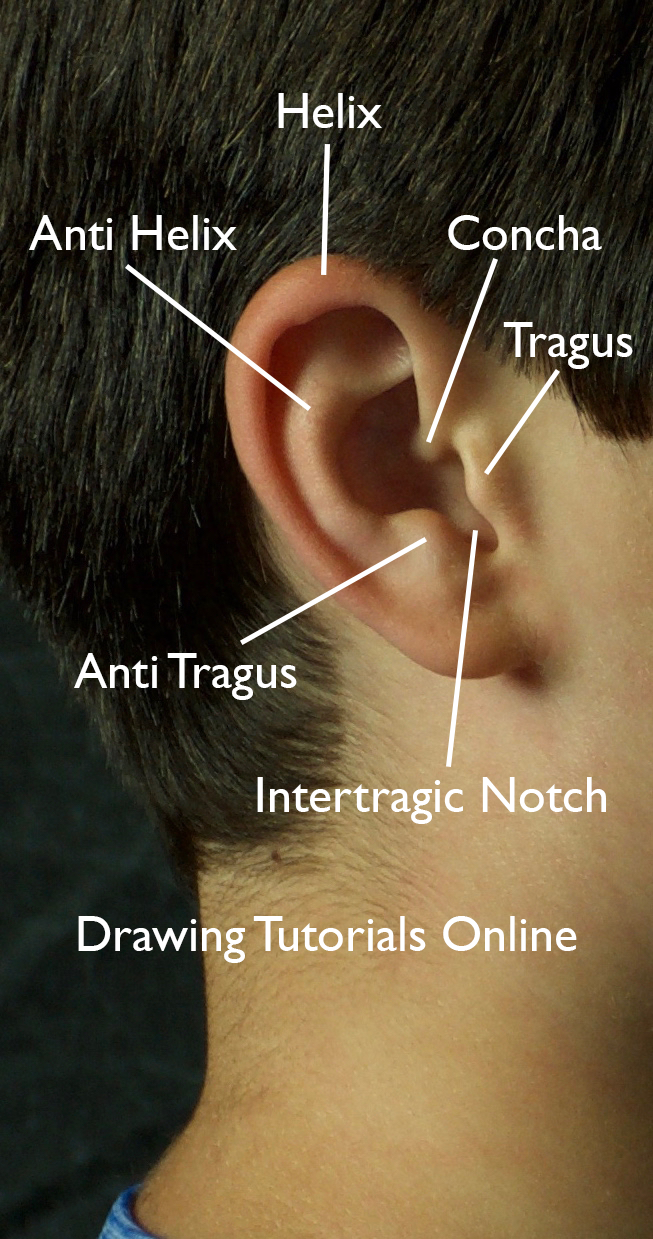
Fourth and last, implement the modeling factors to really promote the three-dimensional quality of the Helix and the Anti-Helix.
If you have any questions or comments leave them below. I’d love the hear from you.


