Mixed Media Figure Drawing

Mixed Media Figure Drawing

I recently uploaded a brand new course to the member’s area over at Drawing Tutorials Online. This course focuses on drawing the figure using diverse mixed media.

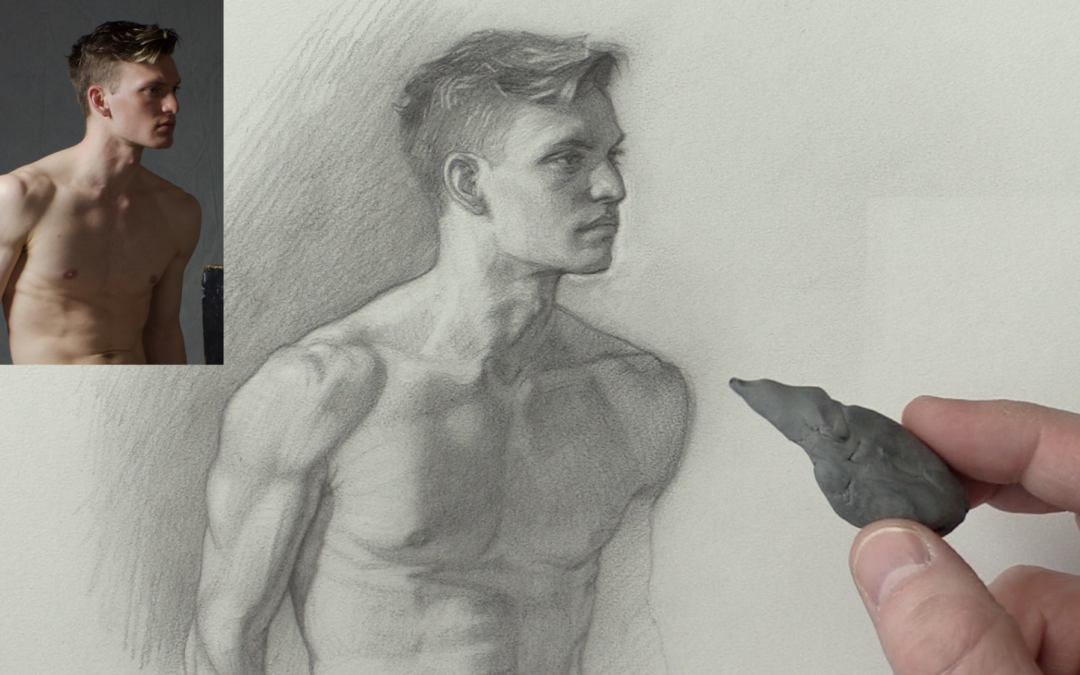
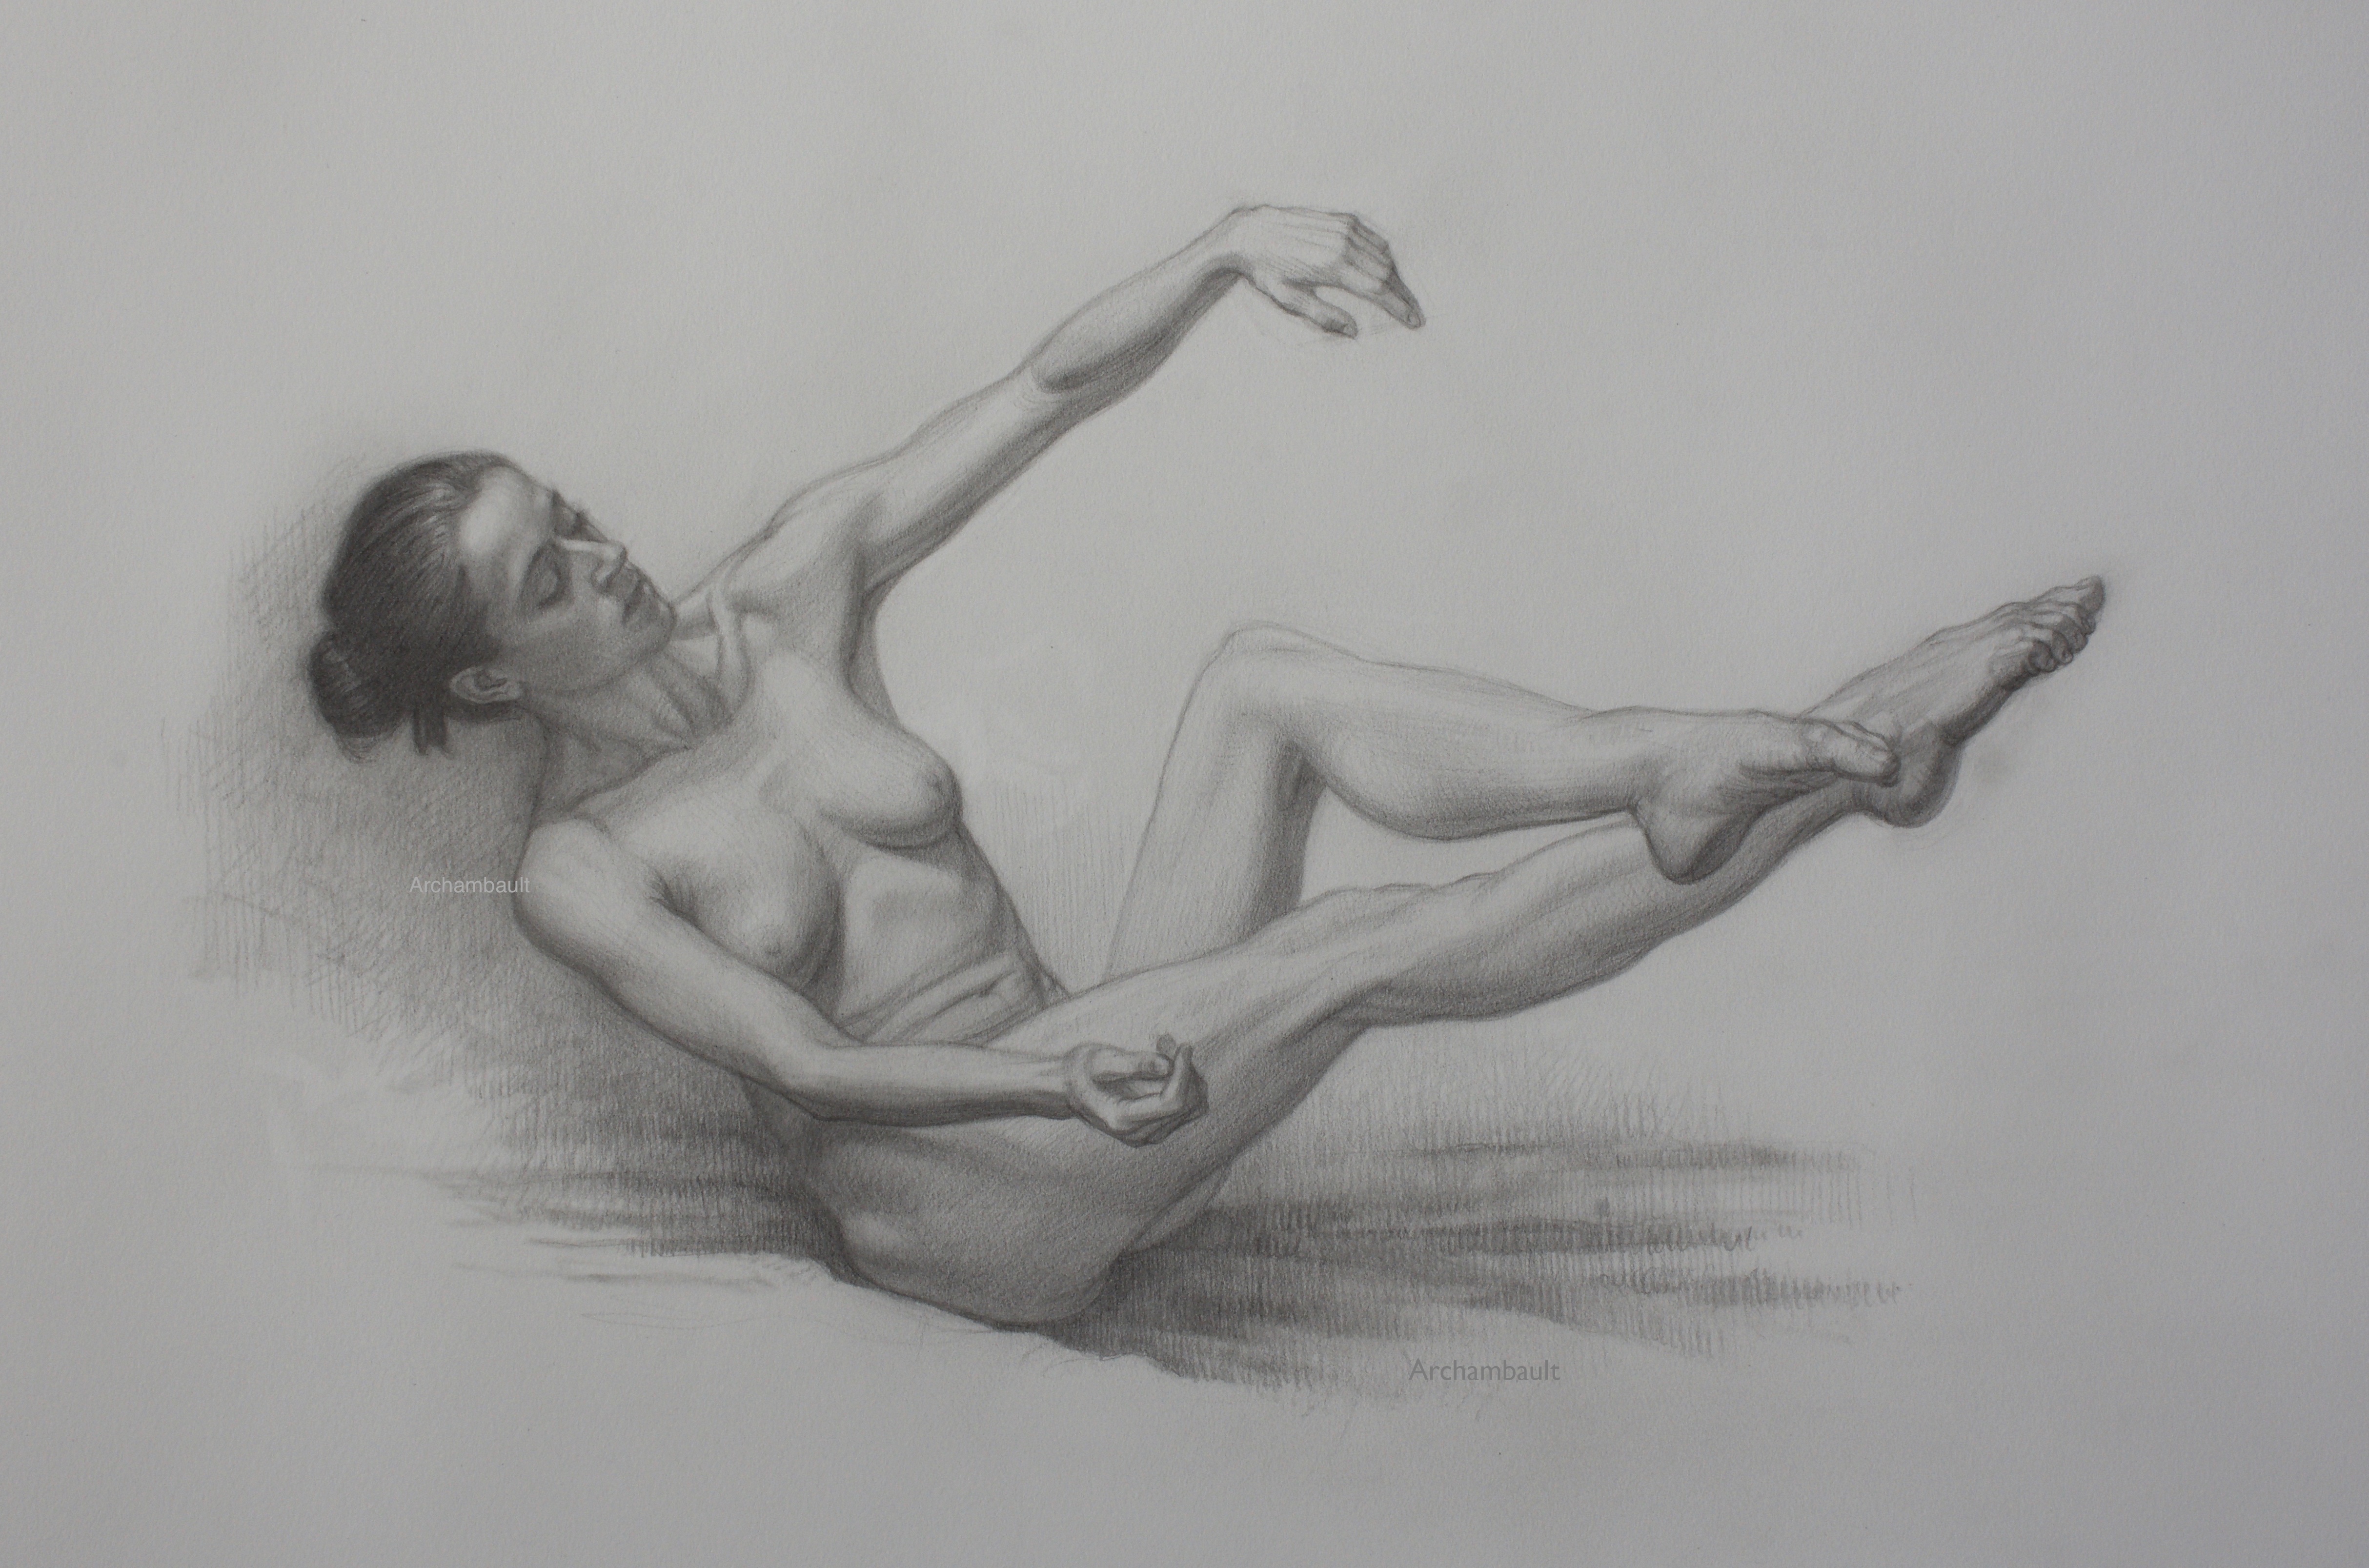
To start with I went old school and used my favorite Strathmore illustration board. I then painted the board using simple acrylic paint. Fifty percent water, fifty percent paint.

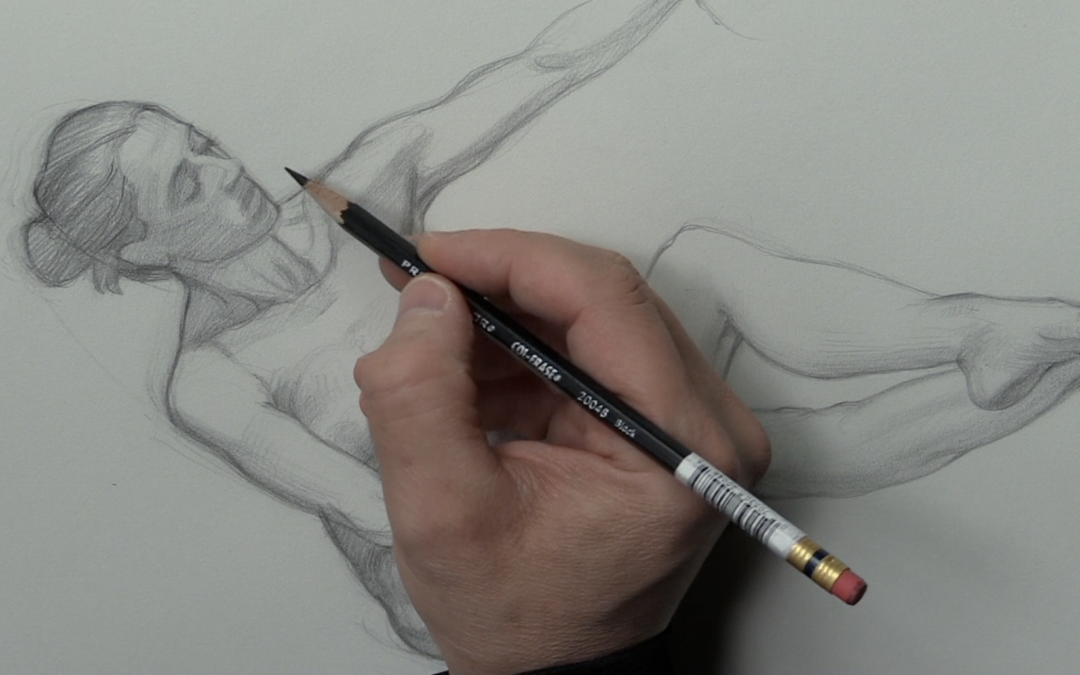
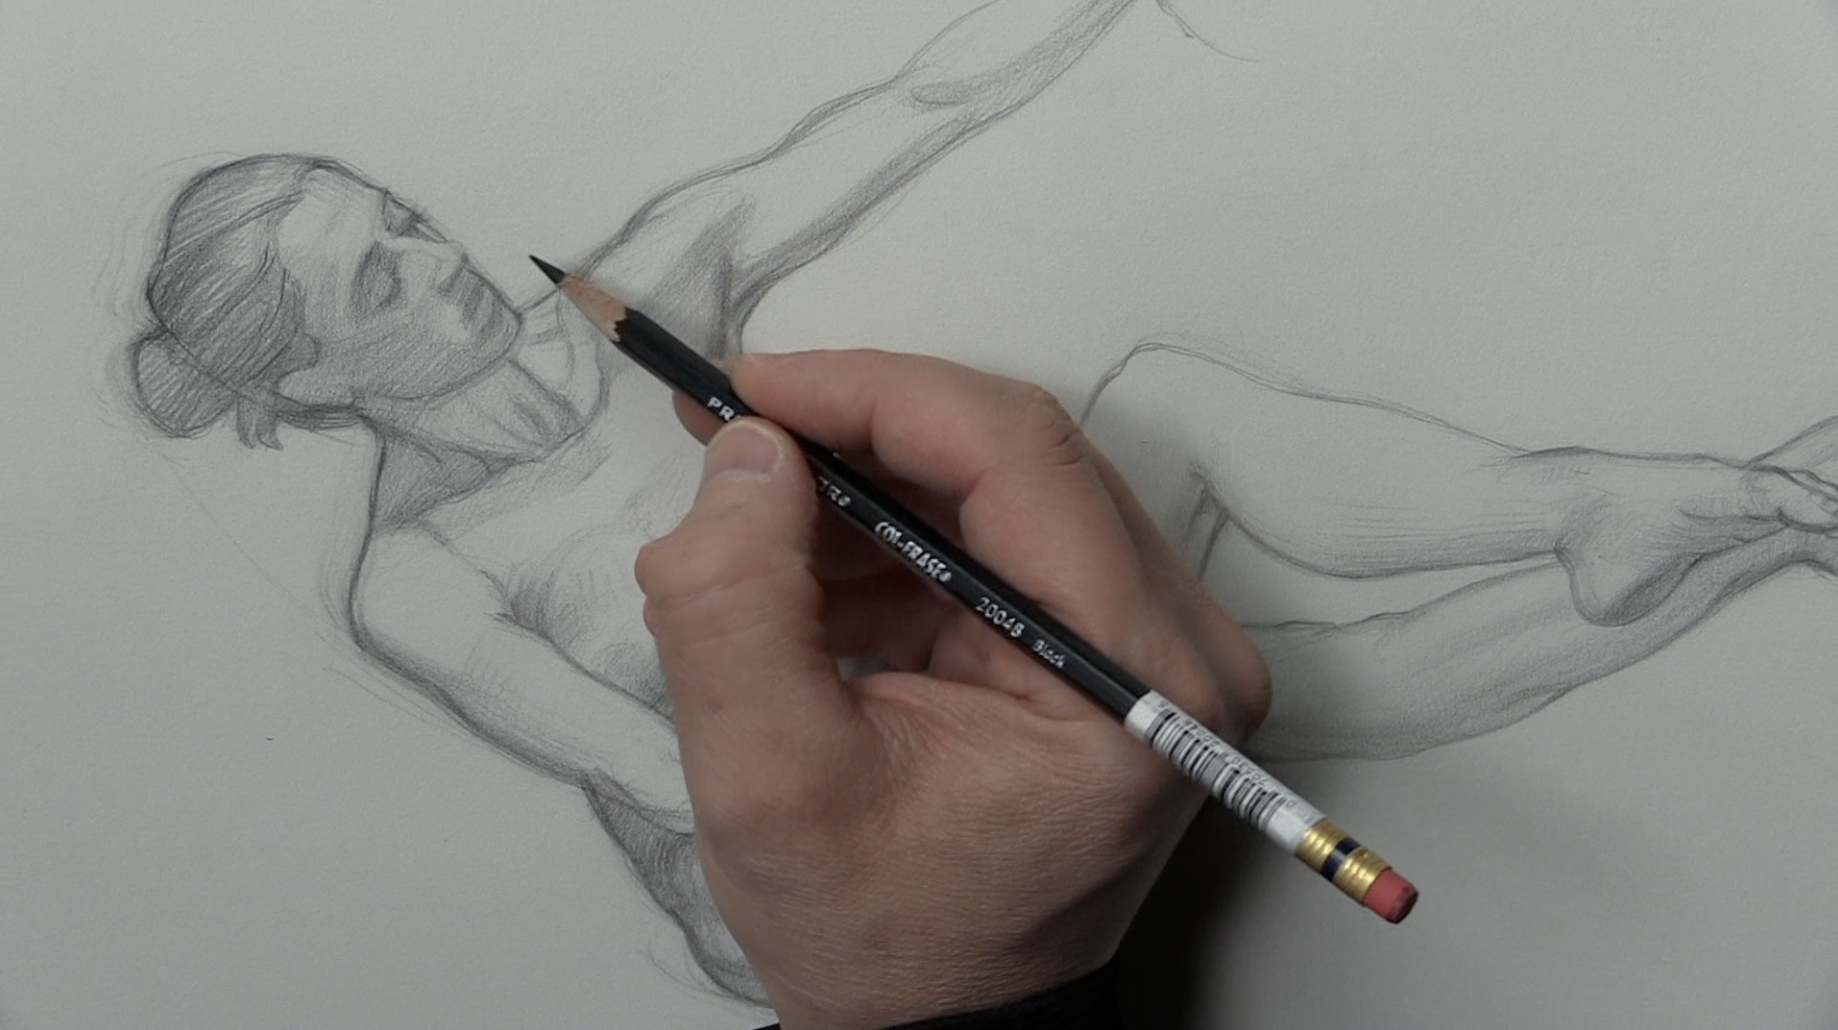
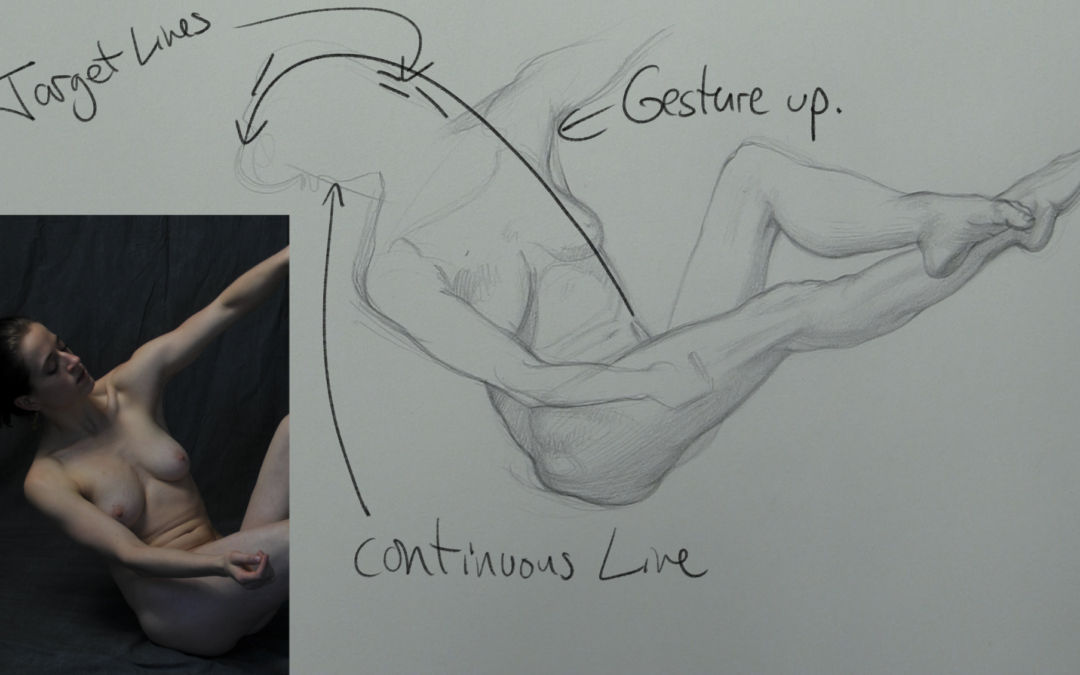
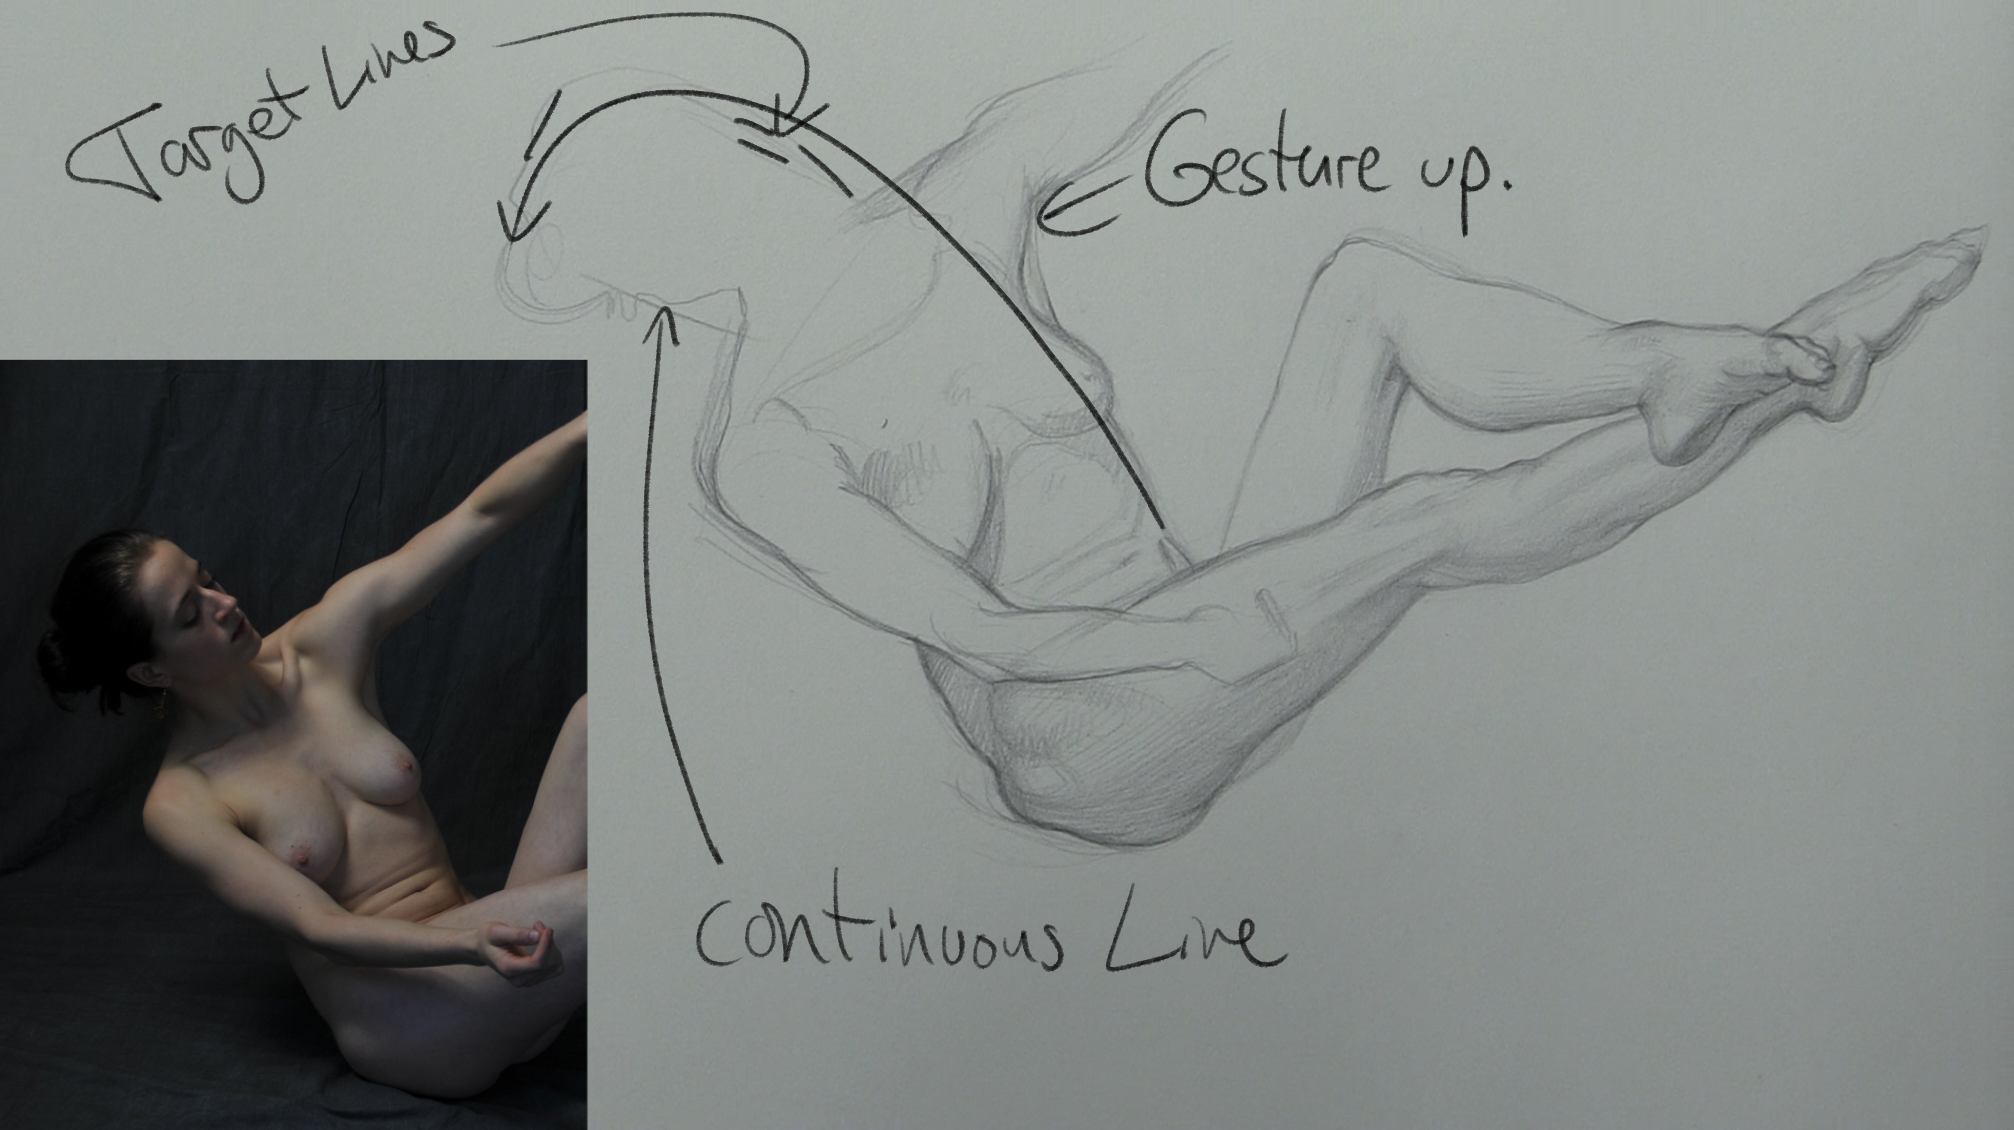
I then just started to draw on the board using my favorite black Prismacolor Col-Erase pencil. As I progressed I started to apply the white charcoal to the light area of the torso only. The concept is taken from oil painting, keep your light’s a bit more opaque and your shadows a bit more translucent.

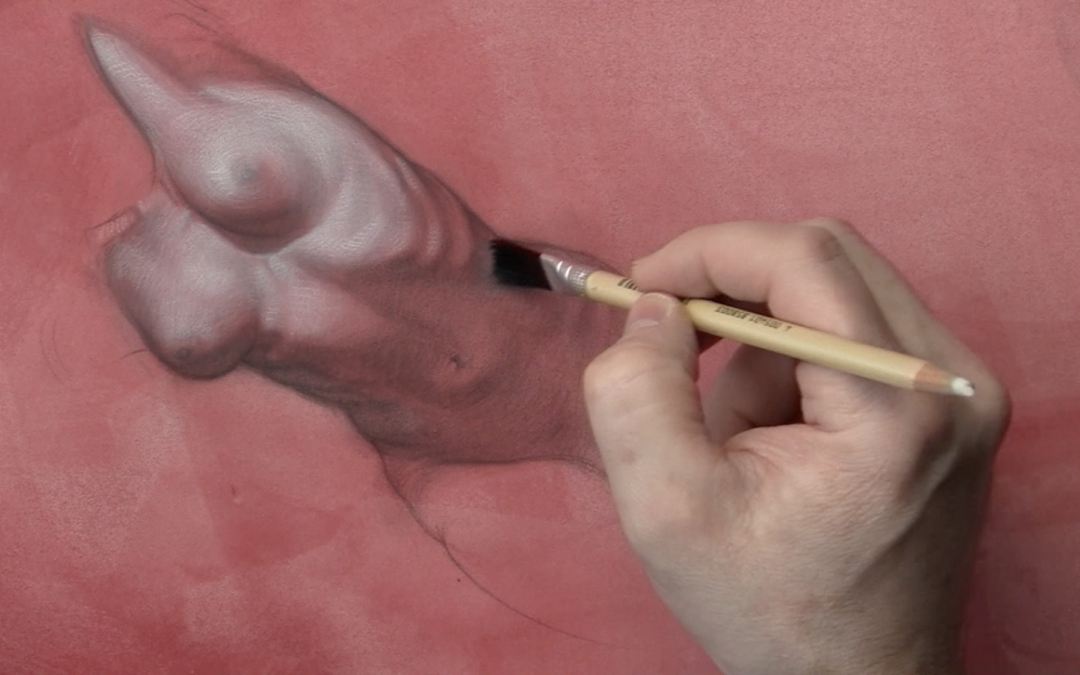
As I started to build up the white charcoal pencil gradually, I then proceed to blend the white charcoal with a bristle brush. Using light pressure to soften all of the edges. Needless to say, this drawing technique is super fun.

The key is to be patient and work in layers. I also incorporated a blending stump in a minimal way. Too much blending stump can work against you making everything too soft.

I encourage you to sign up to see this course in its entirety. I am offering it as a free course with a downloadable PDF that explains my materials in much more detail than this blog post. You can sign up right below.


Don’t forget to sign up for my free course right below. Drawing the figure in a mixed media sort of way could be something new for you to explore.


First Lines When Drawing A Portrait – Process

First Lines When Drawing A Portrait – Process

I just recently added a brand new portrait drawing course in the member’s area over at Drawings Tutorials Online. This particular course focuses on drawing smaller portraits.

With every course, I like to review certain techniques via a screencast video. This particular video reviewed how I start a portrait drawing. Especially a smaller one, say about two inches tall.

I always start with the angles, combined with measure lines and negative space. Nothing new right?

No, it’s not new, I have been teaching these same techniques for many years. Unfortunately, I still see many artists who struggle with drawing a likeness. Don’t fall into the trap of just knowing the techniques because you have heard about them.

You have to constantly practice these portrait drawing techniques over and over again until you master them. It’s not enough to just know them in theory. You need to put them into practice.

Just replace the white lines in the video within photoshop with pencil lines on your drawing pad. Start off with light pressure at first.

Enjoy the video.


If you are interested in learning many more techniques similar to these consider a membership to Drawing Tutorials Online.


Drawing A Small Portrait

Drawing A Small Portrait

Have you ever worked on a figure drawing where the head was really small? Did you ask yourself, how am I supposed to draw so small? The eye is the size of my pencil point.

I’ve been there too, many times. What I have learned over the years of painting smaller portraits on book covers is that shadow shapes are your best friend. 

You really do not want to start outlining little details like the bottom of the nose or say the eye lashes. You first want to block in shapes of shadow. Then you can gradually build up some softer tonal shifts to resolve the features. As you progress you can then start to use some crisper line.

Now I completely understand not every artist works with tone. If this is the case you’ll still want to draw shapes first, not features. If you work with line only you do not have to shade in these shapes.

The key takeaway from this short video, use light and shade to your advantage when drawing small. Also less is best. With a smaller portrait you have to know when to stop. Adding too much detail can take you down a road of heartache.


If you are interesting in learning more, you can check out the full course within the members area of Drawing Tutorials Online. Consider signing up to DTO. You will immediately gain access to all of our comprehensive course listing.


Blending Shadow Shapes With a Brush

Blending Shadow Shapes With a Brush

This short drawing tutorial will teach you how to blend pencil with a bristle brush. By using various types of bristle brushes you can really blend shadow shapes in a soft realistic way.

Sometimes when we use a blending stump things can get a bit over blended. Blending stumps tend to make your drawings look a bit heavy handed when over used.

In this particular drawing lesson the brush really helped me to push the pencil into the texture/tooth of the paper. By implementing this same technique you will be able to model form in a realistic way.

I encourage you to try this technique. The brushes do not need to be expensive, in this case the cheaper the better.


Let me know what you though about this technique. I find it works really well in speeding up the drawing process. Especially when working with an old school pencil on regular drawing paper.

The complete lesson will be posted on Drawing Tutorials Online later this month.


Drawing Facial Features In An Impressionistic Way

Drawing Facial Features In An Impressionistic Way

Drawing a small head on a figure it can be pretty daunting. However when it comes to drawing facial features that are mainly on the shadow side of the head, that can be even more daunting.

The key to drawing facial features that are mainly on the shadow side of the face is to draw them in an impressionistic way. I’m a big believer of drawing shadow shapes, not facial features. Think of them as one in the same. Getting a likeness is about seeing the shadow shapes within the features, then drawing them accurately.

You also want to think and draw in layers. Start off with blocking in light tone. Feel your way through the facial features with very soft light tone. This is where you want to practice your light touch. Diving into drawing the features with heavy dark tone at first will only create a mess.

Especially if you are struggling with measurements.

There are three key takeaways from this lesson. First, work from light to dark when applying tone. Second, don’t draw facial features, draw soft accurate shadow shapes. Third, think layers, build up the dark tone and detail gradually.

These initial soft layers of tone are a foundation for the detail that will come later.


To watch the course in it’s entirety consider a membership to Drawing Tutorials Online. Not only will you learn many new drawing techniques, you can also get your figure drawings critiqued weekly.


Fitting The Head Onto The Body

Fitting The Head Onto The Body

In this very short figure drawing lesson I’d like to share with you how I begin to fit the head onto the shoulders. The two key words are short and begin.

In case you have not noticed I am a big believer in repetition in the mother of skill. I tend to teach the same things over and over again because they work for me. I have also seen these techniques work in the classroom on a weekly basis.

The main crux is to use targets to start fitting the head onto the shoulders. There are few other little techniques you can incorporate into the mix.

One, do your best to gesture into the head. In the video you can see How I use a gesture line from the side of the breast into the side of the face. Use long gesture lines whens fitting the head.

Two after the first few lines stop and get up off of your chair. Reset your eyes, looking out the window at something far away is a great way to do this. After you have reset your eyes come back to the drawing. You will immediately see what is working and what is not.

When we sit down for long period of time we loose site of the drawing in terms of proportions.

So the three keys, use some light target lines to start placing the head onto the shoulders. Incorporate one or two gesture lines to flow into the head as well. Within a minute or two of placing these initial lines get up and look at your drawing from far away.

Try these three techniques the next time you are working on a figure drawing.


If this technique helps you please leave a comment below. I’d love to hear anything you can add to conversation. If you have tried this technique and are still having issues with fitting the head onto the body I would like to help.

I would be happy to critique your work each and every Monday in our members Critique Gallery. It’s a cool place to get feedback on your work without all of the negative commentary you find on social media.